Set the Expiry Date using a Date Picker (Project End Date)
Forms and Columns allow you to create your own transformation tags that can be used in other areas of Provisioning.
In this article, we will show how to use a {Project End Date} column to set the expiry date in a lease.
Create a Column
First the date picker we will use needs to be created, go to Admin > Settings > hover over Forms > Columns
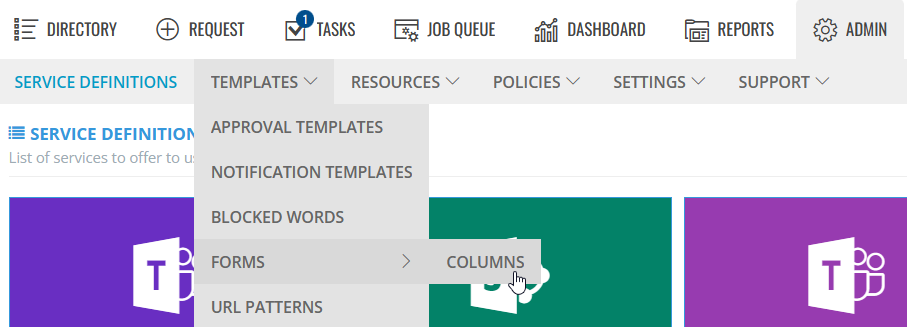
- Click +New Column if you do not already have a date picker you can use and complete the details.
- Name, as it will appear on the form, keep a copy of this for later
- Description that will appear on the form under the column name
- Column type, can be either a date picker or a number field for lifecycle. We are using date.
- Selection type, allows you to set just the date only or date and time.
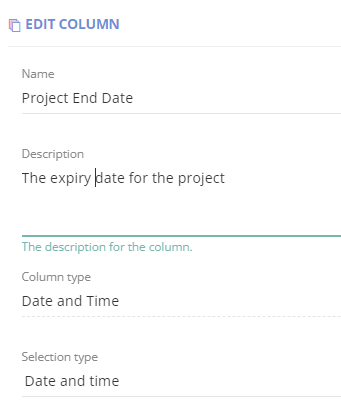
- Save the columns
Now the Column must be linked to a Form. This form will be added to the default options already configured in your service definition and will always be on the right-hand side of the screen.
If you already have a form linked collecting other metadata add this column in or create a new form.
- Go to Admin > Templates > Forms and Add columns to the form as needed.
- Each column must be added individually and the order set. You can make columns mandatory and show them on the info page of the workspace.
If you are using the Date to calculate the lifecyclewe recommend making this required.
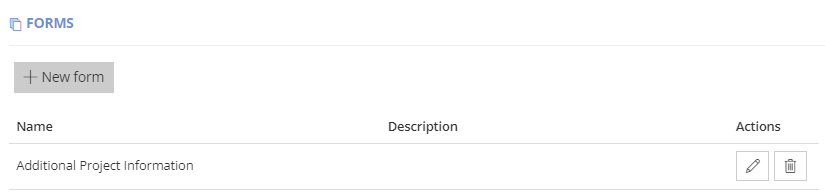
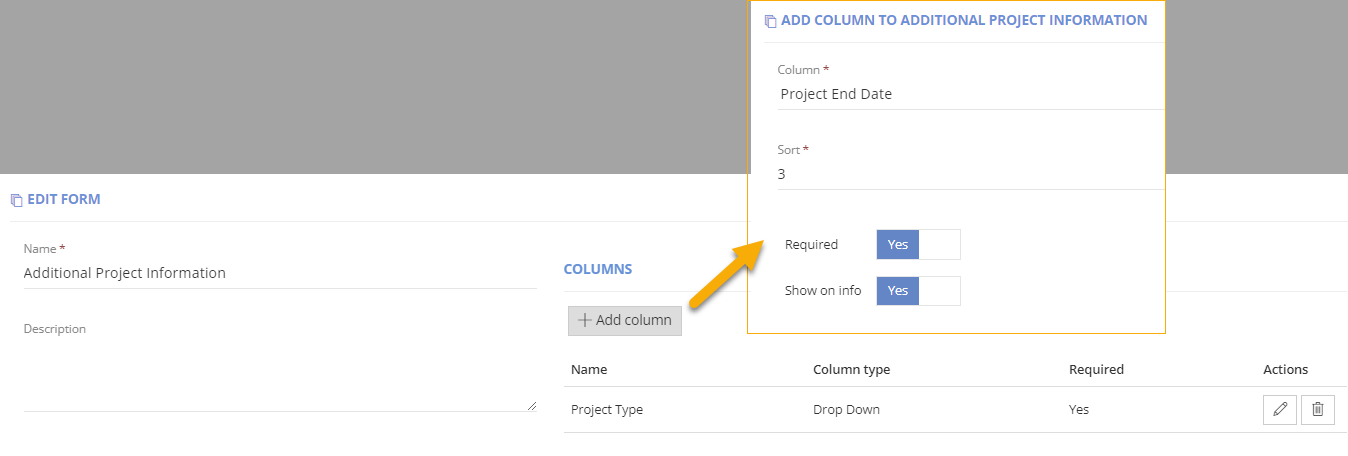
- Save the Form.
Before we can configure the lifecycle, the form must be linked to the Service Definition:
- Go to Admin > Service Definitions. Edit the required one and go to the 'Request' tab and scroll to the 'Request Form' section.
- Select the form you saved from the list of active forms.
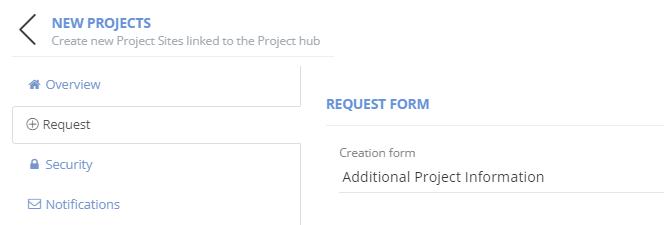
Finally, we can configure the lease or lifecycle.
- A Lifecycle will, apply an expiry date to the workspace that will run multiple stages either before, on or after the expiry date set. Email reminders can be sent before each stage and emails can be sent when each lifecycle action is run.
Expand to read more about the Lifecycle Configuration
- Create Stages that will be used in lifecycle policies
- Go to Admin > Policies > Lifecycle Policies > Stages
- If you do not have any stages created, click +Add lifecycle stage and complete the configuration
- Name, provide a descriptive name of what actions will be run
- Description, give more details of what will be configured
- Click +Add Action
- Select the Action type that will run - for example 'Change Archive State'
- Setup any additional configuration
- Enable
- Add notifications if needed, an email will be sent once the action is run
- Click Save on Action
- Add any other action types that should be run for this stage
- Save the stage
- Create a Lifecycle policy
- Go to Admin > Policies > Lifecycle Policies
- If you do not have any policies created, click +Add lifecycle policy and complete the configuration
- Name, provide a descriptive name of what actions will be run and how the expiry date is calculated
- Description, give more details of what will be configured
- Set Expiry type to Request form field
- Type the name of the column created earlier
- Set the Default lease length (if the variable cannot be used or fails, this number of days will be assigned, this will also set how many days it can be extended using change the lease actions)
- Click +Add Stage
- Select from the list of stages you created
- Set the Trigger to either
- On Expiry date
- Or Expiry date - #of days before
- Or Expiry date + #of days after
- Enable reminders if you want emails to be sent before the stage is reached
- Save
- Set who reminders will be sent to
- Save
- Repeat for more stages to be added
- Enable the Policy
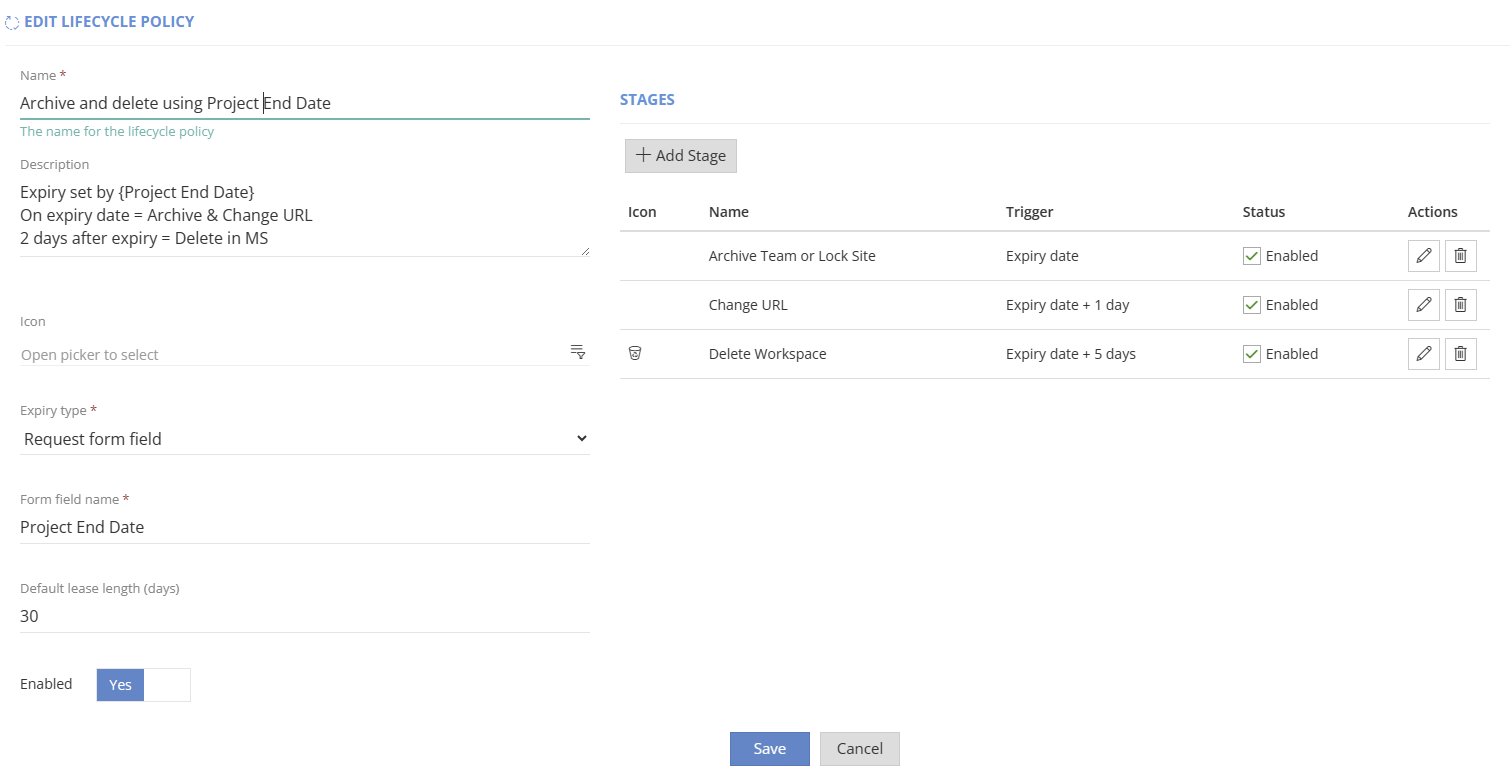
- Add the lifecycle policy to the Service definition
- Go to Admin > Service Definition > open the definition > Lifecycle tab
- Click +Add Policy
- Select the Lifecycle policy to use
- Show the lifecycle stages in the info pages, set 'show service instance lifecycle tab' to yes
- Add a lease description on request form
- Click Save
- Save the Service Definition
Change the expiry date after creation
If you need to change the date you can use the following actions:
Update {Service Type} details
Expand to read more about the Action: Update {Service Type} details
This will allow you to change the date selected.

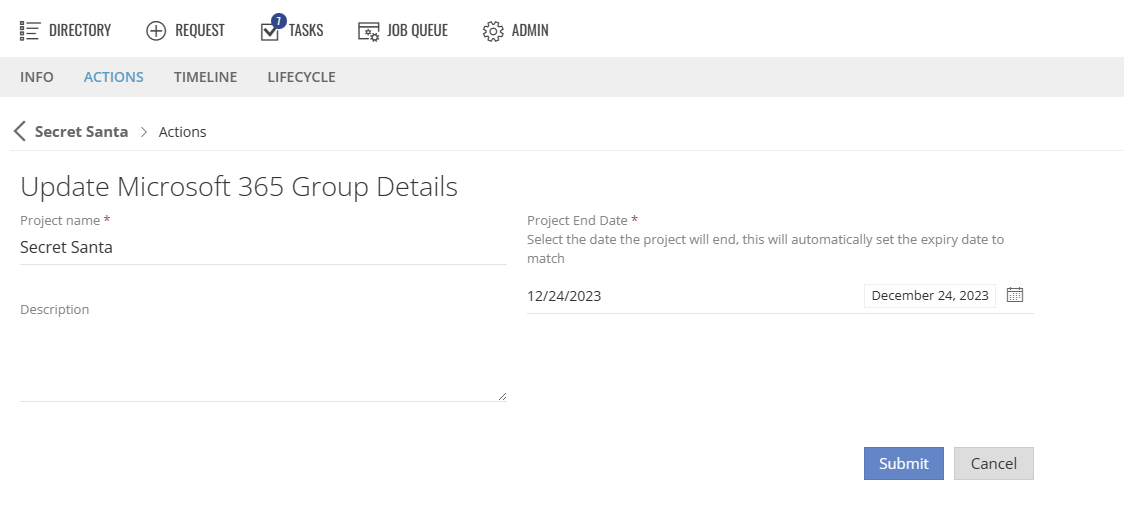
Change the Lease
Expand to read more about the Action: Change the Lease
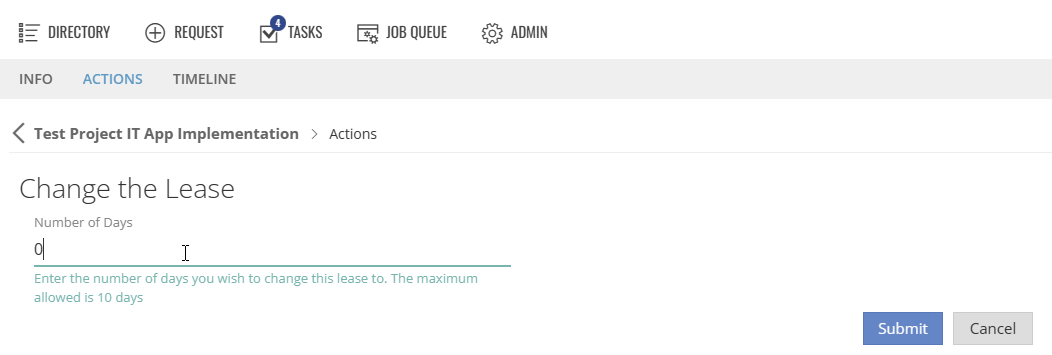
This allows the requestor to set the number of days it will now last, the maximum will be the default lease length.
To trigger the lifecycle to run today, set to 0 days.