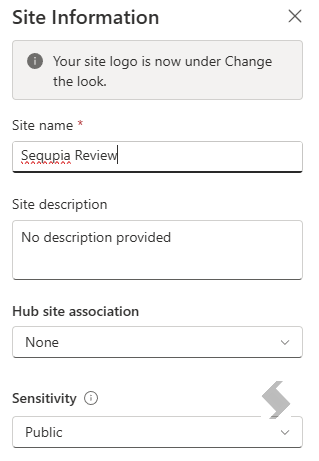
What can ProvisionPoint do with Sensitivity Labels?
- Apply a container label to the Teams, Groups and SharePoint Sites that are created through or Imported in to ProvisionPoint.
- Apply a default Sensitivity Label to SharePoint Lists & libraries
The same label can be added to the container and set as the default for the Documents library and any new libraries that are created through our app.
1.Ensure Sensitivity is setup in your tenant
Learn how to setup the environment from Microsoft
When using the Purview portal, a global administrator must sign in, navigate to the Information Protection section, and select the option to turn on the ability to process content in Office online files.
This action will enable the necessary capabilities for sensitivity labeling.
- Alternatively, you can use PowerShell to enable these features by executing the command
Set-SPOTenant -EnableAIPIntegration $true in the SharePoint Online Management Shell.
This command activates the integration of Azure Information Protection with SharePoint and OneDrive, allowing for the application of sensitivity labels to files stored within these services.
It is important to note that enabling sensitivity labels may take about 15 minutes to take effect after the changes are made.
If you have a Microsoft 365 Multi-Geo setup, you will need to run the PowerShell commands for each geo-location to ensure sensitivity labels are enabled across all regions. This comprehensive approach ensures that all necessary configurations are in place for effective use of sensitivity labels.
Apply Additional setup for Containers: Use sensitivity labels to protect collaborative workspaces (groups and sites) | Microsoft Learn
See examples of Sensitivity Labels here: Learn about the default sensitivity labels and policies to protect your data | Microsoft Learn
Ensure you understand which files can be supported: Enable sensitivity labels for files in SharePoint and OneDrive | Microsoft Learn
2.Publish Sensitivity Labels in Purview
Learn how to Publish Sensitivity Labels from Microsoft
Once your labels are created they must be published to ensure they can be used across your Teams, Groups and Sites.
Create and publish sensitivity labels | Microsoft Learn
For labels and label policy settings, allow 24 hours for the changes to propagate through the services. There are many external dependencies that each have their own timing cycles, so it's a good idea to wait this 24-hour time period before you spend time troubleshooting labels and label policies for recent changes.
However, there are some scenarios where label and label policy changes can take effect much faster or be longer than 24 hours. For example, for new and deleted sensitivity labels for Word, Excel, and PowerPoint on the web, you might see updates replicate within the hour. But for configurations that depend on populating a new group and group membership changes, or network replication latency and bandwidth restrictions, these changes might take 24-48 hours.
3.Add Sensitivity Labels into ProvisionPoint
You do not have to add all available Sensitivity Labels, only the ones that will be used for Provisioning and records management.
Expand here to learn how to extract the details from Purview and add to ProvisionPoint
Extract Label details from Purview
To extract properties of sensitivity labels from your tenant, you can:
Collect data manually
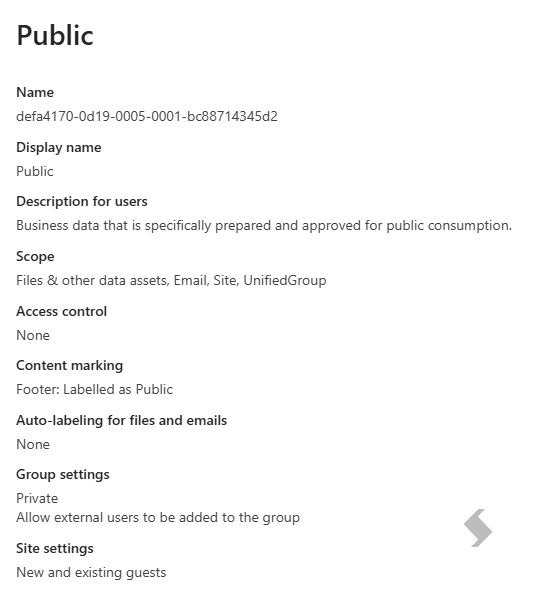
- Open Microsoft Purview > Information Protection > Sensitivity Labels
- Select the label and copy the following
- Name
- DisplayName
- Priority
- For container level the Group and Site Settings it supports
- Repeat for all labels
Use PowerShell commands
- Ensure you are connected to Security & Compliance PowerShell.
- Use the command
Get-Label | Format-Table -Property DisplayName, Name, Guid, ContentType, Description, Priority - This command will provide you with the sensitivity name, ID (GUID), and other relevant details about each label. This is needed to add to ProvisionPoint.
The priority of the labels can be managed by their order in the label policy, which can be adjusted in the Microsoft Purview portal. - Collect what the Labels will do from Purview, for Container labels.

Add Labels to ProvisionPoint
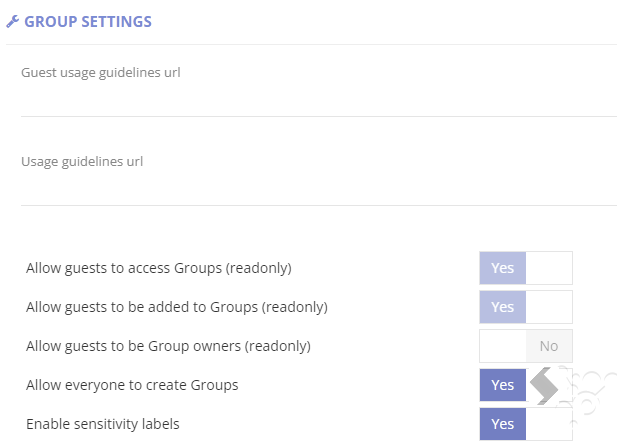
- Go to Admin > Settings > Group Settings and check 'Enable sensitivity labels' is applied.
- Go to Admin > Settings > Sensitivity Labels to configure the labels that can be used during the provisioning of workspaces.
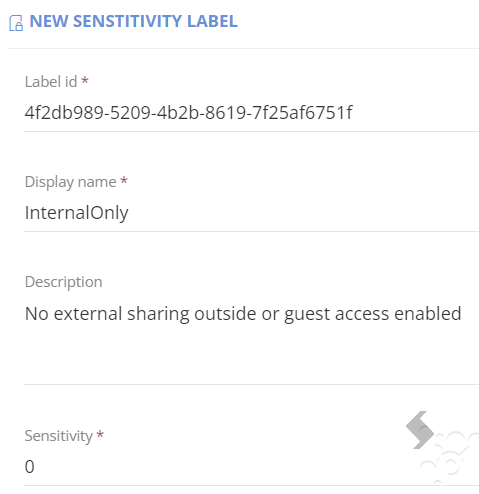
- Click +Add sensitivity label
- Complete the label details, add
- The copied 'Label id' from the script results or from the name field
- The 'Display name'
If you have moved to the modern label scheme the group is not displayed. Set the Display name to something relevant.
It does not need to match what is displayed in Purview. - 'Description' of what this is for
- Choose the 'Sensitivity' level, this will be the priority # pulled from Purview or the script run earlier
- If the Sensitivity is to be used at Container level you must,
If these are for content labels (Files) this step is not required.
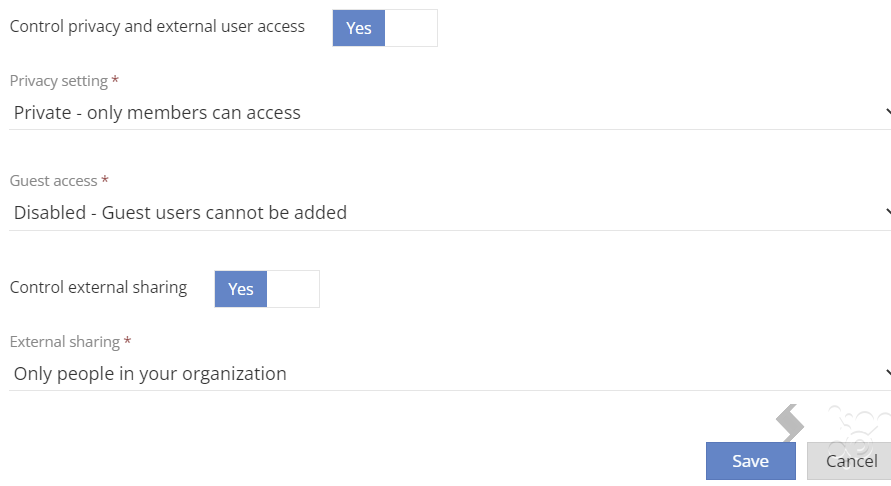
- Enable 'Control privacy and external user access' and define what controls will be enforced
Please note this mean privacy, guest access and external sharing settings may be restricted in ProvisionPoint Actions.
- Click Save
Repeat this for any other labels in your tenant.
4.Apply to the Service Definition
The type you want to apply will determine where this is configured:
Expand here to apply to Files via Lists
When you create a List template in the app, this can be used at the point of provisioning or using the 'Create List' action, ensuring consistency on your lists or libraries
1. Go to Admin > Service Definitions > Open your Service Definition template > Lists
2. Edit the List you want to apply the label to. If you have none, you will need to create Documents to apply to the default Document Library
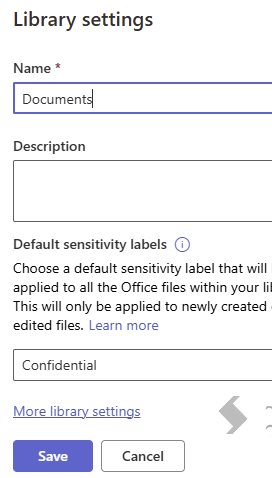
3. When creating or editing a List or Library, under the Sensitivity field, type the name of the Sensitivity Label to applied.
This is a free type filed that also supports transform tags. {Sensitivity} can be used to match the container level label from the Sensitivity tab.
Alternatively type the name of the label to apply.
4. Click Save and then Save the Service Definition
5. Once the List configuration is saved, the card for the List will automatically update to show that a label has been configured and the name of the label
Results in Microsoft:
Expand here to apply to the container
The Sensitivity Label can be set at the container level, this means to the Team or Site and can be used to enforce privacy, guest access enablement and external sharing settings or be just a label.
The ProvisionPoint Service Definition can be used to
- Set the default Label for the Site or Team
- Allow requestors to choose the label to be applied
- Go to Admin > Service Definitions > Sensitivity tab
- 'Allow Sensitivity Labels' must be set to Yes
- Define the 'Default label' to be used for the Service Definition, this will appear on the request form.
- 'Override value type' will provide the values that will be available to the 'Change Sensitivity' Action
- Select Sensitivity List
- Enable each label that can be chosen
- Select whether requestors can choose the sensitivity label at the request form stage. If this is set to No the default label will be applied.
If a label is used that has permission restrictions it will fail to be created.
Results in Microsoft: