Lifecycle Example: Archive, Wait, Delete
In this article, we will show how to set up a basic Lifecycle policy, which includes archiving the workspace, waiting, then a short time later, deleting the workspace.
For this article, the workspace will expire 60 days after creation, then on the expiry date it will be archived and made read only. Then 30 days after the expiry date, the workspace will then be deleted.
Create the Lifecycle Stages
Expand to read more about Creating the Lifecycle Stages
First, create the Stages that will occur within the Lifecycle Policy. (Groups of actions to run at the same time)
In this example we'll require two stages - one to archive the workspace, and the second to delete it.
To configure this, go to Admin > Policies > Lifecycle Policies > Stages
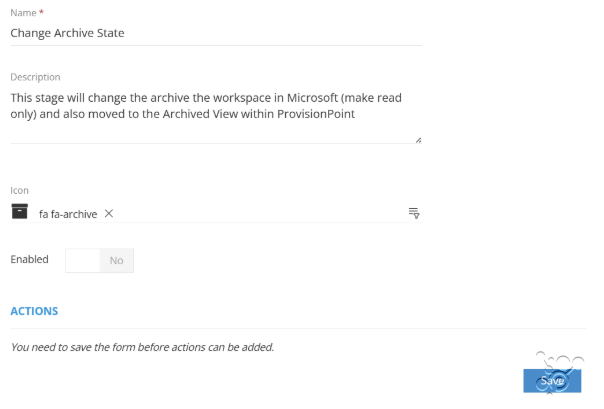
- Click on '+Add lifecycle stage' and complete the details:
-
- Enter the name of the stage, "Change Archive State" or "Archive"
- Enter the description which will appear on the list of Lifecycle Stages
- Choose an icon. This will appear next to the stage in both the Lifecycle Policy and within the Lifecycle timeline
- Click 'Save'.
- The '+Add Action' option will appear.
Adding Actions to a Lifecycle Stage
Expand to read more about Adding Actions to a Lifecycle Stage
Add the automated actions that will run when the date is reached, to the stages.
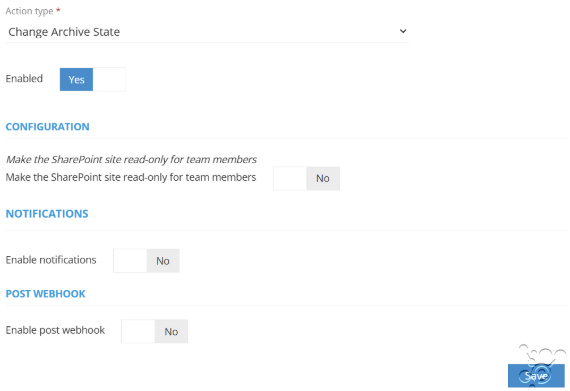
Click on '+Add Action' and configure the following:
- Set the Action type to 'Change Archive State'
- Set 'Enabled' to 'Yes'
- Under configuration you can set set the SharePoint site to be read-only for Team Members (this only appears for Teams). Set this as required
- Add Notifications to the action to receive an email when the action is successfully completed.
- Add a Post Webhook to trigger your own custom automation after the action is successfully completed.
- Click 'Save'
- This will take you back to the Stage action. Click '+Add Action' again
- Configure a second action for this stage, but this time the Action type will be set to 'Change Directory Visibility'
- Click 'Save' to add the action
- Enable the stage.
You'll need to repeat the process to create the Delete stage.
Create a Lifecycle Stage for Delete, then add the action for 'Delete the workspace' and enable the stage
Creating a Lifecycle Policy
Expand to read more about Creating a Lifecycle Policy
Now the stages are created, create a Lifecycle Policy and link the stages needed.
Go to Admin > Policies > Lifecycle Policies and click on '+Add Lifecycle Policy'.
Then configure the following:
- Enter the name of the Policy, in this example it is "Archive, Wait, Delete"
- Enter a description of what the Policy will be doing - this will cause the workspace to expire 60 days after it was created. On the day of expiry it will be archived, then 30 days later the workspace will be deleted.
- Choose an icon if required. This will appear in the list of Lifecycle Policies and on the Lifecycle tab within the Service Definition
- Choose your expiry type - in this example we have set this to Number of Days, but could also be a date picker on your request form.
- Enter the lease length of 60 days
This will also be the maximum people can increase by - Click 'Save'
Once saved, add the stages you created previously.
Adding Stages to a Lifecycle Policy
Expand to read more about Adding Stages to a Lifecycle Policy
Link the stages that were created earlier to the Lifecycle Policy.
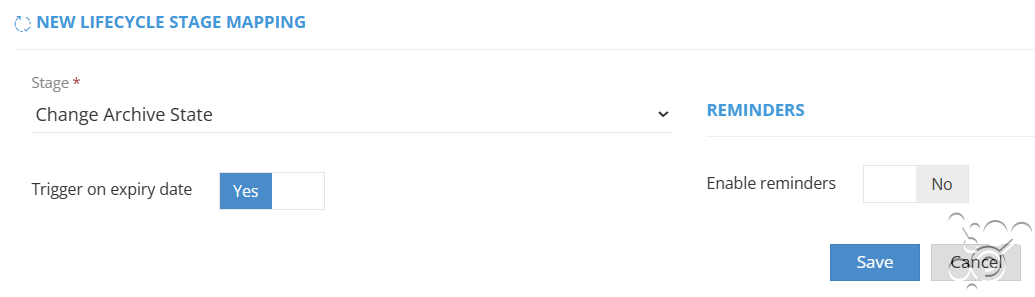
From within your Policy, click on '+Add Stage'. Configure the following:
- Select the first stage you want this to run. Here, you would select your 'Change Archive State' or 'Archive' stage
- You will set 'Trigger on expiry date' to 'Yes'
- Click 'Save'
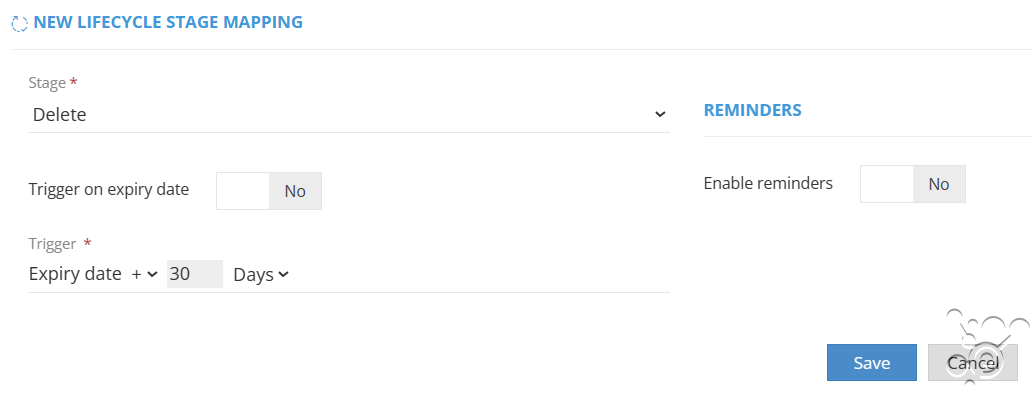
Repeat this for the Delete action. The configuration is as follows:
- Set the stage as Delete
- Leave 'Trigger on expiry date' set to 'No'
- Set the 'Trigger' to '+30 days'. This means the delete stage will run 30 days after the expiry date
- Click 'Save'
- Save the Lifecycle Policy
Linking the Lifecycle Policy to a Service Definition
Expand to read more about Linking the Lifecycle Policy to a Service Definition
Lastly, go to Admin > Service Definitions and edit the Service Definition that will need the Lifecycle Policy.
Select the Lifecycle tab on the left hand side and select '+Add Policy'.
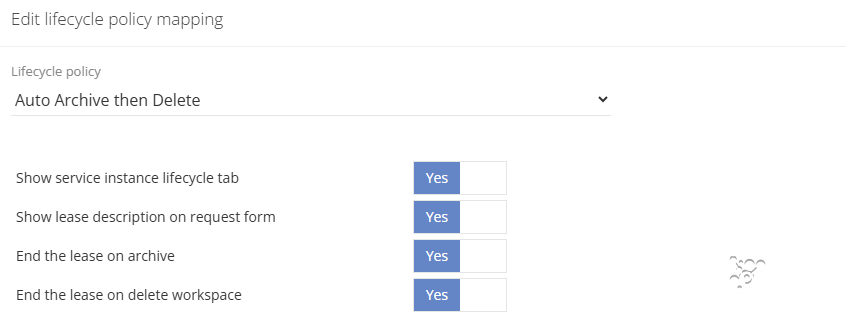
Select the Archive, Wait, Delete policy created.
Choose if the following options are required:
- Show service instance lifecycle tab; this will show anyone who can access the info page the name of the stages and when they will run.
- Show lease description on request form; will allow you to add text that will appear on the request form describing the lifecycle policy
- End the Lease on Archive; this will set the lease to 0 days if the 'Change Archive State' action is run manually by an owner.
- End the Lease on delete workspace; this will set the lease to 0 days if the 'Delete workspace' action is run manually by an owner.
We choose to turn all of these on to allow visibility of what will happen and ensure if the workspace is archived or deleted before the end of the lease, the lease will also end, allowing the next stages to run.
Click 'Save' and save the Service Definition. Your new Lifecycle Policy will now be applied to this Service Definition.
Once the Lifecycle is added, new creations will automatically archive and delete, unless an owner or admin intervenes.