Example: Expense Approval Process
This article explains how to create and demonstrate a simple approval workflow using an Expense List.
The goal is to show how a request moves from Draft → Submitted → Approved/Rejected → Paid.
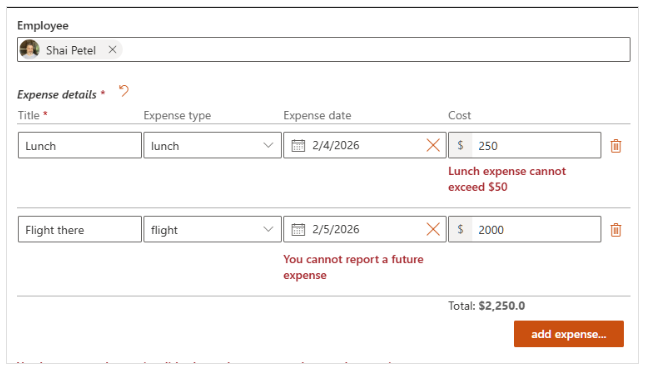
Watch our webinar:
Steps on how to build the Basic Approval Workflow
1.Create the Expenses List
This list will store employee expense submissions in a SharePoint List
Expand to see more details
Add Required Columns
- Add Status Choice field if needed
- Options: Draft, Submitted, Approved, Rejected, Paid
- Default value: Draft
- Require that this column contains information
- Add comments: Multiple lines of text field if needed
- Add approver: Person or Group field if needed
- Open the View Item form and add APl script to disable the Status column.
- This disabled the status field in the UI, but allows API updates and default value updates. This will allow us to use the status field in the user-actions conditions.
- This is optional, the traditional way would be to hide it in new/edit forms and update it in the workflow using an activity.
kwizcom.ModernUILibrary.FormPage.OnReady("disable_status", function (form) {
    switch (form.context.pageType) {
        case 8://new item form  rules only
        case 6://edit item form  rules only
            //Disables the status field in the UI, but allows API and default value change to the field value
            form.SetFieldsState({
                Status: { disabled: true, preventUndo: true }
            });
            break;
    }
});
2.Update Form Builder
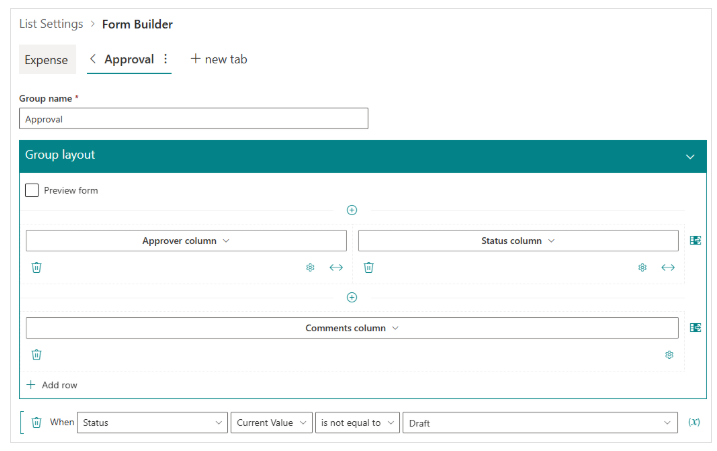
Design the layout of the form to show the approval options it is own tab
Expand to see more details
- Change the layout to use tabs.
- Add a new tab called Approval.
- Layout:
- Approver column | Status column
- Comments column
- Condition: Show this tab when**** The Status is not Draft.
3.Create User Workflows
Created first to use in conditions later, there are multiple work flows to create, expand each to see the setup
Submit for approval Workflow
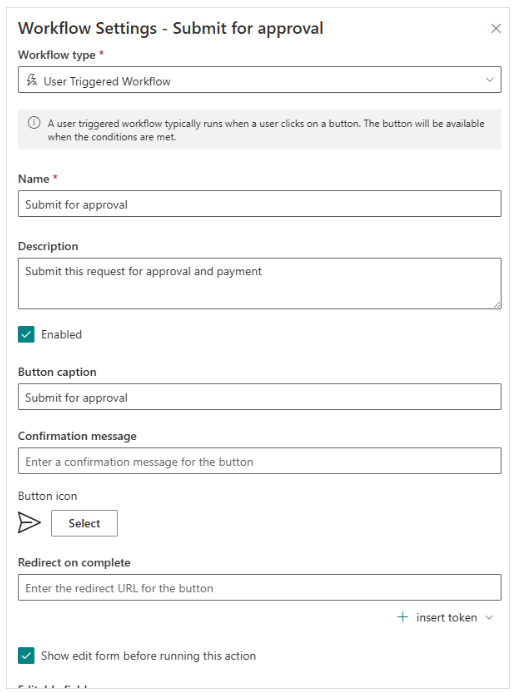
- Create the Workflow
- Workflow Type: User triggered Workflow
- Name: Submit for Approval
- Description: Submit this request for approval and payment
- Icon: Send
- Show Form: Enabled
- Add Conditions: when status = draft

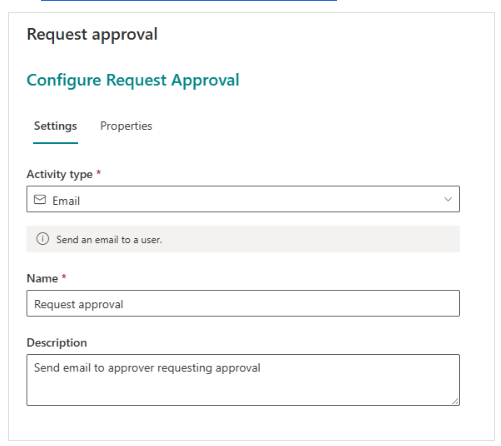
- Add activity: Email.
- Settings Tab:
- Activity type: Emil
- Name: Request approval
- Description: Send email to approver requesting approval
- Properties Tab:
- Recipients: [Approver],
- CC: [Employee]
- Subject/Body: ** ACTION REQUIRED ** Please review and approve this expense.
<div>Hey [Approver]!</div><div>Please review and approve this expense:</div><div><a href="[View Item]">View Item</a></div>
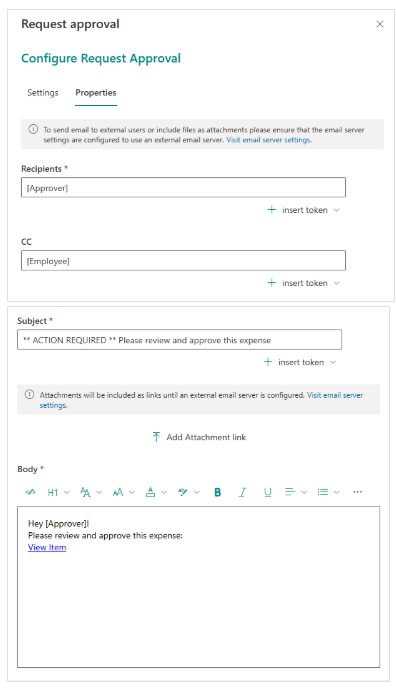
- The workflow is setup
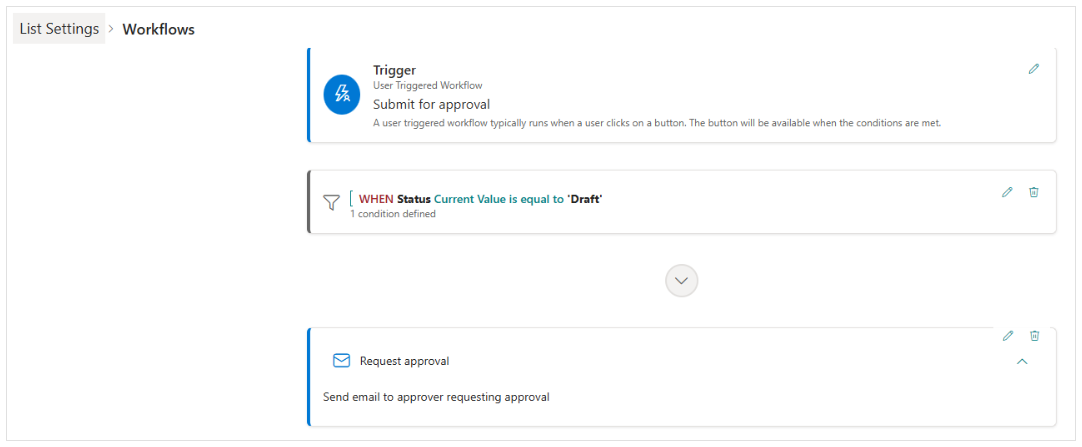
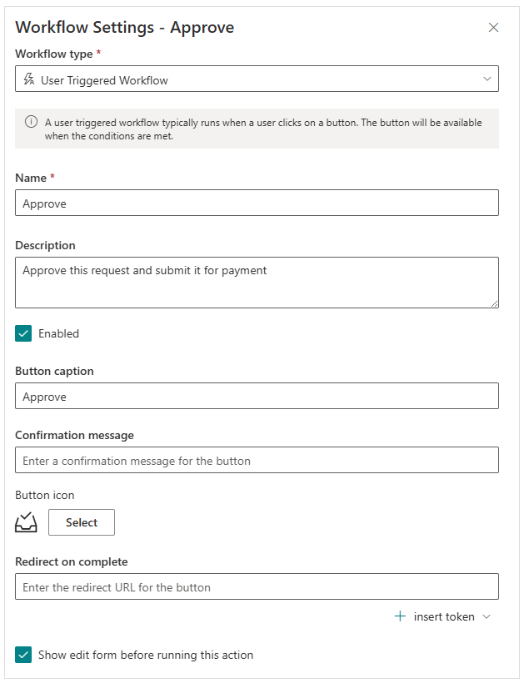
Approve Workflow
- Create the Workflow
- Workflow Type: User triggered Workflow
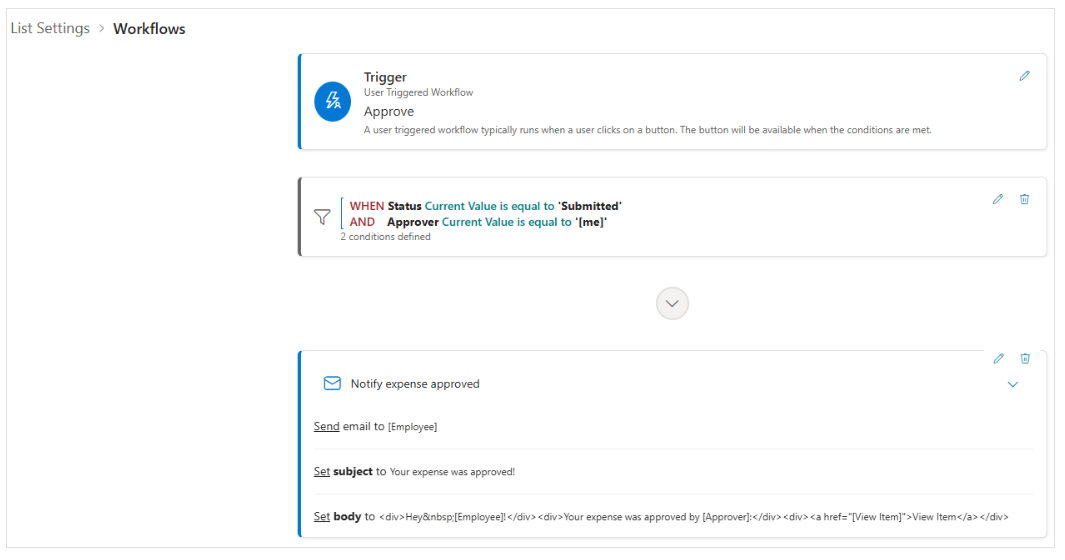
- Name: Approve
- Description: Approve this request and submit it for payment
- Icon: InboxCheck
- Show Form: Enabled
- Add Conditions when status=submitted AND approver = [me]

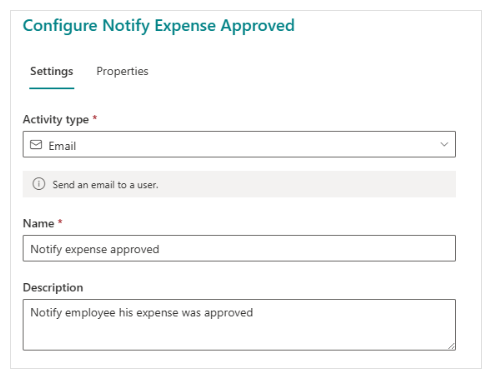
- Add activity: Email.
- Settings Tab:
- Name: Notify expense approved
- Description: Notify employee his expense was approved
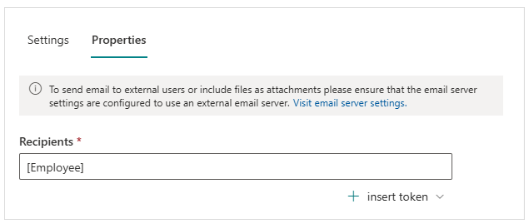
- Properties Tab:
- Recipients: [Emploee]
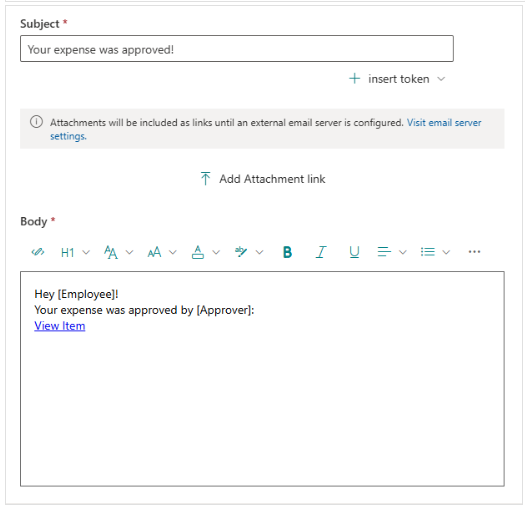
- Subject and body: Your expense was approved!
<div>Hey [Employee]!</div><div>Your expense was approved by [Approver]:</div><div><a href="[View Item]">View Item</a></div>
- The Workflow is now setup:
Reject Workflow
- Duplicate the Approve Workflow
- Rename to Reject
- Description: Reject this request and notify employee
- Icon: Unsubscribe
- No need to edit conditions
- Remove activity and add new one
- Duplicate Notify expense approved
- Name/description: replace approved with Rejected
- Subject/body: ** IMPORTANT ** your expense was declined
<div>Hey [Employee]!</div><div>Your expense was declined by [Approver]:</div><div><a href="[View Item]">View Item</a></div>
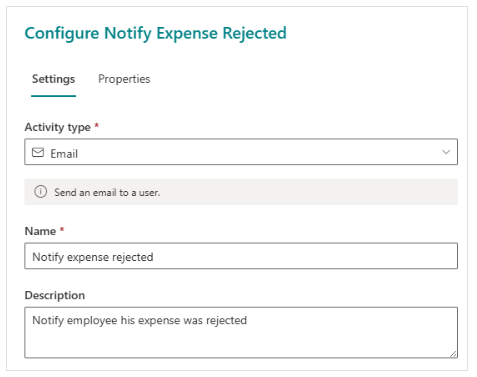
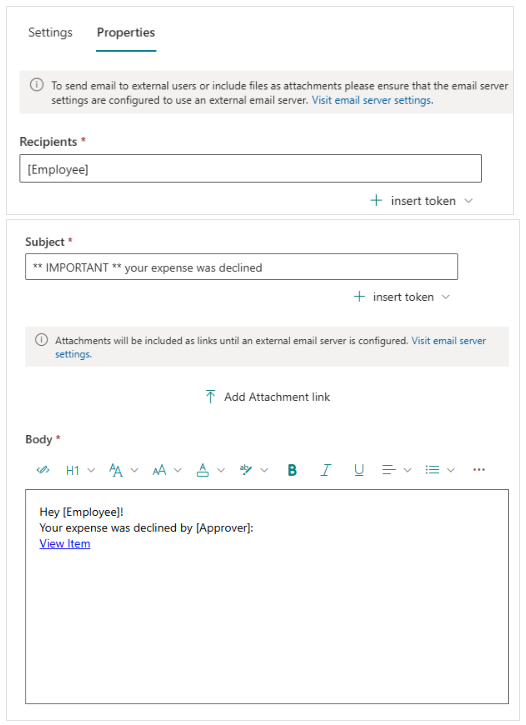
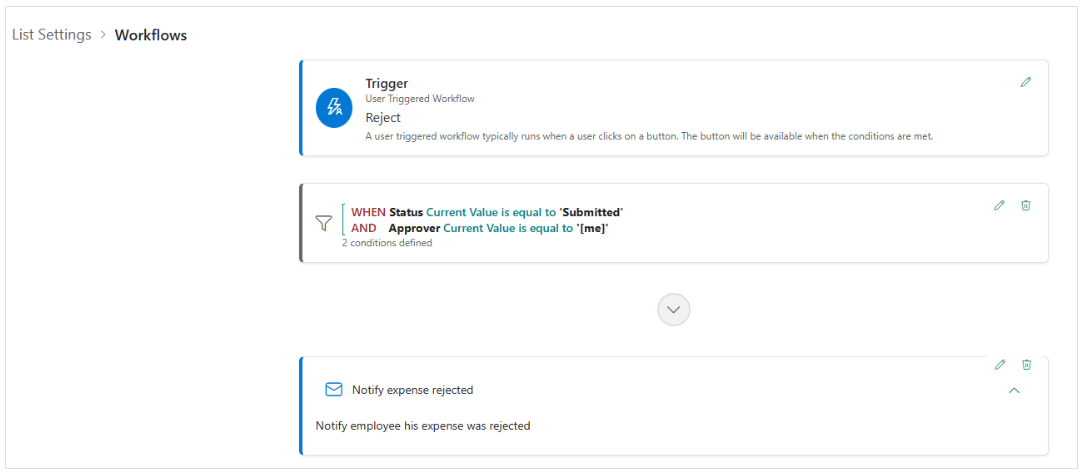
- The Workflow is setup:
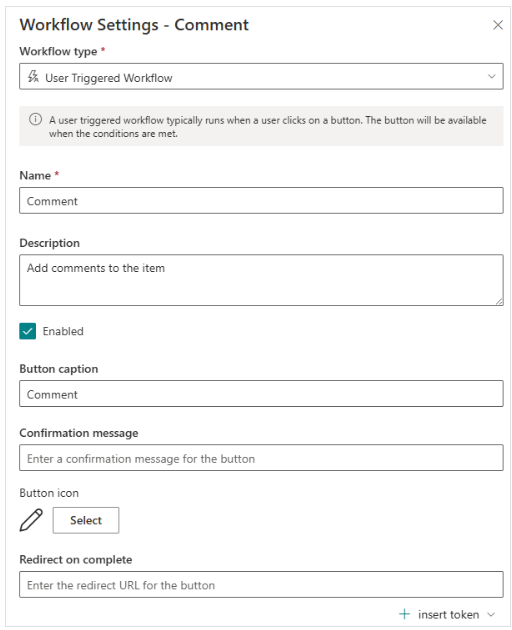
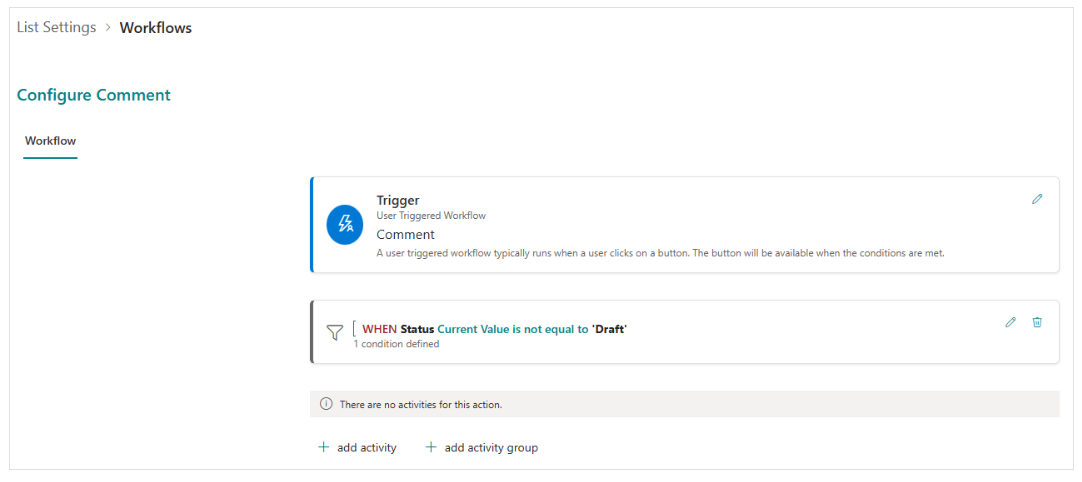
Comment Workflow
- Create a workflow
- Name: Comment
- Description: Add comments to the item
- Icon: Edit
- Show form - select Title and Comments fields
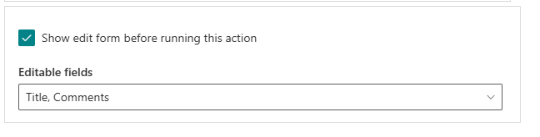
- Add Conditions: Status != Draft
This will help us later, block editing item, using a default action

- The Workflow is setup:
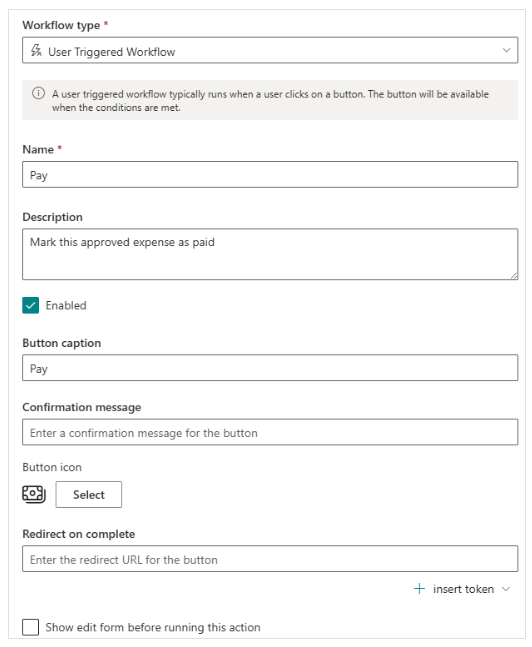
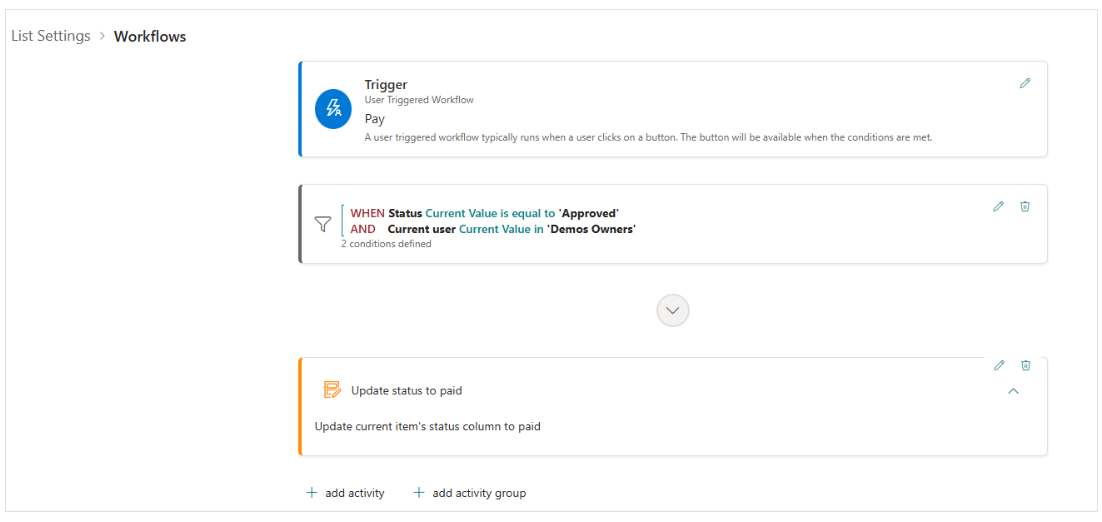
Pay Workflow
- Create the workflow
- Name: Pay
- Description: Mark this approved expense as paid
- Icon: Money
- Do not show form
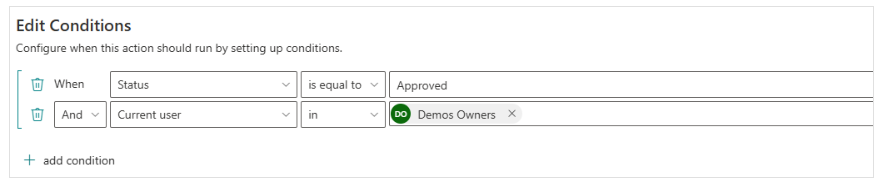
- Add Conditions: When status = approved AND Current user is in "Demos Owners" (mention: in production, you would also set current user is in [accounting] group)
![]()
- Add activity: Update item
- Name: Update status to paid
- Description: Update current item's status column to paid
- Add field, Status = Paid
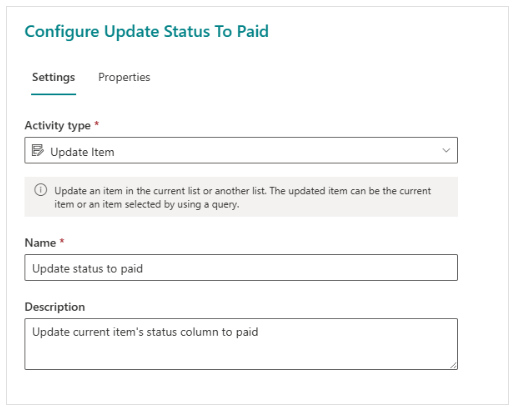
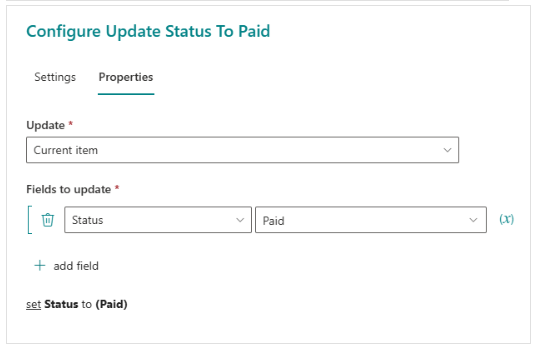
- The Workflow is setup:
In Progress demo
- In a new tab, refresh the list page to reload settings
- Click New item
- Show - no approval tab
- Create an item > status = draft
- Open to view view item, show these:
- Can edit
- Can submit for approval
- Click submit for approval -> explain why the approval tab is missing
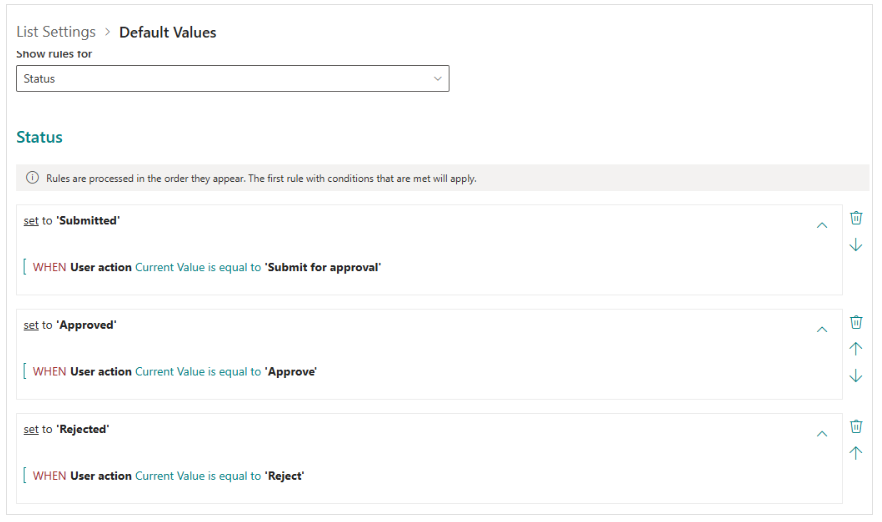
Default values settings
- In the first tab
- Visit default values settings
- Status
- Submitted when action is submit
- Approved when user action is approve
- Rejected when user action is reject
In progress demo
- In the second tab, refresh the list page to reload settings
- Refresh view item
- click submit for approval
- Show approval tab is now visible, but approver is not a required field
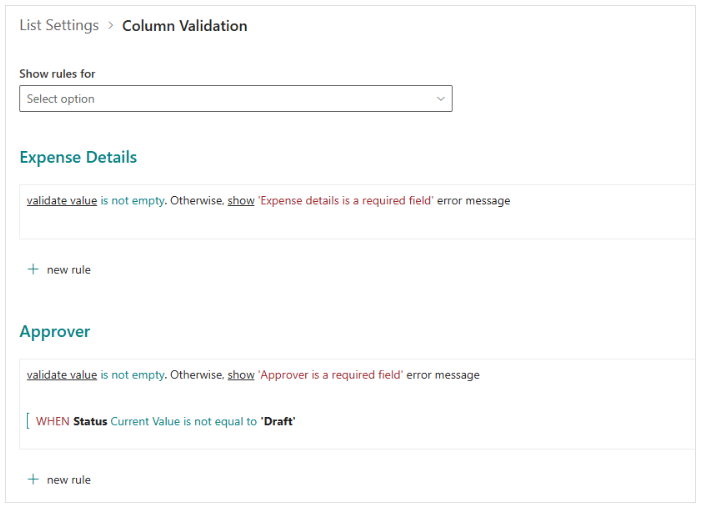
Column validation
- In the first tab go to column validation settings
- Approver - set required when status != Draft
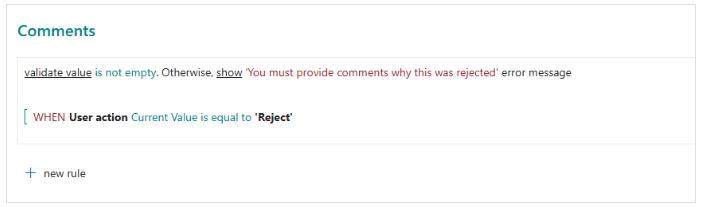
- Comments required when action = reject, set error to: "You must provide comments why this was rejected"
Column permissions
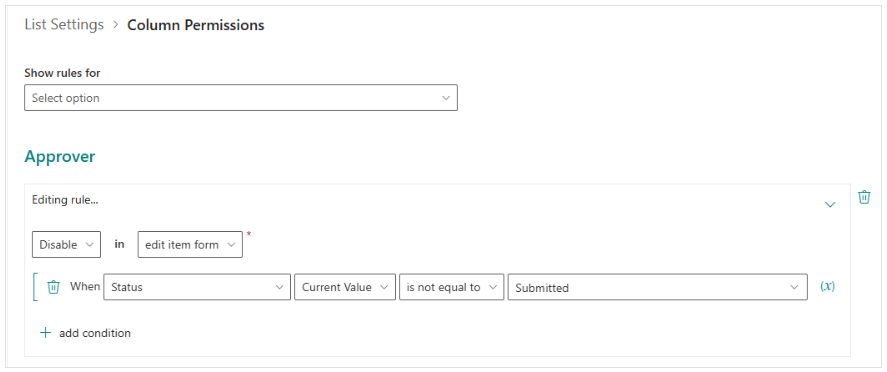
- Go to column permissions settings
- Disable approver in edit form when status != Submitted
- Disable status field in list views to prevent changes in edit list mode
In Progress demo
- In the second tab, refresh the list page to reload settings
- Refresh view item
- click submit for approval
- Finish the action
- Show validation: Approver is required
- Correct the error and submit
- Show email received > click view item
- Item will open in new tab
- Show approve / reject / comment actions
- Click edit: Show user can edit the item
Default actions
- In the first tab, go to workflow settings > Default actions
- Select approve, reject, comment, pay as default edit actions
- Explain: "If one of those actions are available to the user, they will have to chose one of those actions instead of edit action"
In progress demo
- Close the item opened from email
- Reopen view item from the email
- Click edit: show user now must select between available actions
- Explain: if current user is NOT an approver, the only action is "Comment"
- Click comment to show how the user can only add comments in this action
- Open the item again, click edit and reject, try to save to show validations: "You must provide comments why this was rejected"
- Mention how approver is now disabled
- Open the item again, click edit and approve - finish approving the item
- Show email item approved
- If you are a member of "Demo Owners" group, you will be able to demo the "Pay" action.
- Here is the group members list: /sites/Demos/mr/_layouts/15/people.aspx?MembershipGroupId=3
- Click pay to show an action with no UI