What is a Request Variable?
Request variables allow you to define your own transform tags, apply a change to an existing transform or
system tag or collect user values from your Azure tenant to use in
- Naming conventions of Teams, Sites, Groups, Communities, Planners, Team Channels
- Lifecycle policies to set the expiry date,
- Approval templates to define who the approver will be
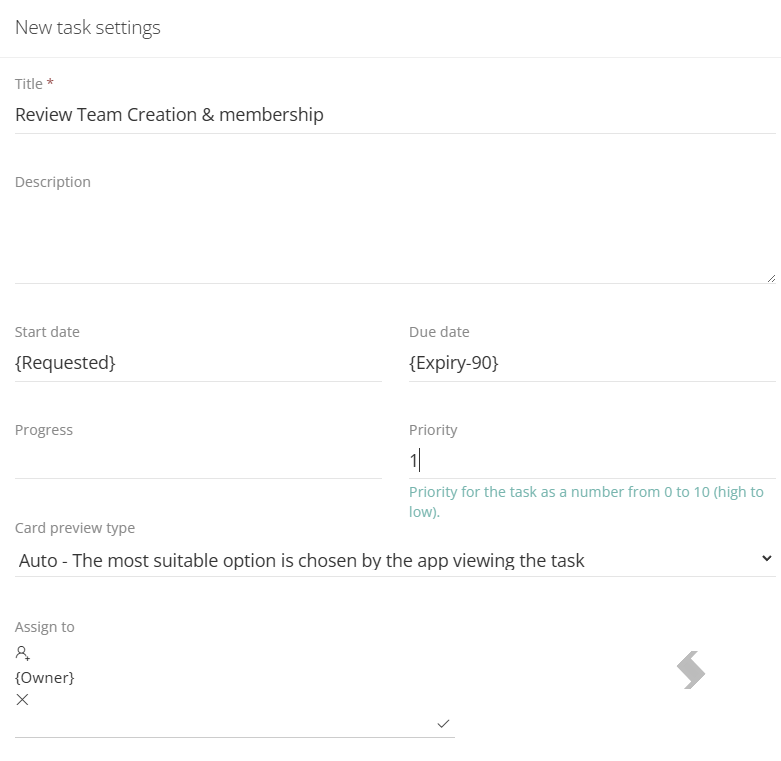
- Within Planner tasks to set start and due dates or assign people tasks
To setup a Request Variable you will need to complete the steps below in the following order
- Create the Request Variable
- Link the Request Variable to Service Definition(s)
- Apply to the Service Definition, title formula, approval, lifecycle policies or planners
Go to Admin > Templates > Request Variables to create any request variables needed. This area will display a list of any that have been created.
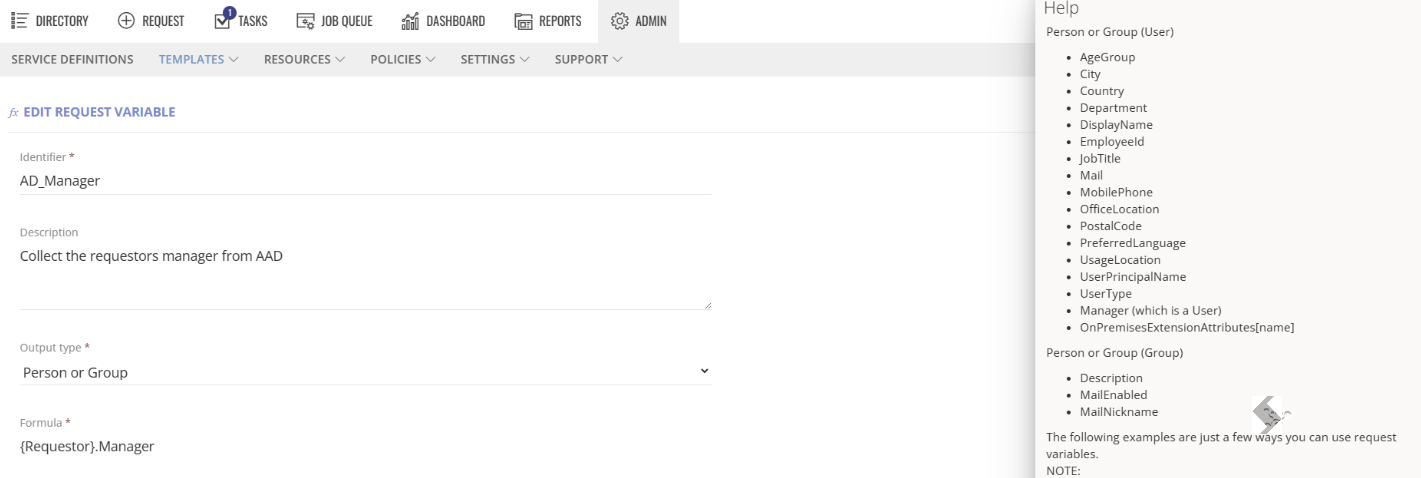
- Identifier, the name used to identify the request variable.
- Description, should describe what will be achieved
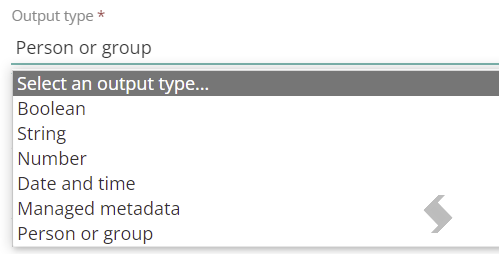
- Output type, the output is what will be produced from the calculation, the qualifiers that can be used are linked to the type selected.
This will also be used to filter down when the request variables can be used, for example numbers and dates in Lifecycle. 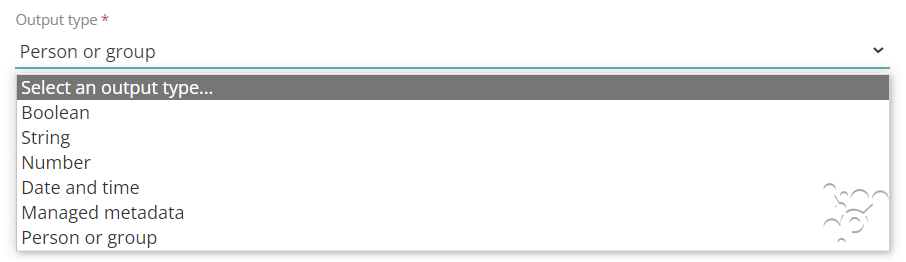
- Formula, create the formula to get the results required.
Formulas comprise of a {transform tag} or Now followed by qualifiers, separated by full stops/period with parameters.
For example, {EncodedTitle}.Replace("_","") will replace the underscore with nothing. Additional qualifiers can be added to the same formula {EncodedTitle}.Replace("_","").Append(PRJ)
The built-in transform tags can be used inside the {} brackets, or the identifier keyword can be used.
The qualifiers are specific to the value type resolved by the preceding part of the formula.
Where a qualifier has parameters, they must be in double-quotes. Parameters are shown in () brackets, for example, AddDays(60).
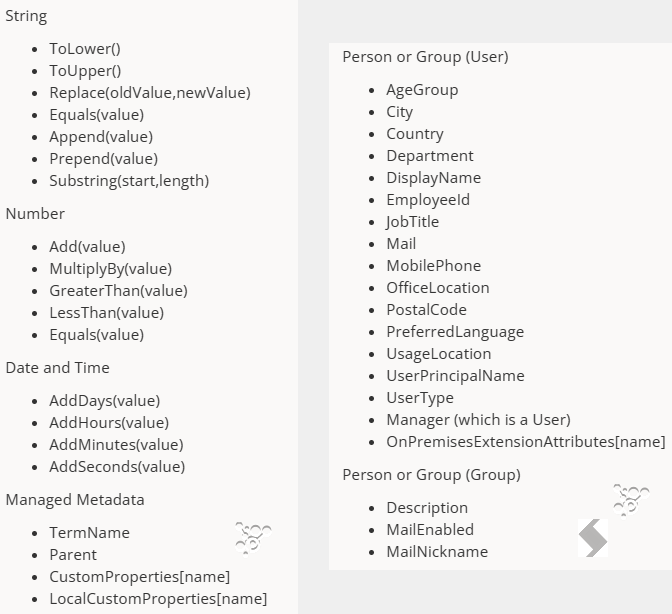
Examples
String
- {EncodedTitle}.Replace("_","") - Removes the underscores from the encoded title value.
- {Title}.ToLower() - Converts the title to lowercase.
- {Business Unit Name Lookup[1]}.ToUpper().Append(" Managers") - Gets the business unit name lookup value at index 1, converts it to uppercase and adds Managers to the end. e.g. GRP001 Managers. NOTE: Business Unit Name is the name of a Dropdown field on the request form with a corresponding lookup column.
- {Requestor}.Department.Append(" Approvers") - Gets the requestor's department and adds Approvers to the end. e.g. HR Approvers.
Date & Time
- {Start Date}.AddDays(90) - Adds 90 days to the start date column provided on the request form.
- {Project End Date}.AddDays(30) - Adds 30 days to the end of a project date column on the request form
- Now.AddDays(365) - Takes todays date and adds 365 days
- Now.AddDays(90) - Takes todays date and adds 365 days
Person or Group
- {Requestor}.Manager - Gets the manager (of the person requesting the creation) from EAC/AAD user properties
- {Primary Owner}.Department - Gets the department of the person selected in the 'Primary Owner' column on the request form from EAC/AAD user properties
- {Requestor}.OnPremisesExtensionAttributes["extensionAttribute1"] - gets the custom attribute from exchange admin center in position 1.
Number
- {Duration}.Add(90) - Adds 90 to the 'Duration' column provided on the request form.
Managed Metadata
- {Fileplan}.Parent.TermName - Get the name of the parent term from the fileplan selected on the request form.
NOTE: Fileplan is the name of a Managed Metadata field on the request form. - {Customer}.CustomProperties["shortname"] - get the custom property set in Termstore (SPAC) based on the Customer selected on the request form.
NOTE: Customer is the name of a Managed Metadata field on the request form.
The Request Variable must be linked to any Service definitions it will be used in.
- Go to Admin > Service Definitions > Request tab > Request variable References
- Click +Add reference
- Select the request variable reference
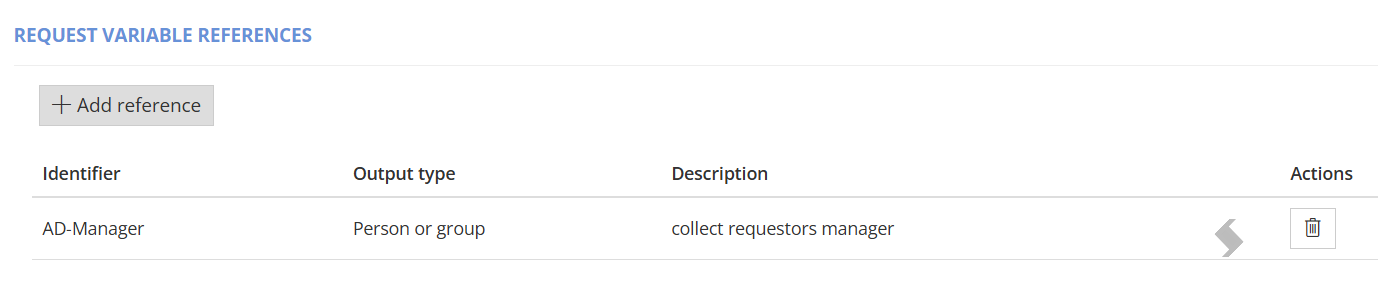
- Save the Service Definition
Now you can use the identifier you created in your naming conventions, approvals, lifecycle and planners
Once the request variable is linked you can select where the request variable will be used. If you have not added the variable to the request tab, please do so.
Naming Conventions
To apply the request variable to the naming convention, apply the identifier in curly braces to either title formula or URL settings
Approval
To apply the request variable to the approval:
- Create an approval template,
- Set the actor type to Request Variable and
- Select the variable to be used.
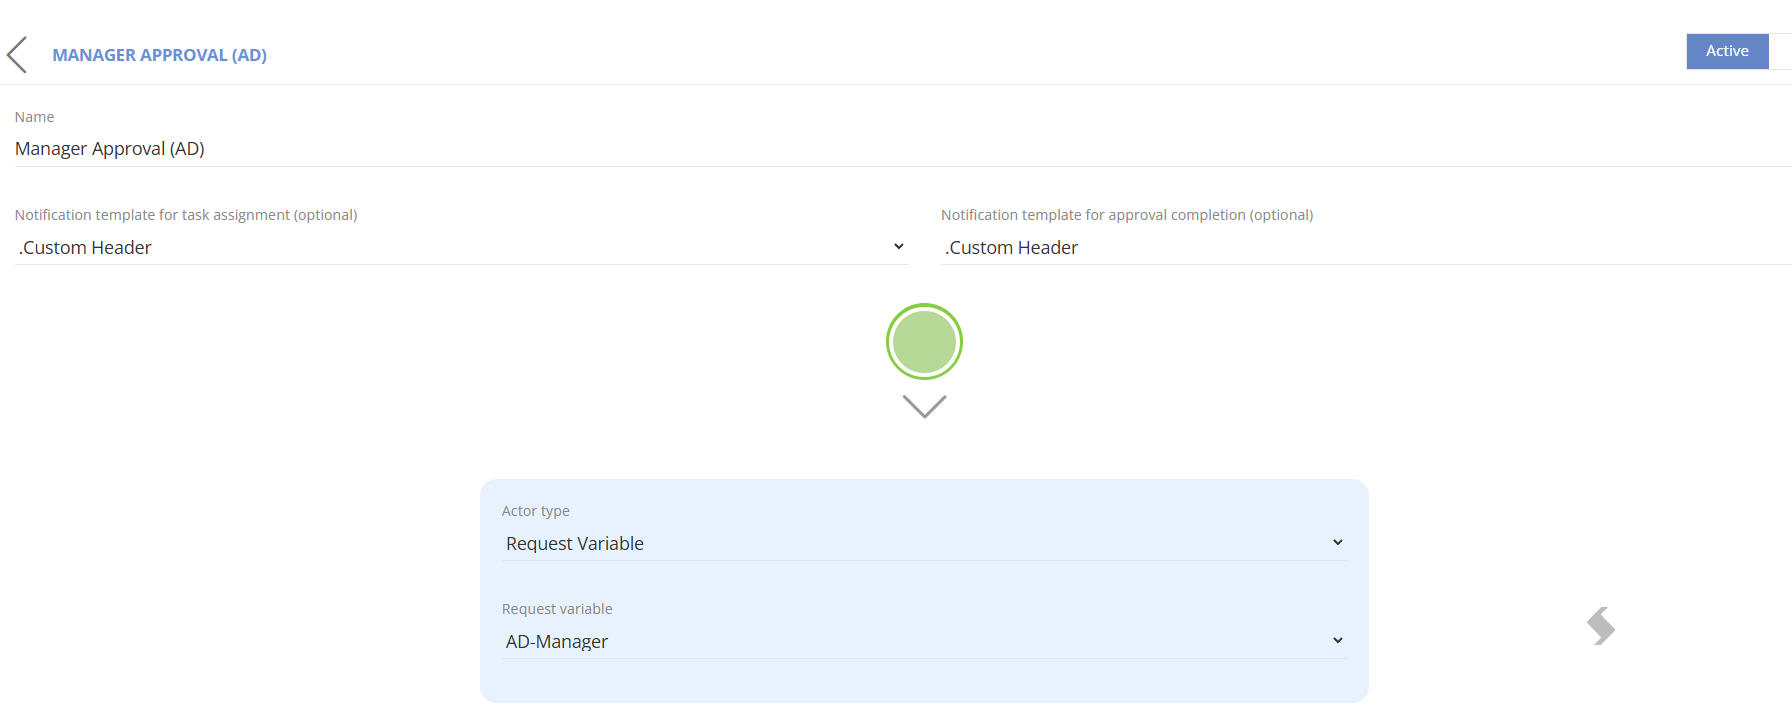
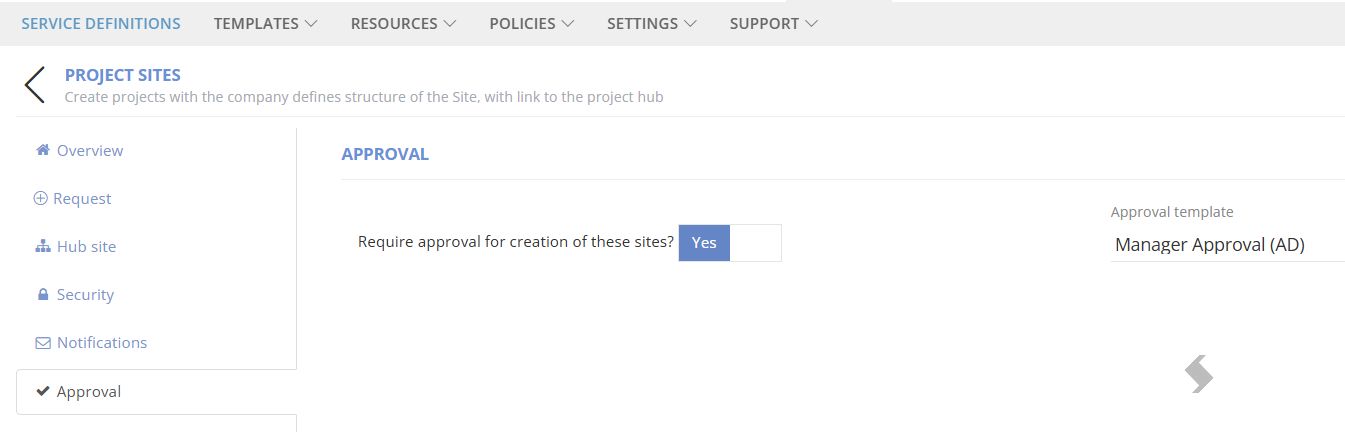
- Enable approval in the service definitions and select the template created
Lifecycle Policy
To apply the request variable to a lifecycle policy:
- Create a lifecycle policy
- Set the Expiry type to Request variable
- Select the Request variable to be used
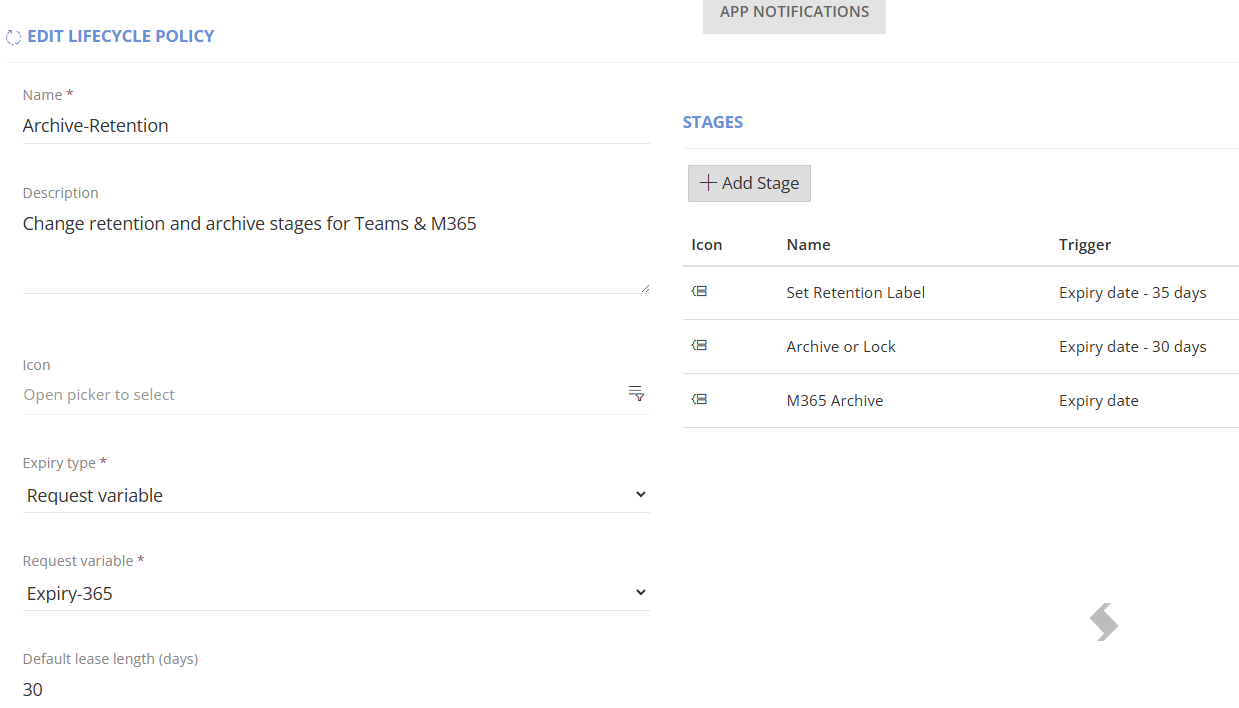
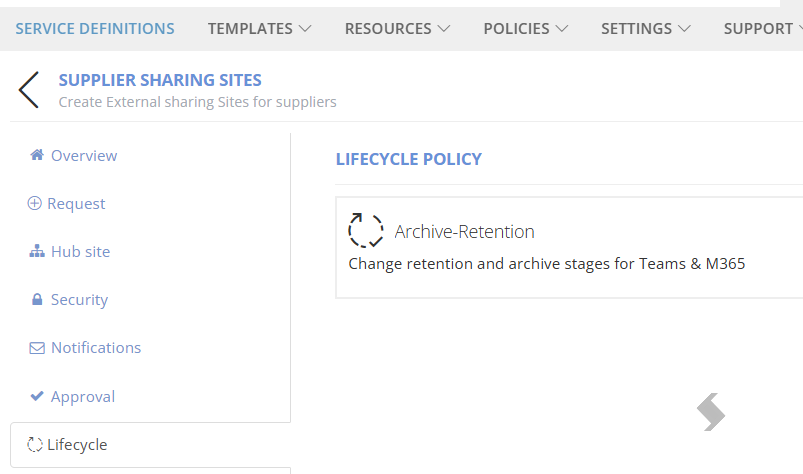
- Add the lifecycle policy to the Service Definition
Planner Tasks
To apply the request variable to the Planner tasks,
- Open the planner tab and select the planner to use
- Apply the identifier in curly braces to either the Title, Start date, Due date or Assign to fields