What are Notifications?
Notifications are emails that are sent from ProvisionPoint to notify admins or owners of changes to their Microsoft 365 workspaces, that are managed through ProvisionPoint.
ProvisionPoint can send email notifications to requestors owners, admins or named people for a variety of reasons:
- Creation is Successful
- Requestor, owners (optional), admins (optional)
- Approval is assigned
- Approvers
- Approval is completed
- Requestors
- Lifecycle stage reminders
- Owners, admins, named people
- Lifecycle Action completion is successful
- Owners, admins, named people
- Manual Actions completion is successful
- Requestor, owners or admins
- Job Failures (creations, actions, compliance)
- named users, optionally owners and requestors
- Non-Compliance found
- Owners, Admins, named people
Notification Providers
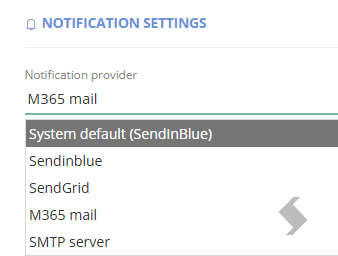
By default, ProvisionPoint will send email notifications in English from either no-reply@provisionpoint.com or no-reply@appmail.provisionpoint.com.
The default notification provider is an external company (Brevo or SendGrid) depending on the location of your ProvisionPoint instance.
The username of the email can be changed, but the domain must be left in place.
If you change the from address to your own domain, this may work for a short period before the emails are blocked.
To successfully use your own domain you will need to:
- Register an account with one of our supported providers
- Use M365 Mail
- Use SMTP relay
To check your default, go to Admin > Settings > App Settings > Notification Settings To change providers read ....
Enable Notifications
The notifications for creation, actions and failures are configured in the Service Definition, go to Admin > Service Definitions > Notifications
Each Service Definition needs to have the notifications enabled for them to send and a notification template must be selected.
Once enabled you have the following options for the Creation, Action and error emails:
-
Notification Template
This field is mandatory and must be set.
- The notification template contains the subject, header, body and footer of the email.
By default you will have the System Default template only, use this to test the emails are sent as expected and if the default content is suitable. - Create additional notification templates to customise the content to another language or to include your own text.
We recommend setting up your own header & footer template to remove the ProvisionPoint logo and add relevant information to all emails
When the header and footer template is used in the Notifications tab, it will only replace the default header and footer, the subject and body will be replaced with our system default text.
-
From Address
The default email address will vary depending on your notification provider. The notification provider can be changed in Admin > Settings > App Settings by your app managers/Admins:
- When the default notification provider is selected, the username can be changed to anything, for example DepartmentalTeam@provisionpoint.com
- If your own domain should be used, and a subscription to SendGrid or SendinBlue (Brevo) the email address must match the sender address setup. For example, no-reply@mydomain.com
- If you are using M365 or SMTP this MUST be blank as the from address is configured in the Admin > Settings > App Settings > Notification Provider section
-
Admin email address
Add the email address' to define who the admins are that should receive notification emails, multiple addresses can be added to the Service definition, use a semi colon ; to separate the emails.
The emails that can be sent are enabled in various areas:
- Creation > 'Notify administrators when site is created' in the Service Definition > Notifications tab
- Actions completed > got to the Actions tab.
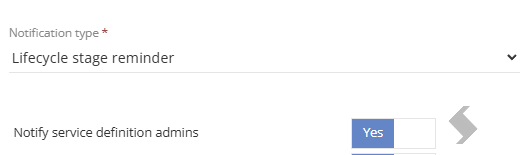
- For each action turn on the 'Notify service definition admins'

- Lifecycle reminders > via Lifecycle Policy > when the stage is mapped, enabled reminders and choose recipients
- Lifecycle Actions completed > via Lifecycle Stage > when the action is mapped, enable notifications and choose recipients
- Non-Compliance > via Compliance Policy > Add Notification and choose the recipients.
- If there should be different recipients this can be set when the compliance policy is added to the service definition.
For the lifecycle and compliance they all have a toggle to 'Notify service definition admins'
-
Error email address
If the creation or actions should fail to complete an error email will be sent with the trace log to the email addresses defined in this section.
We strongly recommend this is setup to help you monitor when jobs are not completing.
Add the email address' or use
Transform Tags for {Owners.AllEmail} or {Requestor.Email} to define who the failure emails will be sent to. Multiple addresses can be added, use a semi colon ; to separate the emails
-
Notify Administrators when site is created
If the Admin email address has been completed, the creation email will also be sent to the users defined.
If the field is blank it will not have anyone to email and can be left as No.
Use this if you have users that need to be kept in the loop about creation requests for specific service definitions.
If they are also the requestor or owner they will receive multiple emails.
-
Notify owners when site is created
By default the creation email will be sent to the requestor of the workspace, enabling this option will also send a creation email to the Owners defined for the workspace.
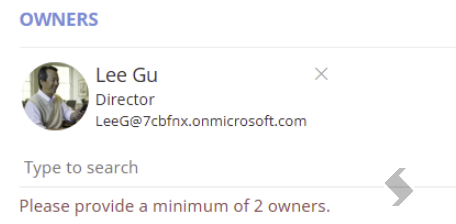
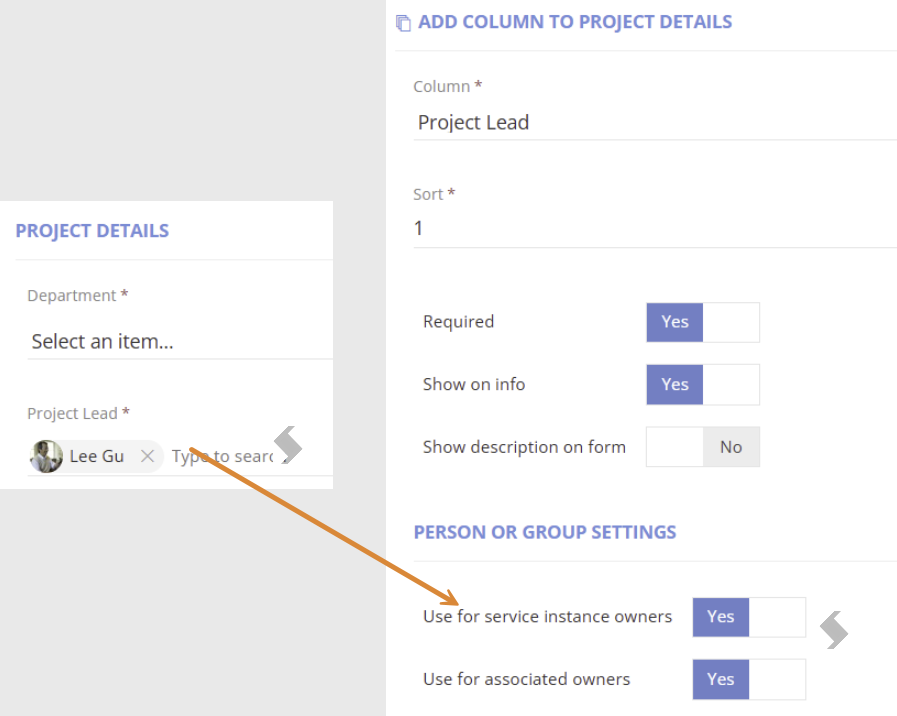
If you are using custom columns/fields to manage your owners, it will send to the any 'Service Instance Owners'. If this has not been selected it would default to the requestor.
Please monitor the Job queue for any failures regularly, where possible add the email address of your service desk to ensure the failures are investigated at the time of the failure.
For other notifications they are configured in other locations:
-
Approvals = Admin > Templates > Approval Templates
When a notification template is applied to approval templates the header, footer, subject line and content can be customised for both the approval assignment and the completion.
Emails will be sent to the requestor and the person it is assigned to.
- Go to Templates > Approval Templates > Manage
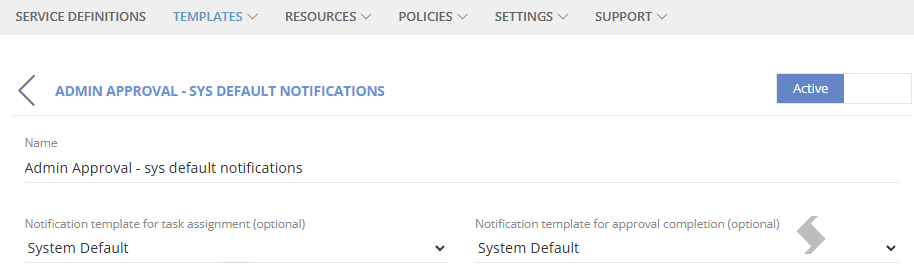
- Select an appropriate template from the list provided for
- Task Assignment
- Approval completion
- Click Save
-
Lifecycle reminders = Admin > Policies > Lifecycle Policies
When a notification template is applied to Lifecycle, custom notifications can be used for stage reminders
- Go to Admin > Policies> Lifecycle Policies
- Edit each Policy stage to set the reminders that will be sent prior to the Stage running
- Set the reminder days and interval to define when the reminders will be sent
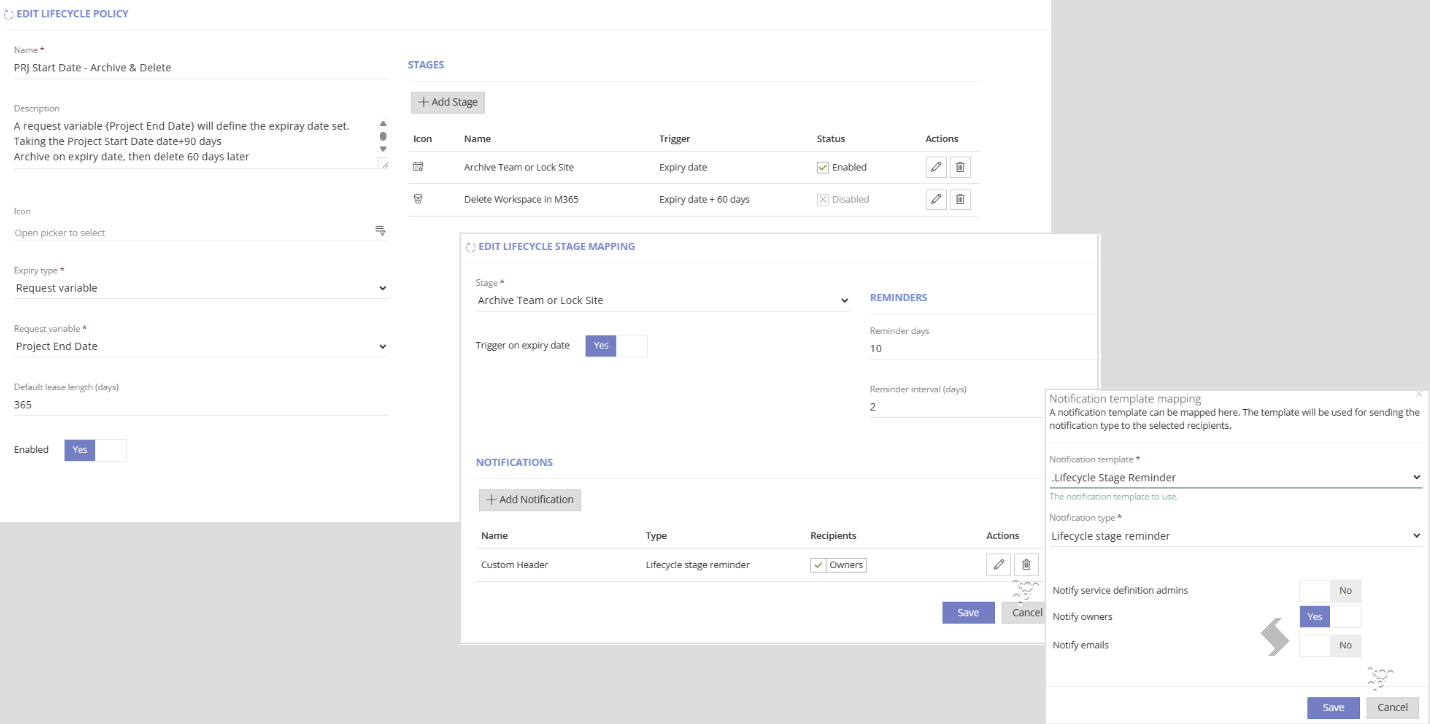
- Select an appropriate template from the list provided
- Define who will receive the notification
- Save the Policy
-
Lifecycle stage completed successfully = Admin > Policies > Lifecycle Policies > Stages
When a notification template is applied to Lifecycle, custom notifications can be used when an action has been run to advise it has been completed
- Go to Admin > Policies> Lifecycle Policies > Stages
- Edit each Stage and the actions applied to send an email on completion
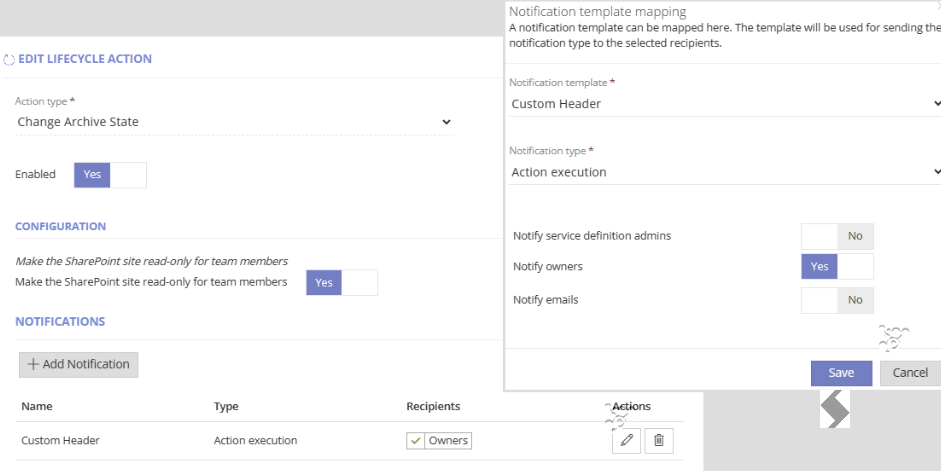
- Select an appropriate template from the list provided - If System Default is the only option go to Templates > Notification templates to create your own
- Define who will receive the notification
- Save the Stage
-
Non Compliance = Admin > Policies > Compliance Policies > Rules
When a Compliance rule is created the content of each rule can have its own text added. The rules should contain relevant instructions and what the result means.
When the Compliance policy is created a Notification template can be applied to define the layout but will include any rules that were non compliant and the text that has been added.
The policy notification should contain information about the policy that has run and the workspace it is run on. Additional information can also be added
- Go to Admin > Policies > Compliance Policy
- Expand and edit the Compliance Policy
- +Add Notification
- Select the appropriate template from the list provided
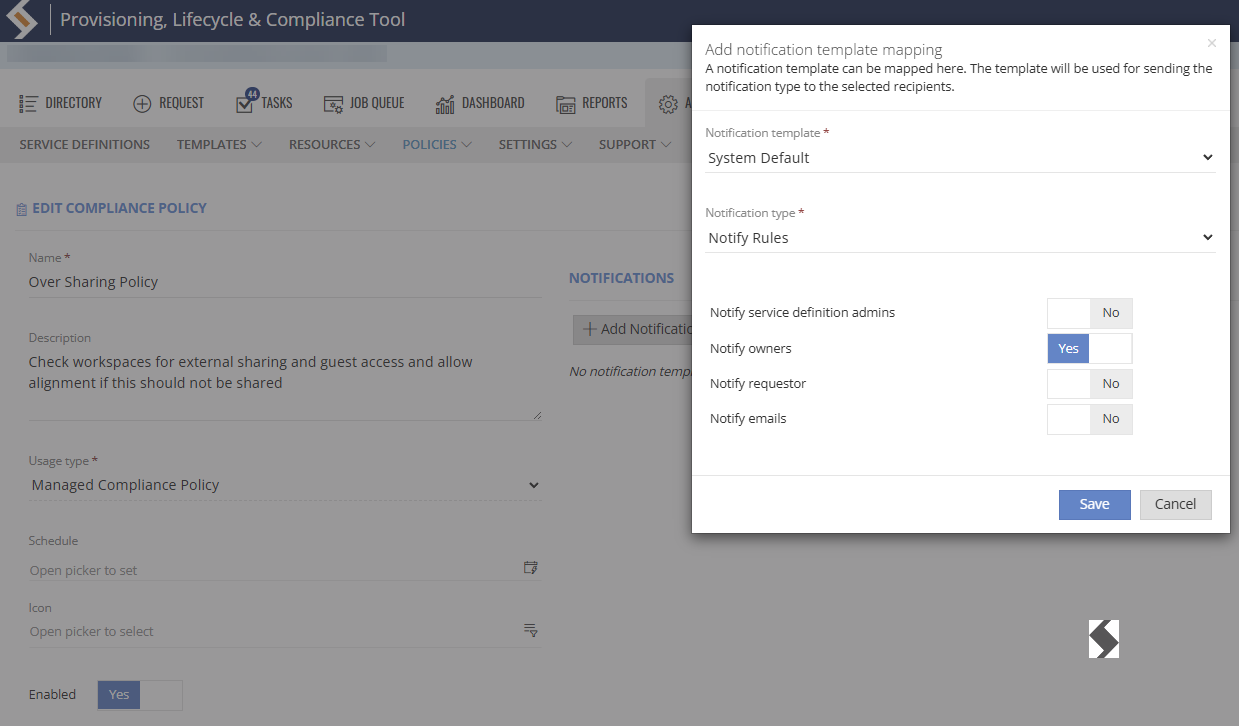
- Define who will receive the notification
- Save the notification mapping, then the policy
- Go to the Rulesets and edit the Notify rules
- Add the Content to be included
- Save the rule
More information about customising Notification templates can be found here:
Useful Articles: