ProvisionPoint can use terms that are managed in the SharePoint Admin Center > Content services > Term store
This means the values available are managed externally to our application, but the terms can be used in naming conventions.
First, a Term Group in SharePoint Admin Center will need to be defined (If you do not already have one specified)
- Go to SharePoint Admin Center > Content Services > Term Store > ‘Add term group’ button
- Once a Term Group has been defined, ‘Add term set’
- Then add terms under the Term Set, using the ‘Add term’ button
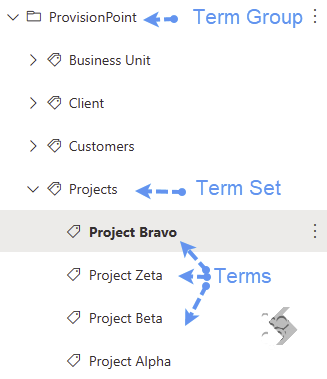
Additional values can also be assigned to the terms using Advanced > custom properties.
This can allow admins to assign project details that can also be used within naming conventions in our app.
In this example a property called 'Project Code' has been added to each term with a value assigned
ProvisionPoint Configuration
Once everything has been configured in SharePoint, you will need to set up a few things in ProvisionPoint:
- A column that points to the managed metadata
- Link the column to a form
- For advanced custom properties create a request variable to collect the value
- Add the form (and request variable, if used) to a service definition
- Add the transform tag of the Column or Request Variable to the Title formula or URL settings
-
Create the column
- Go to Admin > Templates > Forms > Columns > +New Column
- Name the column (It is recommended to name the column after your Term Set, to help identify the correct column when adding to a form)
- Select Managed Metadata as the column type
- Select the term set to use
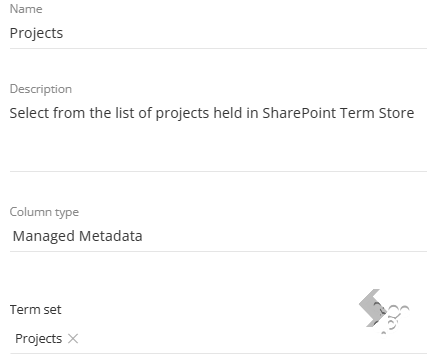
- Save the Column
-
Create a new form or manage an existing form
- Go to Admin > Templates > Forms
- Add the newly created column to the form.
- Set the column as ‘Required’ forcing the requestor to provide a value
- Add any other columns needed
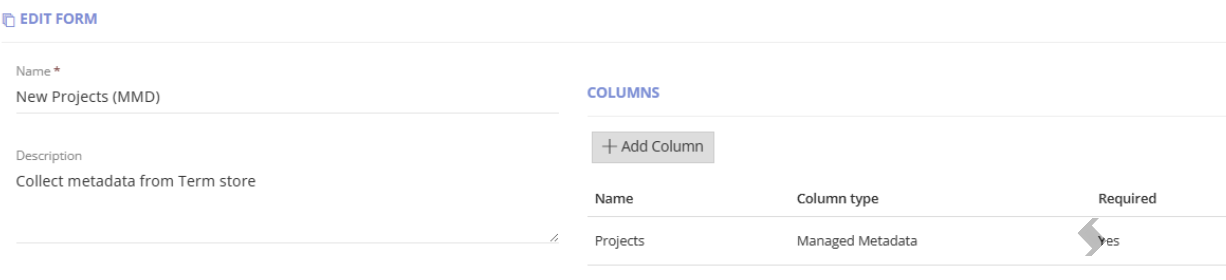
- Save the form
-
Create a 'Request Variable' to collect additional values from the Term
-
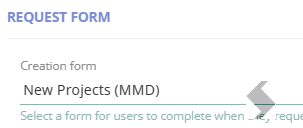
Update the Service Definition(s) - Go to Admin > Service Definitions > Request tab
- Select the 'Creation Form' from the list provided
- Add the Request Variable reference (if used)
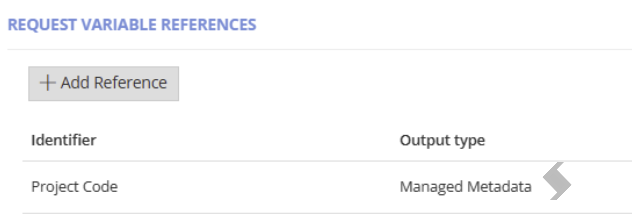
- Define the naming conventions
- Set the Name of the workspace
- Add a Title Formula - {Projects} will pull through the Term name selected on the request.
Prefixes and suffices can be used and any other transform tags - Set Show title field to No - this will remove the default 'Name' field on the request form
- Set Use formula on update to Yes - if update details action is run and the Project is changed this will also update the name of the workspace
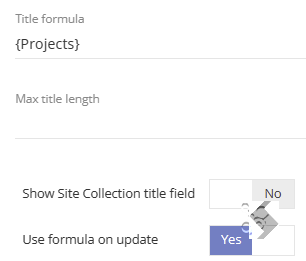
- Set the Site Url of the workspace (also the Group mailbox if Group connected)
- In URL settings > set Url type to Dynamic format
- Add the Url format to set the naming convention -
- {Projects} will pull through the Term name selected on the request.
- {Project Code} will use the request variable to collect the custom property set against the Term selected on the request form
- Prefixes, suffixes and other transform tags can also be used
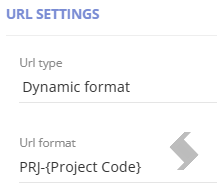
5. Save the Service Definition
As the {Column} and {request variable} are used in the naming, these values must be present in Term store otherwise the request will fail to create
If you would like the metadata to prefix the title, you can copy the below naming conventions and customise with your own details, enable the Show Title field and give the Title label a value
- {ColumnName}-{Title} – Returns the term that has been selected and the title