Create a Planner Plan
The Planner tab is available in the Planner, Group or Microsoft Teams Service Definitions. This allows the creation of pre-defined Planner plans.
Here the app managers or service definition managers can define the categories, buckets and initial tasks that will be created.
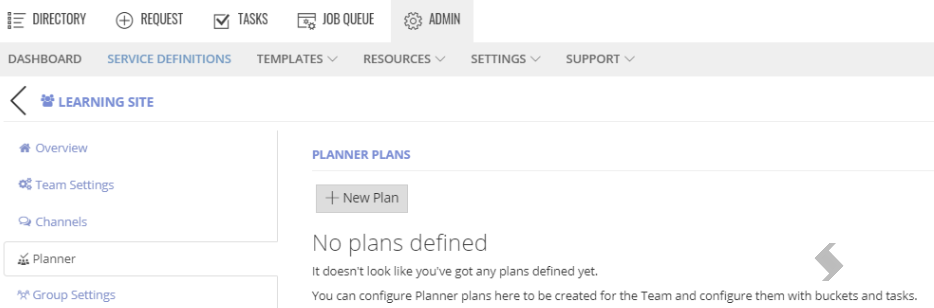
Expand to see the Creation steps for a new Planner Plan
- Click the ‘+New Plan’
- Configure the plan by setting:
- Title, provide a title of the Plan
- Description, provide a description of what the plan is for
- Category, for each colour as needed, add the text that will be shown
- Enabled for create instance action, if set to Yes this will be created when the workspace is requested using this Service Definition.
- Enable for create plan action, if set to Yes this template will be available for the 'Create Planner Plan' Action. To read more about actions read the Managing Actions article.
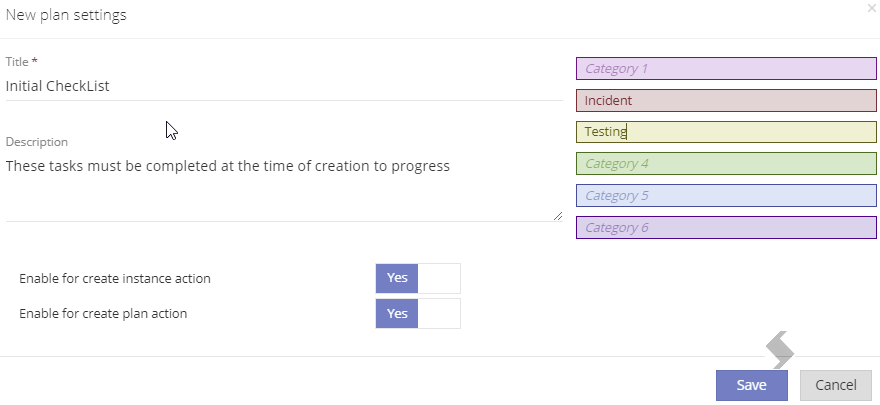
- Click Save to save the plan
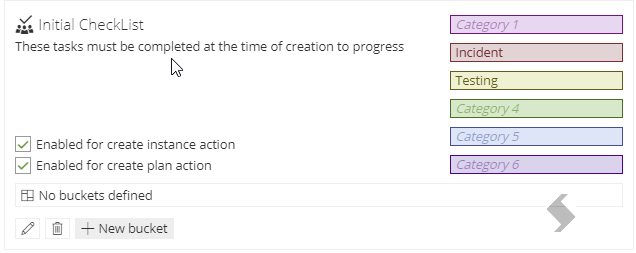
- Click Save
Add Buckets to the Planner Plan
- Click +New Bucket and configure
- Name of the bucket as it will appear in the plan
- Description of what the bucket is for
- 'Enabled for create instance action' must be set to Yes for the bucket to be created when the workspace is created
- 'Enable for create bucket action' is not yet available and will default to No
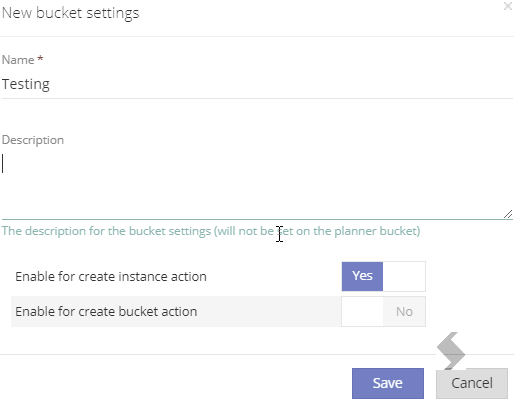
- Save the Service Definition
Add more buckets by repeating the steps.
Configure Initial Tasks
- Click on 'No initial tasks' shown in the Bucket created before. Once Tasks have been saved the number of tasks will be shown instead of no.
- Click +New Task
- Configure the task:
- Title, as it will be seen in the Planner list
- Description, this will be shown in the noted field and can only have a maximum of 1024 characters.
- Start and End Date, define the start and end date, request variables or date fields
- Progress, add a number between 1 and 100
- Priority, add a number between 1 and 10
| Number range |
Recommended Value
| Value applied |
| 0 to 1 |
1
| Urgent |
| 2 to 4 |
3
| Important! |
| 5 to 7 |
5
| Medium |
| 8 to 10 |
9
| Low |
-
Card preview type, select the preview option from the list
- Assign to, add who the task will be assigned, use tags that you have created, they must be a person or group type to work here.
- Add Checklist items if required
- Set the order of the checklist
- Set if they should be checked or not using 1, True or Yes for checked or 0, False or No for unchecked
- Add any references that are required using Urls
- Click Save
- Add other Tasks as required. The order of the tasks will be the order of creation. Click and drag the tasks to change the order.
- Click Done
- Click Save on the Service Definition.
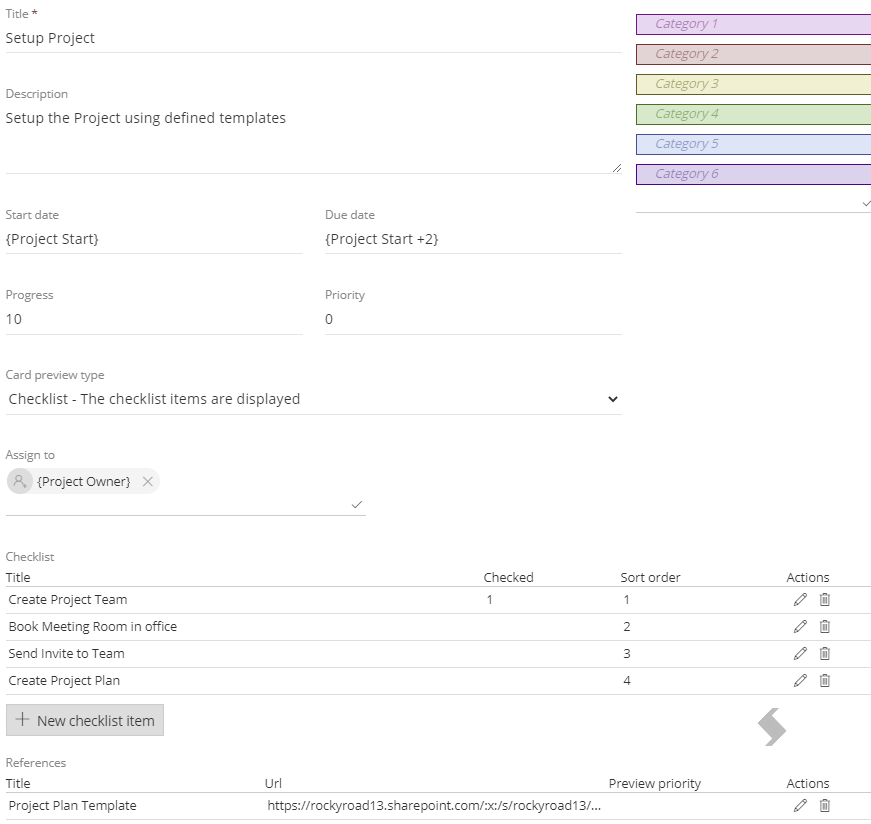
NOTE: For the example shown,
{Project Start} is a request form date field, that has been completed at the time of the request.
{Project Start +2} is a Request variable set up to add 2 days to the Project Start date.
{Project Owner} is a person request form field, that has been completed at the time of the request.
Once a request is made the Planner Plan will be created and in this example has been added to a Teams Tab called Checklist
Add Planner to Teams Tab
Once you have configured Planner plans in the Service Definition, they can be added to your Team Tabs using the Channel tabs.
Microsoft do not officially support adding a configured planner via the Graph.
We have a workaround that can be configured to achieve this:
Expand to see the Steps to add a Planner to a Teams Tab
If no Planner is provisioned or available on the Group it will not display any information.
Expand here to add Multiple Planners to a Teams Tabs
If multiple planners have been created in the Service Definition, the {PlannerId} must include the number associated to the plan.
Find the Planner number
Open the Planner tab from within the Service Definition.
- The First Plan shown will use the {PlannerId} variable
- The second shown will use {PlannerId[1]} variable
- and so on...
Add to the Tab configuration
Apply the correct PlannerId variable in the Tab configuration to ensure the Plan you expect will be displayed: