Bulk Creation
If you are migrating to M365 from other platforms you will need to start creating new workspaces to use. All the data can then be migrated to the new Groups, Sites, Teams and Communities you create.
Alternatively, you may want to use an existing form or application to trigger your creation using the API.
This article with give you key insights for both Creation and Importing
Import
Before adopting ProvisionPoint, Teams and Sites may have already been created. Use the Import functionality to bring those workspaces into the app's directory.
A lifecycle policy, compliance policy or Actions can be enabled and applied to your imported workspaces to make changes or continue your governance journey.
When importing you have the choice to retain its existing setup, or to align it to the Service Definition configuration (excluding Security change in M365).
To make additional changes add bulk actions after your import or use Compliance policies to enforce changes.
Please use this guide to Import multiple workspaces.
If you require assistance from ProvisionPoint with an import, please contact your account manager or our support team for more information and a quote if no onboarding time has been purchased.
Types of Import
We often see two types of Import, either works well. Choose the option that is best for you.
If you do not yet know what structure you want to employ a simple Template and Import.
If you know what you are looking to achieve then import into defined templates is best.
We recommend add in the use cases you have, you can always build on these later.
| Type of Import | Pros | Cons |
| Simple Import before Templates have been defined |
- Simple data collection
- Shorter time to create Service definition templates
- Additional time to review activity using compliance
- Can use Lifecycle policies to setup a review period
|
- Will need to run change service definition later (Often a forgotten step)
- Additional Actions to apply lifecycle if not already in place
- Additional actions to get the setup needed
|
| Import into defined Template |
- Imported Items will have full governance, lifecycle & compliance enabled from the start
- Apply additional metadata at import
- Apply additional structure on Import
|
- Requires larger data collection
- Variations on Import templates may be required
- May require changes via Bulk actions or compliance to align the current setup
|
Process
You will need to complete all of the following steps:
Preparation
- Ensure the ProvisionPoint API Setup is complete & you understand how to connect using PowerShell 7
- Download & save the Import script examples and Modules files from ProvisionPoint API Examples.
The PowerShell scripts have been zipped, please extract them as well as example csv files.
- Example = using default owner setup, no additional metadata
- Metadata = using default owner setup, with additional metadata from custom forms and columns
- FormOwners = Using Forms and custom columns to set Owners
- Understand the Service Definitions to Import into
Each Service Definition will have potentially different configurations, it is vital that you understand the following to ensure your import is successful.
-
Any mandatory fields in the request forms will need to be collected and added to the import request csv and script
If a request form has been linked to the Service Definition, and the form has required columns configured, these values will need to be added to your Import script and CSV.
- Check your Service Definition > Requests tab > Request Form to find out the name of the form.
- Go to Admin > Templates > Forms to find the form
- Check the Column Setup
If you have required columns, these must be added to the CSV, with a value that is supported.
The script needs to be updated:
- $FormColumns area must be uncommented (remove the < ) and the column names added.
- Number columns will need the IsNumber = $true
- People & managed metadata will need the IsMultiple set to true or false
- Yes/No columns will need IsBoolean = $true
- $Metadata area must be uncommented in the script (remove the < )
- $action area must include the variables for Metadata (remove the #)
- If you are only adding metadata but NOT managing ownership ensure Owners is uncommented in $action
-
Owner Management
There are multiple ways to define the ownership in ProvisionPoint.
1.When a Service Definition is created by default multiple Owners and Members can be provided on the request form and it will look like this:
There are options to set a minimum number and base group. These will be respected on import, in the example above we have added a minimum owner count.
- In this case, you will need to have the Owners column in your csv with the owners upn added.
- Map the $OwnersFieldName variable to the name of the column in the CSV:
- Ensure the $action variable has Owners uncommented (remove #)

2.If you manage the Owners and Members via custom columns (request form fields) your configuration would be different:
A form will be associated and the columns added would be configured to set the appropriate permissions.
In this case, you will need to have the custom column names in your csv and their values added
The script will need to be updated:
- The $OwnersFieldName should be set to null
- $FormColumns area must be uncommented (remove the < ) and the column names added.
- People column will need the IsMultiple set to true or false
- $Metadata area must be uncommented in the script (remove the < )
- $action area must include the variables for Metadata (remove the #) and Owners must be commented out (add the # at the beginning)

-
Lifecycle Policies
If a Lifecycle Policy is linked to the Service Definition it will be applied to the workspaces you import.
Within the script you have a choice to set the requested date (start date for the lease) to:
- The date it was created in Microsoft or
- The date you import.
Why is this important?
Scenario A: The lifecycle policy will auto archive after 365 days, and the workspaces was created 5 years ago
- Import using the original creation = It will import and immediately Archive
- Import using the import Date = It will have 365 remaining
Scenario B: The lifecycle policy will auto delete 60 days after the expiry date, and the workspaces was created 5 years ago
- Import using the original creation = It will import and immediately delete
- Import using the import Date = It will have 365 days remaining
Update the Script to reflect your choice:
- Set the 'ImportStartLeaseFromInstanceCreation' property to true or false:
- $true will set the requested date to the date it was created in M365.
- $false will set it to the date it was imported.

If you do not have a Lifecycle Policy or Lease this will be ignored
-
Hub Association
If you are planning to associate to a Hub Site this can also be defined in the Service Definition.
If you are associating it must be to a Site that already exists in ProvisionPoint.
- We recommend having a Service Definition that can group these together and MUST be the first Sites you import or Create before anything can be associated to them.
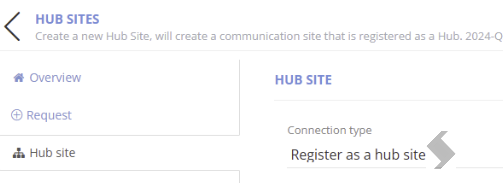
Once they are imported or created, you can then import others with the correct association.
If you get any errors with association on import, this can be hardcoded in the the script or set adaptively in the script and CSV.
- Add AssociatedHubSiteId=with the service instance id of the hub to the $actions list
- Alternatively run actions to associate after Import
-
Request Variables
Are Request variables used in your Service Definition? Check the Requests tab in your Service Definition
If there is a request variable reference, please check how they will be used and if they depend on any other columns or variables
- Check the Admin > Templates > Request Variable to see what the setup is and which column it is related to
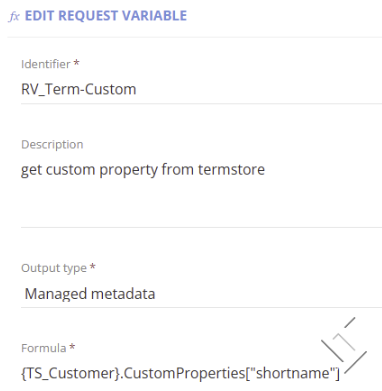
- Check where the variable is used in the Service Definition
- Naming convention
- Lifecycle
- Approval
- PnP
- Etc
For example,
- If an approval is configured to collect the manager of the requestor from Azure AD, a request variable formula is used {Requestor.Manager}.
- Another example could be the requestors department is pulled from Azure with the formula {Requestor.Department}.
These would both take the requestor and lookup information in Entra. If the requestor is the API these will not be collected and the request will fail.
In this case, you would need to provide a
Delegated Requestor in the csv and script. The person defined will be used instead of the app registration name (our example was ProvisionPoint API) and would therefore have the values needed.
If your Request Variable was using another column (for example, Start Date) and applying a calculation to it for the Lifecycle. You must ensure that the start date is provided in the CSV and script as metadata.
-
URL Settings
If your URL settings are 'Set by Requestor' you will need to
- add the URL (after/sites) to your CSV in a Column
- Assign the column to $RelativeUrlFieldName in your script.
Changes to the script:
- Map the $RelativeUrlFieldName variable to the name of the column in the CSV:
- $action area must include the variables for RelativeUrl

-
Grant API Permissions to request
In the Overview tab of each Service Definition, the people who can make request is set in 'Requestor Settings'. The App Registration for the API must also be given this permission.
When your API App registration was created it was added to a Security Group in Entra. Ensure the Group is a Requestor for each Service Definition you will import into.
-
Collect Team, Site, Community data for Import
- Collect Mandatory Information for all Imports
- Name of the Teams or SharePoint Sites or Community
- SharePoint URL
- Owners (1 owner is mandatory unless you have set a minimum)
- This data can be manually collected from the sites, exported from SharePoint Admin Centre or collected via PowerShell or Graph Explorer.
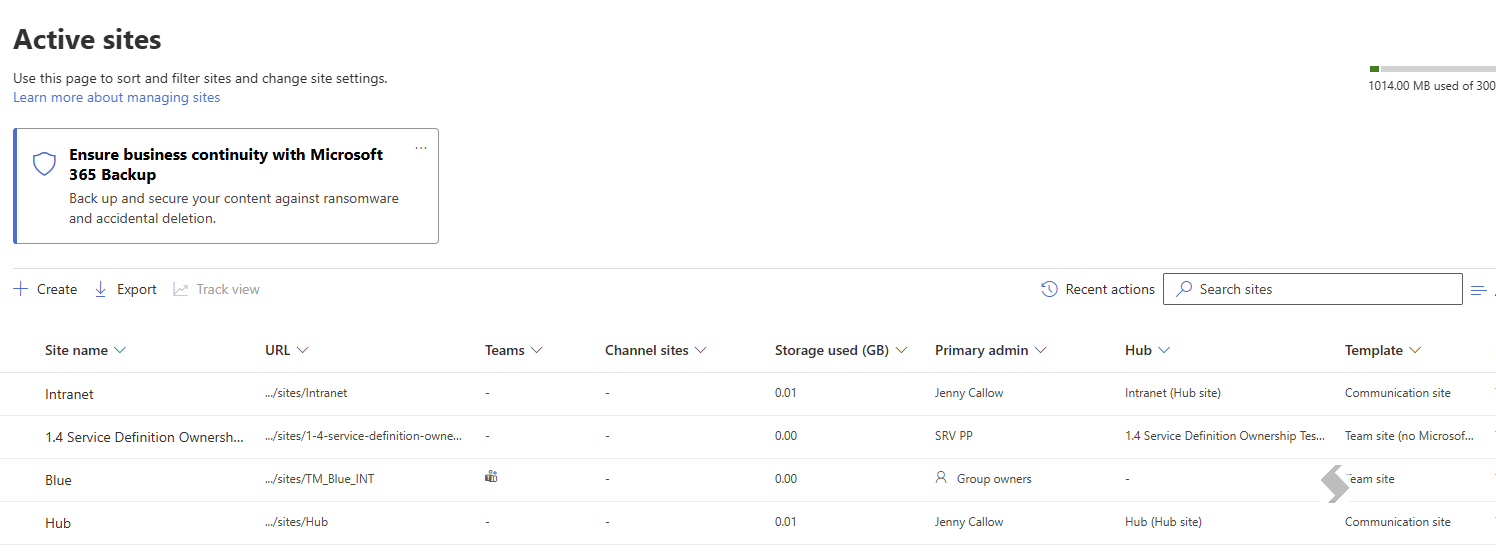
- Additional Options - If you want to add options or change settings the options below are available
-
Format the CSV file for Import
In the CSV, ensure there is a column for the mandatory fields, any required metadata, delegated requestors and additional settings you want to apply.
The last two columns of the CSV should be added as a header but the values must be empty:
- ServiceInstanceId = will populate upon success with a unique id for the workspace
- ErrorMessage = will populate upon failure with the error provided. To rerun the Import please clear this first.
Both these columns must be left blank to run successfully. If they contain data this line will be skipped
Example of csv in excel for default owners
Example of csv in Notepad++ with request form fields for metadata and owners
If you have 'Group Operations' enabled in ProvisionPoint Admin > App Settings, ensure all imported workspaces have the Service account set as the Owner in M365.
Best Practice:
- For the import to be successful we advise copying and pasting information directly from the source into the csv to ensure accuracy.
- Person or Group fields must be separated by a ; with no spaces
- For additional metadata, the Column names must match what is set in ProvisionPoint Columns
- Date Time fields must be formatted YYYY-MM-DDThh:mm:ss (2022-09-27T12:15:00).
If you edit the csv in excel, the field can update to a date field which will change the format. Change to a text field before typing the date and double check this in notepad before i - To pass through a sensitivity label, you must provide the Id in the CSV.
- Number fields cannot have a value starting with a 0
- Batch your imports if you have a wide range of metadata to make it easier to check for issues
- Close the csv when running the script or you will get an error
- Prepare the PowerShell script associated to the csv you have chosen.
- Location of Script, CSV and Modules folder.
- The Script will presume that the PowerShell Script, Modeules folder and CSV are all in the same location. When you open PowerShell you may have to change directory to run it.
Type cd "C:/locationofscript" to set this correctly.
- Add the authentication details collected from the API setup.
- $UserTenant
- $UserAppClientId
- $CertificateThumbprint or $Secret
You can uncomment $Secret or $CertificateThumbprint and add the values collected, if these are not provided it will ask for a username and password to interactively connect.
For Secret always ensure you copy the value not ID
$UserTenant = "Add tenant ID"
$UserAppClientId = "Add Client ID from API App Registration"
$CertificateThumbprint = "Add Certificate Thumbprint from API App Registration"
#$Secret = "Add Secret Value from API App Registration"
-
Uncomment the Instance of ProvisionPoint (all others can be deleted)
- To uncomment remove the < before #location
# UK
$APIClientId = "8fca124b-608f-47a0-bf3b-d1144b8c755a"
$APIUrl = "https://api.provisionpoint.com/v1.0""
$APIResourceUrl = "api://app.provisionpoint.com/8fca124b-608f-47a0-bf3b-d1144b8c755a""
#>
<# EU
$APIClientId = "45609b28-9849-43f0-8e68-d2ff51b672bc"
$APIUrl = "https://009api.eu-pp365.app/v1.0""
$APIResourceUrl = "api://009.eu-pp365.app/45609b28-9849-43f0-8e68-d2ff51b672bc"
#>
<# US
$APIClientId = "c17a2732-5e88-405d-9969-066a47194a55"
$APIUrl = "https://006api.us-pp365.app/v1.0""
$APIResourceUrl = "api://006.us-pp365.app/c17a2732-5e88-405d-9969-066a47194a55"
#>
<# AU
$APIClientId = "1a463967-8074-49ed-a273-66c908a6be09"
$APIUrl = "https://011api.au-pp365.app/v1.0""
$APIResourceUrl = "api://011.au-pp365.app/1a463967-8074-49ed-a273-66c908a6be09"
#>
<# CH
$APIClientId = "338de4e6-8a61-4e3f-9ee9-b16ce71aac7e"
$APIUrl = "https://016api.ch-pp365.app/v1.0""
$APIResourceUrl = "api://016.ch-pp365.app/338de4e6-8a61-4e3f-9ee9-b16ce71aac7e"
#>
-
Batch Size
As with all APIs it is unwise to request too many requests at once.
To help you do this we have included a Batch size and sleep seconds to try to ensure this does not hit any thresholds, you will need to tweak these options for your tenant.
$BatchSize = the number of items it will import on each run
$SleepSeconds = how many seconds it will wait between each line from the CSV
$BatchSize = 100
$SleepSeconds = 10
If you are only importing a few items, the batch and sleep seconds will not matter.
As mentioned earlier you can also choose to batch via the CSV, have multiple CSV files for different Service Definitions or to break up the lifecycle expiry date.
Run imports out of hours.
-
CSV Name & Path
- $SitesCSVName - the name of the csv file must be provided with the file extension
- $SitesCSVPath - the location of the script using
The script presumes the CSV is in the same location but you can update this to set the location if needed.
#Provide the name of the CSV file
    $SitesCSVName = "Import-Example-Metadata.csv"

#Set the filepath using the current script folder
    $SitesCSVPath = Join-Path $ScriptPath $SitesCSVName

#Import the SitesWorkbook file as a csv
    $csv = Import-Csv -Path $SitesCSVPath -Encoding UTF8
-
CSV Column Mapping
The Mandatory Information must be provided for the default columns in ProvisionPoint. If the Column is not in the CSV type in null. Alternatively type the name of the Column.
This should match the name of the Column in ProvisionPoint
For Bulk Creation you will need to provide the Relative Url if the URL settings are set by requestor.
$ServiceDefinitionFieldName = "Service Definition"
$ServiceNameFieldName = "DisplayName"
$AbsoluteUrlFieldName = "URL"
$RelativeUrlFieldName = "null"
$OwnersFieldName = "Owners"
$MembersFieldName = "null"
$ServiceDescriptionFieldName = "null"
$VisibilityFieldName = "null"
$RequestorFieldName = "null"
$PrivacySettingFieldName = "null"
$GuestAccessFieldName = "null"
$ExternalSharingFieldName = "null"
$ClassificationFieldName = "null"
$SensitivityFieldName = "Sensitivity"
$DelegatedRequestorFieldName = "Requestor"
-
Additional Metadata (Forms & Columns)
- If additional columns and Forms are added to the Service Definition, the $FormColumns array is required
FormColumns = @(
    @{
        Name = "General text or drop down"
    },
    @{
        Name = "Site ID"
        IsNumber = $true
    },
    @{
        Name = "Termstore-ManagedMetadata"
        IsMultiple = $true or $false
    },
    @{
        Name = "People Picker"
        IsMultiple = $true or $false
    },
    @{
        Name = "Yes or No field"
        IsBoolean = $true
    }
)
- The $Metadata array is also needed to ensure the values are all collected into a format that the body will support
$Metadata = @()

            if($FormColumns -ne $null){
                $FormColumns | ForEach-Object -Process {
                    $FormColumnName = $_.Name
                    $Value = $SiteRow.$FormColumnName

                    if ($_.IsMultiple){
                        $Value = Get-PPAsArray $Value
                    }

                    $Metadata += Get-PPAsMetadataItem -FieldName $FormColumnName -FieldValue $Value -AsNumber:$_.IsNumber -AsBoolean:$_.IsBoolean
                }
            }
- Finally you will need to uncomment the Metadata line in the $action to ensure the data is added to the import request.
$action = @{
	            ActionTypeId= 1
	            ServiceDefinitionName=$ServiceDefinitionName
	            Title=$ServiceName
	            Owners=$Owners
	            Members=$Members
	            Metadata=$Metadata
-
Set the Body of the API call
$action will create an array of the values collected from the CSV and pass them through in the correct format.
Uncomment the values you need & either pass through the converted values from the script or hardcode the values you want to set
Do not change ActionTypeId, this should always be 1
$action = @{
   ActionTypeId= 1
   ServiceDefinitionName=$ServiceDefinitionName
   Title=$ServiceName
   Owners=$Owners
  #Members=$Members
  #Metadata=$Metadata
  #Description=$ServiceDescription
  #GroupGuestAccess=$GuestAccess
  #ExternalSharing=$ExternalSharing
  #SensitivityLabelId=$Sensitivity
  #RelativeUrl=$RelativeUrl
  #Visibility=$Visibility
  #Classification=$Classification
  #PrivacySetting=$PrivacySetting
  #AssociatedHubSiteId=8732
-
Enable Import Options - If you are performing a Create action these options are not required
The Same script can be used for Creation as well as Import, the following options must be set for Import to happen:
Import=$true
ImportLevel=2
ImportIdentifier=$AbsoluteUrl
ImportStartLeaseFromInstanceCreation = $false
- Import = $true
- Do not change this to false, it will try to create a new Team or Site instead
- ImportIdentifier=$AbsoluteUrl
- This is the Site URL provided in the CSV, we use this to ensure it does not already exist in ProvisionPoint.
- Do not change this value
- ImportStartLeaseFromInstanceCreation = $false or $true
- Will set the requested date and can impact the Lifecycle Policy, ensure you have read the section about lifecycle.
- Import Level =
- 1 = Import only and apply lifecycle if configured,
- 2 = Import, apply lease (if configured) and update Site directory Lists - To make no changes we recommend this option
- 3 = Import and apply Service Definition options
The following properties can be defined in your Import requests but will only change the options in ProvisionPoint, these will not be passed to M365
- Title & URL options
- Privacy, Guest Access and External sharing
- Sensitivity Labels (Container)
- Team or Group Settings
- Additional Metadata
- PnP Templates
The following properties will be applied automatically on import level 1 or 2
- Enabled Actions
- Compliance Checks
- Lifecycle
- Integration Lists
The following Properties will be automatically applied to M365 if Import level 3 is used:
- Enabled Actions
- Compliance Checks
- Lifecycle
- Integration Lists
- List/Library Settings
- Channels & Tabs
- Planner Creation
To automatically apply changes to M365 you can use the following options
-
- Add a delay and run action to make a change to M365, add the action to the Import script. This allows the timeline to track the changes made after import
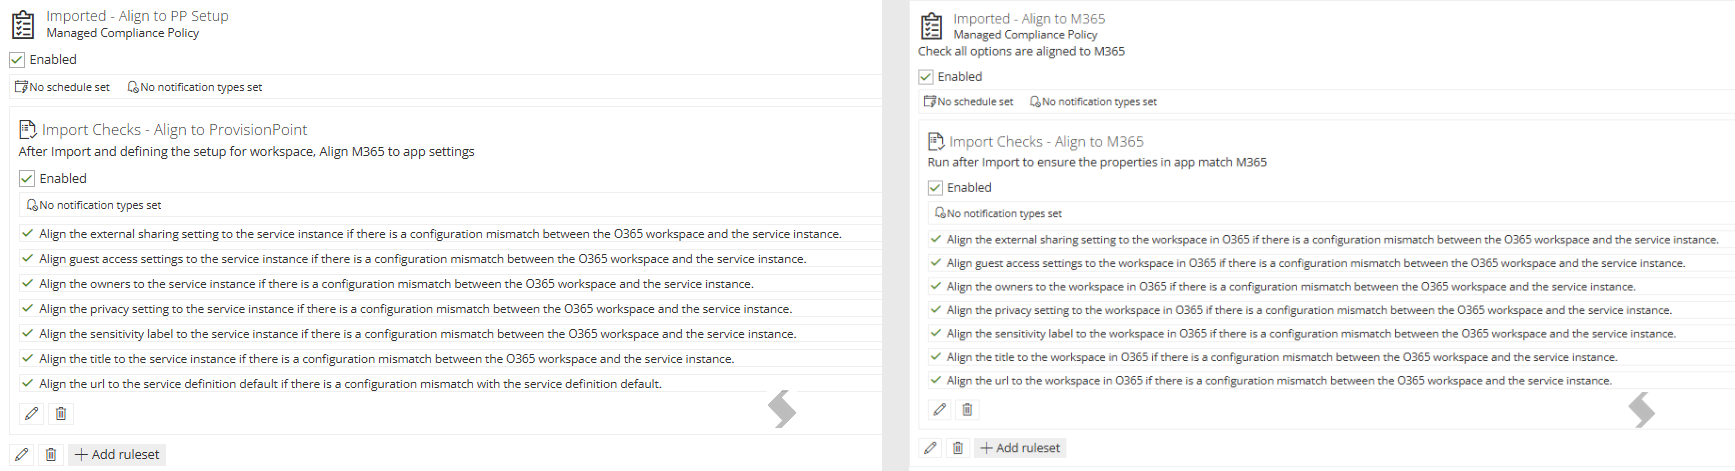
- Run an Import Compliance check to
- Align to M365 - If you have not collected the data from M365 before import, this will ensure what ProvisionPoint shows matches M365.
- Align to ProvisionPoint - This will allow you to apply naming conventions, changes to security options like guest access or external sharing.
Run the Script in PowerShell 7 to complete the import or creation
Once everything has been configured, you can then run the script and the workspaces will begin to import.
- Save any changes made to your script and CSV. Close them
- Open PowerShell 7
- Change directory if needed
- Run the PowerShell .\name-of-file.ps1
- Check the results
- Any errors will be displayed and the error will be recorded in the CSV file, read the Troubleshoot Import or Create Script failures article
- Resolve any listed errors
- Remove the contents from the 'ErrorMessage' cells in the CSV.
- Re-run the script
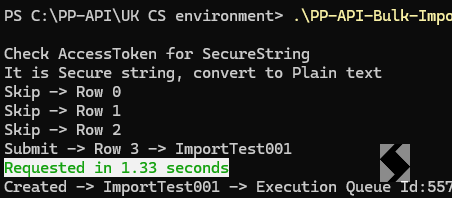
- If successful it will show as below and the 'ServiceInstanceID' will be populated in your CSV file.