This article explains how to collect standard and verbose logs from the KWizCom Client Agent. These logs help diagnose issues related to printing, communication with SharePoint, or other client-side components.
Step 1: Open the System Tray
- Go to the bottom‑right corner of your Windows taskbar.
- Click the arrow ▲ to expand all system tray icons.
- Locate the KWizCom Client Agent icon.
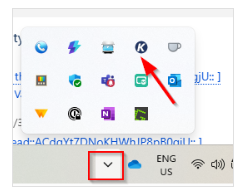
Step 2: Open and Send the Standard Log
- Right‑click the KWizCom Client Agent icon.
- Click View Log.
- A log file will open automatically.
- Save the file to send it to support.
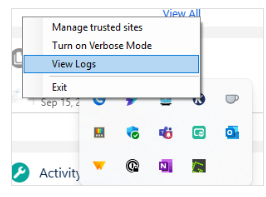
Step 3: Enable Verbose Logs
- Right‑click the KWizCom Client Agent icon again.
- Select Turn on Verbose Logs.
- Verbose mode will now capture more detailed diagnostic data.
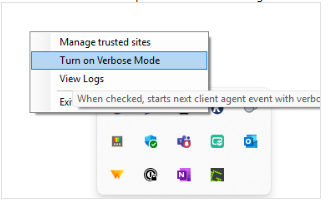
Step 4: Reproduce the Issue
- Try to print again or repeat the exact action that causes the issue.
- Make sure the KWizCom Client Agent is running while you reproduce the problem.
Step 5: Send the Verbose Log
- After reproducing the issue, return to the verbose log window that opened.
- Save the file.
- Send this verbose log to support as well.
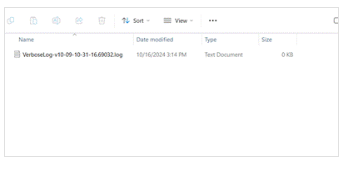
Please send both of the following:
- Standard log file (from View Log)
- Verbose logs (detailed logs) file (after turning on Verbose Logs and reproducing the issue)
Add the logs to a ticket to help disagnose the issue