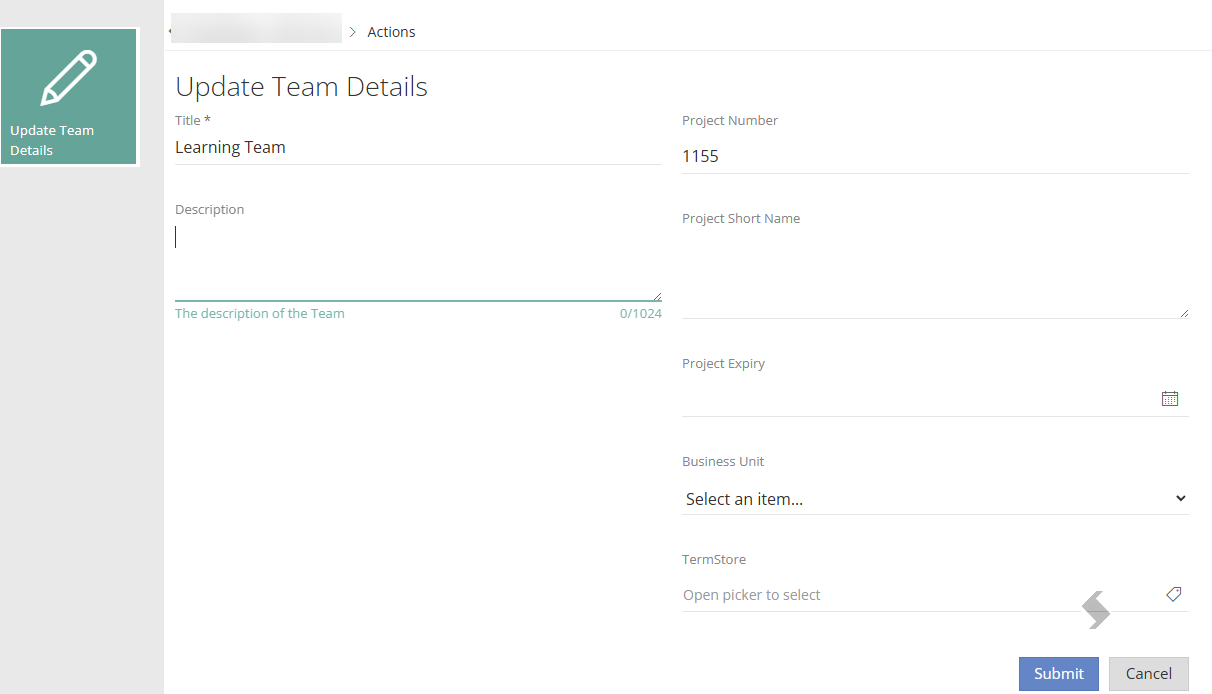
All Service Definitions are initially linked to a basic form that is adjusted based on the defaults and settings defined in your Service Definition.
For some, additional metadata is required, for example,
- Who will be the approver,
- Which business unit is used,
- Dates for projects to start or end,
- Project owners,
- Project types and numbers
- and much more.
Custom request forms can be created to define the additional metadata that needs to be collected, this is then added to the basic form.
When a new request is made the additional information can be populated.
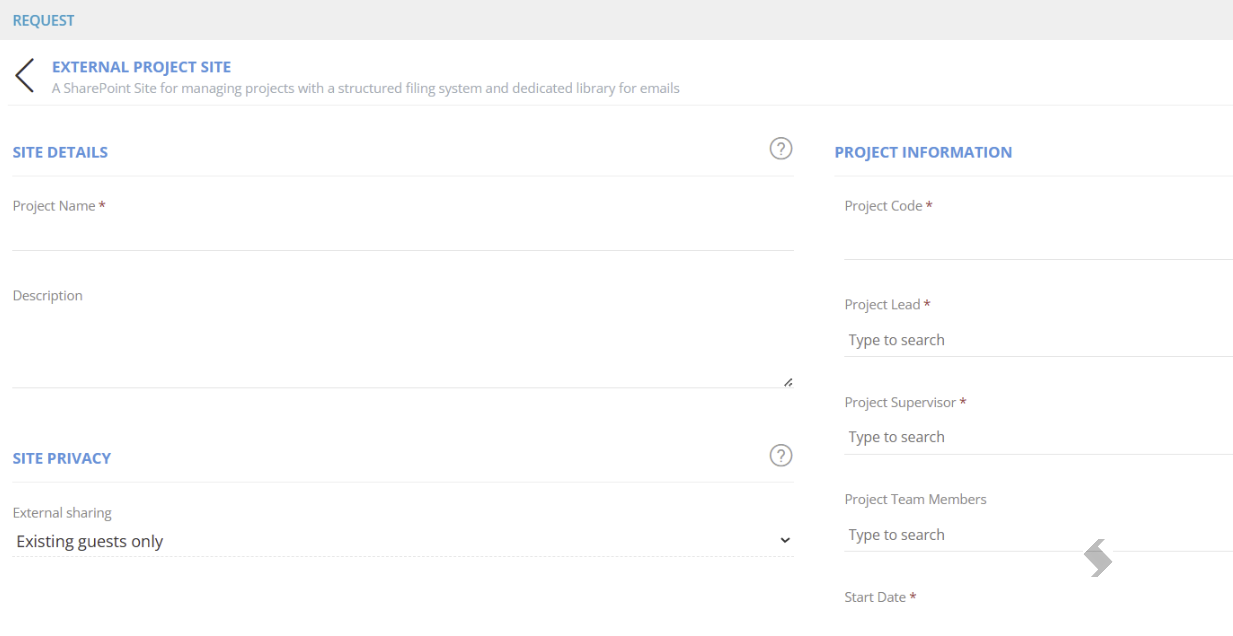
To add the metadata follow the steps below:
-
Create the Columns
Expand to see the steps
Columns are created in Admin > Templates > Forms > Columns, these will be the labels that will appear on the request form.
There are a range of different columns types that can be created.
- Text box or Area
- Number
- Boolean
- Date and Time
- Drop-downs
- Managed Metadata
- Person or Groups
Create a Column
- Click +New Column
- Complete the Column details:
- 'Name', the label that will appear on the form.
- 'Description' text that can be displayed on the request form to aid users
-
'Column Type', select the type needed.
Some will require additional configuration, see the table below:
|
Columns Type
|
Additional Configuration
|
|
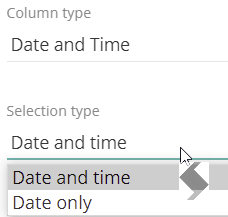
Date and time
|
Select just date or if the time is required as well.
|
|
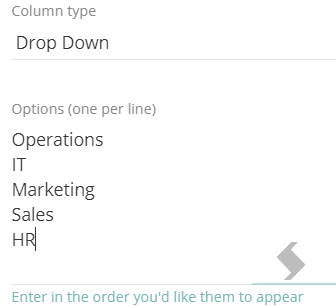
Drop Down
|
Enter the options requestors can select from
|
|
Managed Metadata
|
Select the Term set requestors can select from, the values are managed in the SharePoint Admin Centre,
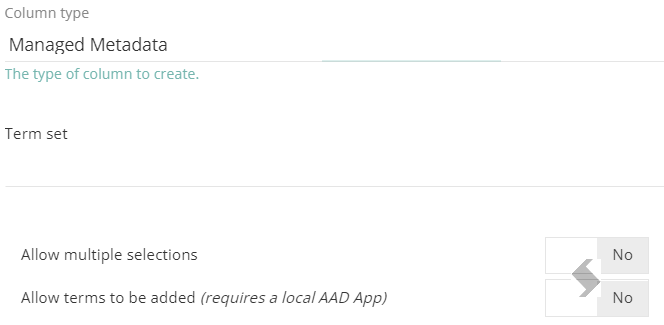
Additional configuration can allow requestors to add to the terms from the request form
|
|
Person or Group
|
Use the option to define who can be selected,
'Base Group' will limit the people allowed to be selected to a specific Group you define.
'Allow selection of users' must be set to Yes
'Allow multiple selections' will allow more than 1 person to be selected in the column
'Include disabled owners' will prevent disabled users being selected
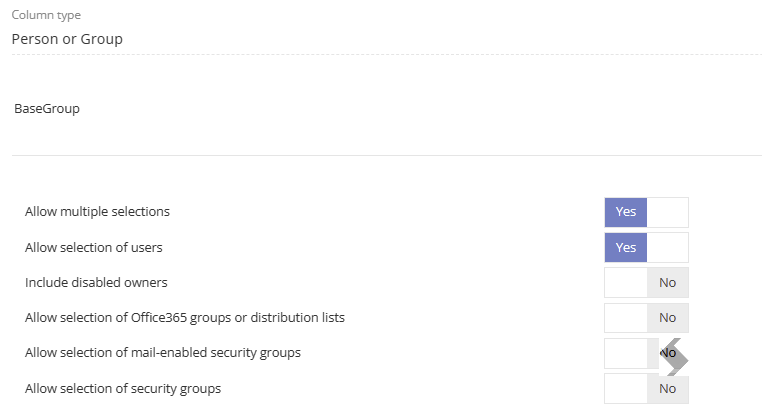
Allow selection of groups is only supported on requests linked to SharePoint Sites with no Groups.
Distribution Lists cannot be added to Microsoft SharePoint Sites or Teams.
|
- Click Save
- Repeat to create all required metadata.
-
Add Columns to a Form
Expand to see the steps
Forms are created in Admin > Templates > Forms and are used to group the columns together and apply additional configuration.
Columns can be used in multiple forms, but their column configuration will be the same. If anyone updates the column this will impact all forms it is linked to.
In your instance of ProvisionPoint you may have one Form that is used on all requests or have different forms for each Service Definition.
Create as many forms as are needed.
- Click + New Form
- 'Name' of the form, this will appear on the request form as a title.
- 'Description will only be displayed in the forms list
- Click Save
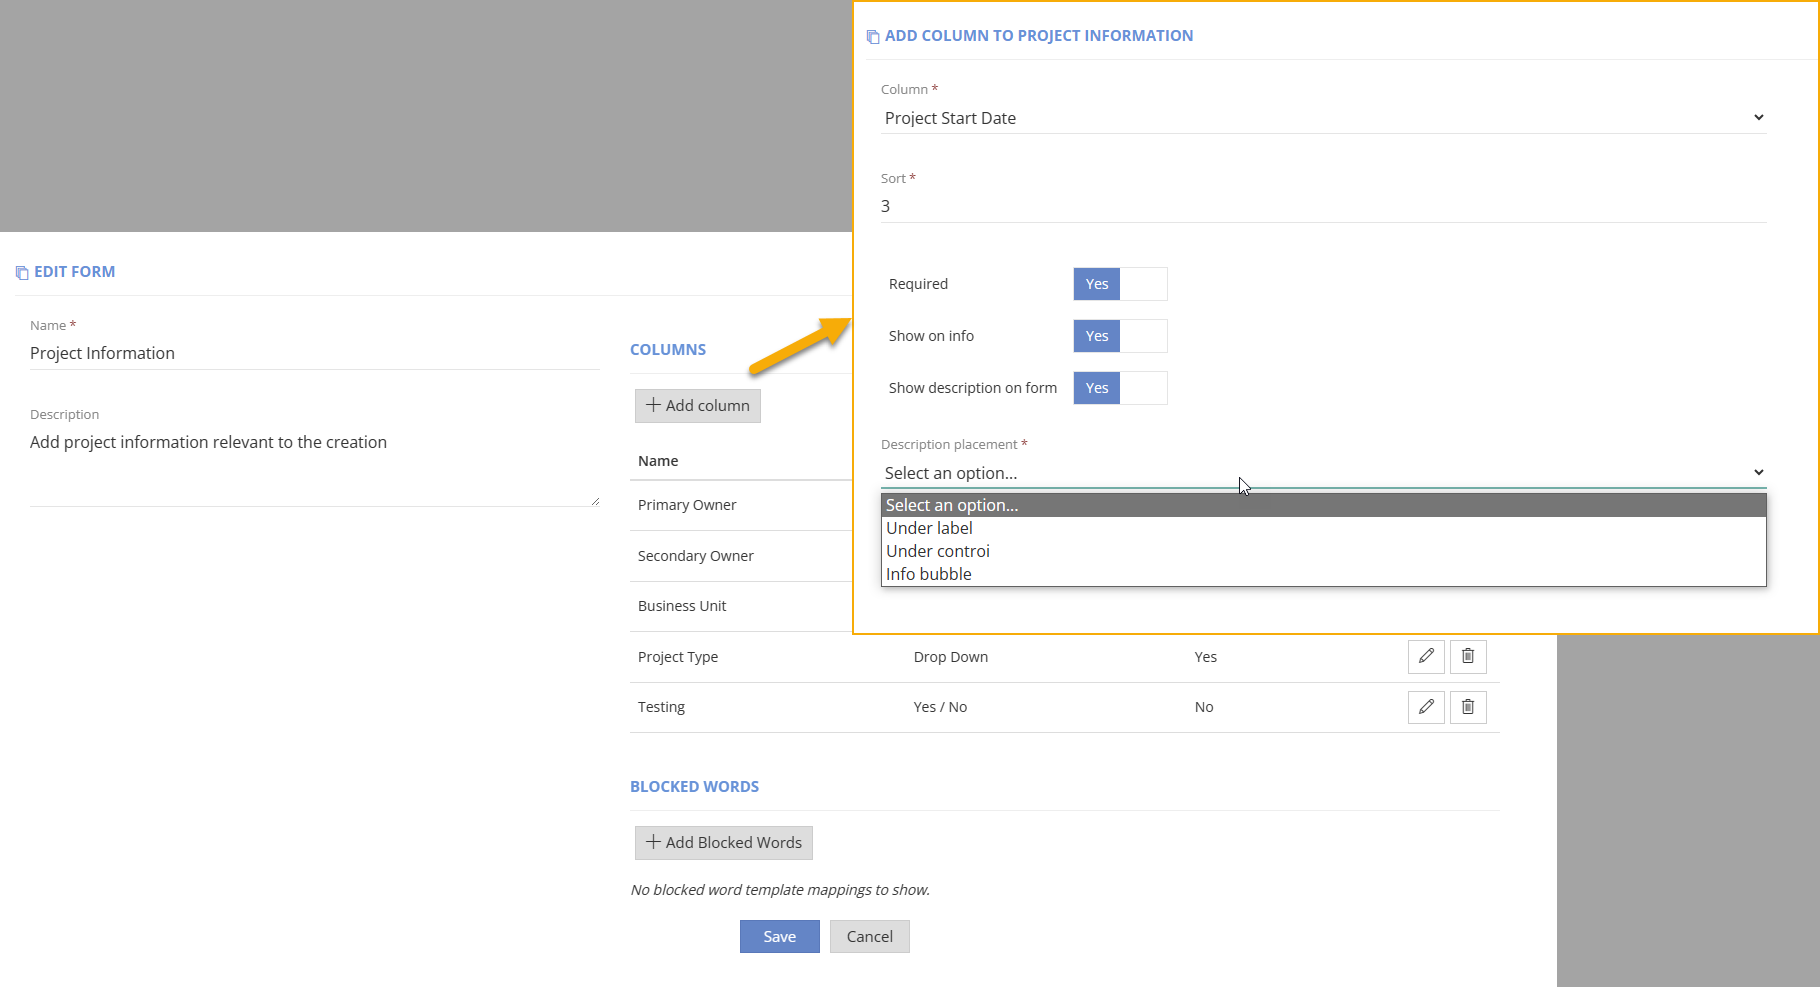
- Click + Add Columns
- Select the column from the list
- 'Sort', the order the columns will be displayed from top to bottom, 1 being the top
- 'Required' to Yes, if the column will be mandatory for creation and updates
- 'Show on info', should the column and values be displayed on the ProvisionPoint Directory Info page
- 'Show description on form', should the description of the column be displayed and where
- 'Under label', will be permanently displayed under the name of the column
- 'Under control', will display when you highlight the field
- 'Info bubble', will show description when you hover over the (i)
- Additional configuration, some of the column types will have additional configuration.
- Person or Group will allow you to define the permissions that will be applied if the service definition uses forms to manage owners and members
- Text and Boolean columns will allow blocked words to be configured
- Click Save for each column added
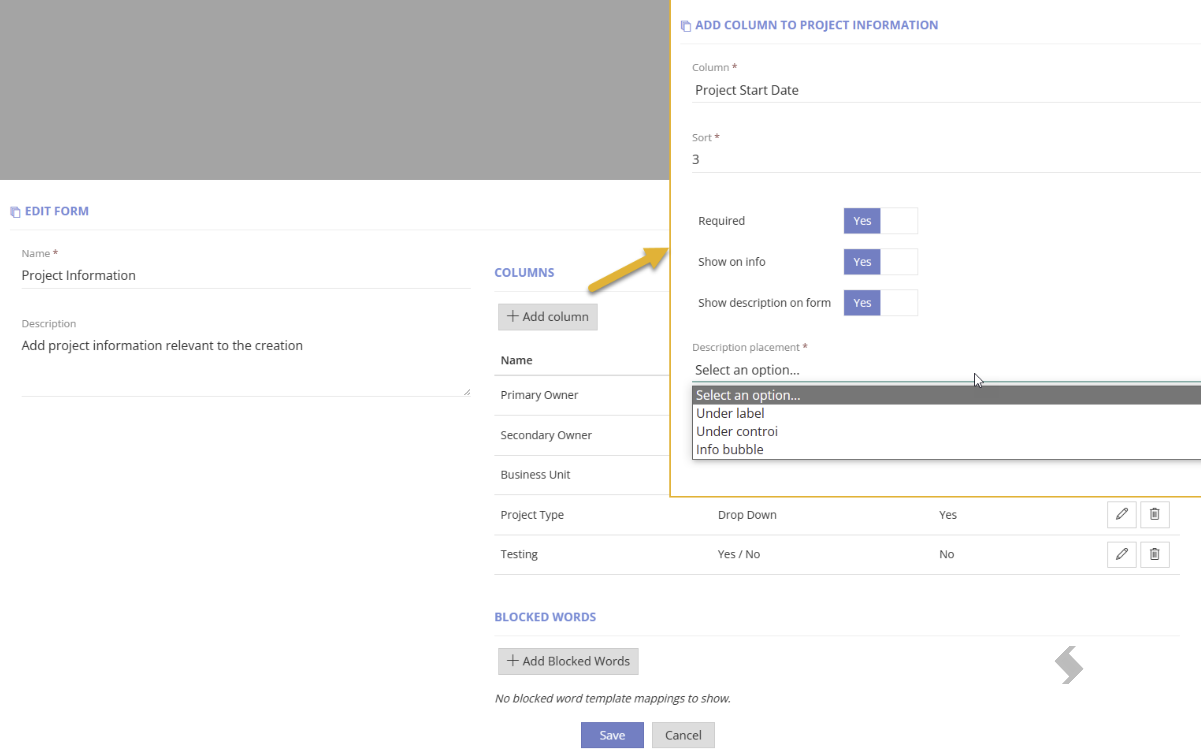
- If you have added a text field you can define a Blocked words template to the column or the whole request form after you have saved. This will block words from being used within them.
- Click + Add Blocked Words. For more information read the
- Add additional columns and repeat the steps above.
- Click Save on the form
-
Link the Form to the Service Definition(s)
Expand to see the steps
The Form can now be linked to any Service Definitions, the same form can be used or you can create unique forms for each.
- Go to Admins > Service Definitions > Request Tab > Creation form
- Select the name of your custom form from the list
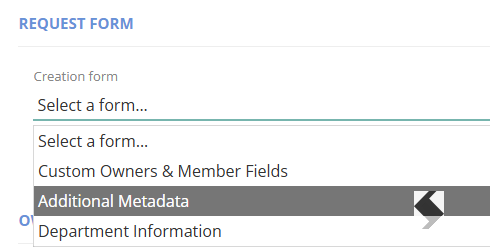
- Save your Service Definition
Now your form is in place, you can use the column values provided in your requests in your provisioning by encasing the column name in {} , for example: {Project Code}. These can be used in:
- Naming Conventions,
- Approval Templates
- Naming of your channels and Tabs for Teams
- Notification templates
- Assign permissions for actions
- Be passed on to PnP Templates and webhooks for automation tasks
How to update the Metadata after creation
Once your request has been created, the metadata can be updated using the 'Update Details' action.
The name of the action will also include the service type,
Ensure this is enabled on the Service Definition and appropriate approval, notifications and permissions have been applied.