Set up a Expiry Date using a 'Start Date' column
Forms and columns, in ProvisionPoint, allow you to create your own metadata that can be collected at the point of request.
This metadata can then be used within your provisioning requests as a transform tag.
In this article, we will show how to use a {Project Start Date} to set the expiry date in a lease or lifecycle.
1. Create a Column
First, the date picker that will be used in our request, needs to exist or be created,
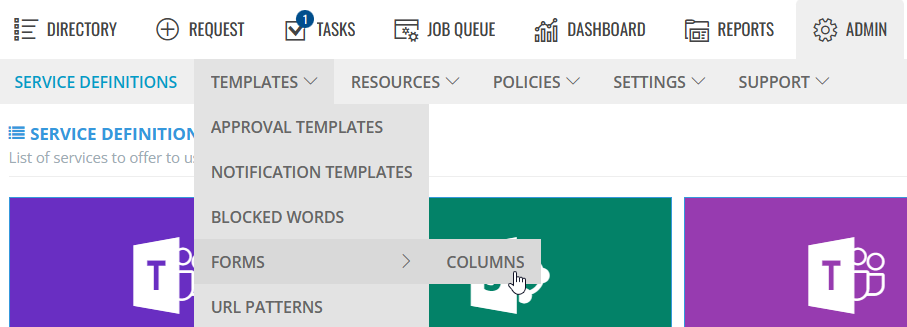
- Go to Admin > Settings > hover over Forms > Columns
-
- If you already have a date picker column you want to use skip to, 2. Add Column to a Form
- If not, continue to create a new column
- Click +New Column, (if an existing column exists this can be used on multiple forms)
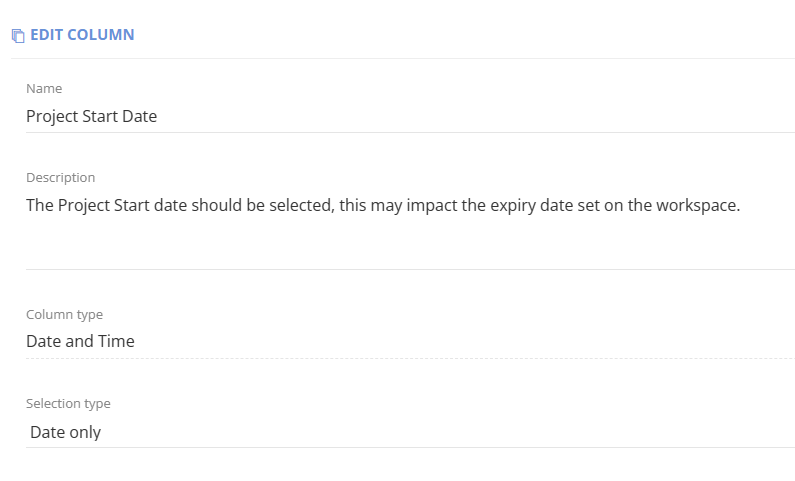
- Name, as it will appear on the form
- Description, that will appear on the form, to offer guidance to the requestor
- Column type, can be either a date picker or a number field for lifecycle, for this example a date picker is selected
- Selection type, allows additional configuration to be set, for a date picker this will be to add the time as well as the date or not
Forms group your columns together and set the order they will be displayed, if they are mandatory and apply additional configuration where needed.
If you already have your date picker column connected to a form, continue to step 3. Create a Request Variable. If not, follow the instructions below to create a form and link the columns, needed.
Only 1 form can be linked to a Service definition, ensure all columns you need are added.
- Go to Admin > Templates > Forms
- Click +New Form or open an existing form
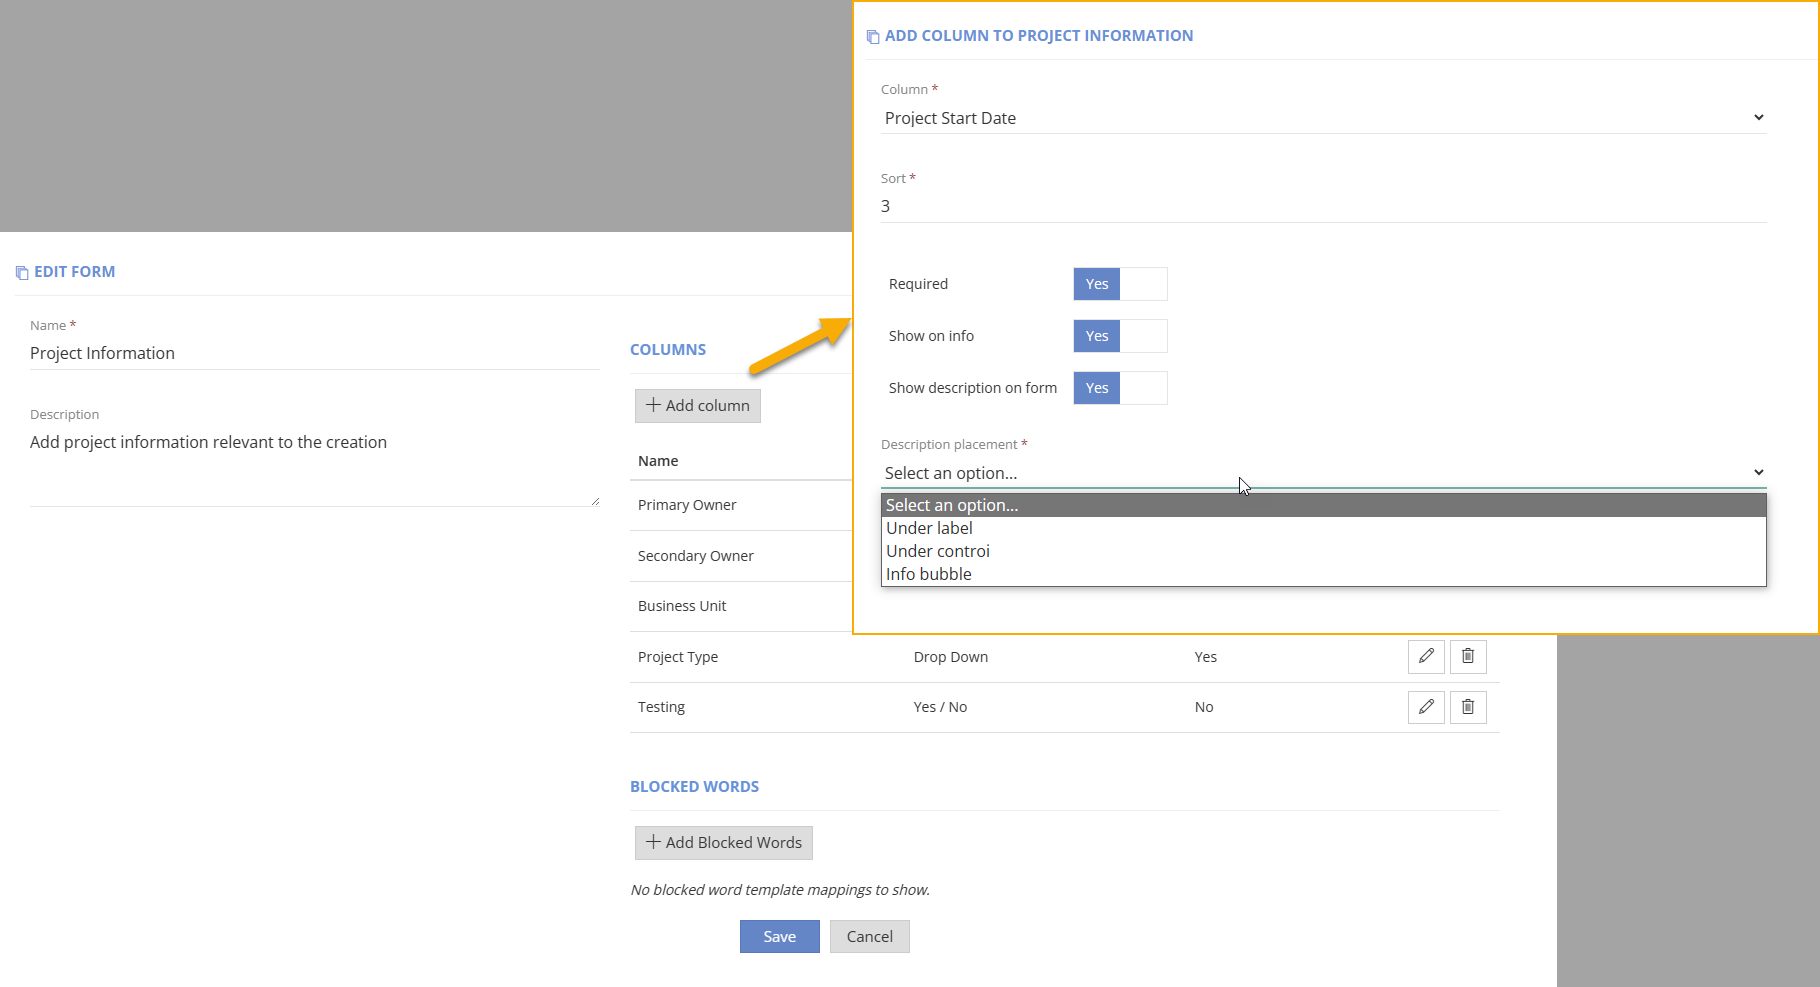
- Click +Add Column
- Select the Project Start Date column created earlier from the list of Columns
- Set the Sort order; this is the order the column will appear on the form from top to bottom.
- Required will force the column to always be completed on creation and when using the 'update details' actions
If you are using the Date to calculate the lease we recommend making this required. - Show on Info, will add the column and its value to the info page, accessible from the ProvisionPoint Directory
- Show description on form, choose if and where the description should be displayed.
- under label, will be permanently displayed under the name of the column
- under control, will pop up when you highlight the field
- Info bubble, will show description when you hover over the (i)
- Click Save
3. Create a Request Variable
A request variable allows us to build the calculation needed to add a set number of days to the Project Start Date.
The variable we create, will then be applied to the lifecycle.
If you already have a request variable configured, continue to step 4. Link the Request Variable to a Service Definition, if not, follow the steps below to create a new one:
- Go to Admin > Settings > Templates > Request Variables
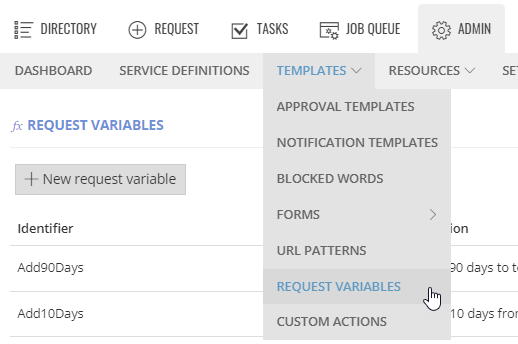
- Click +New request variable and complete the details.
- Identifier, will be the name of the request variable, you will need to save this for later, my example is ProjectExpiryDate
- Description that will appear when selecting the variable
- Output type, set this to Date and Time
- Formula, this will determine the expiry date, it must start with a tag, then have the change needed, for example, {Project Start Date}.AddDays(180)
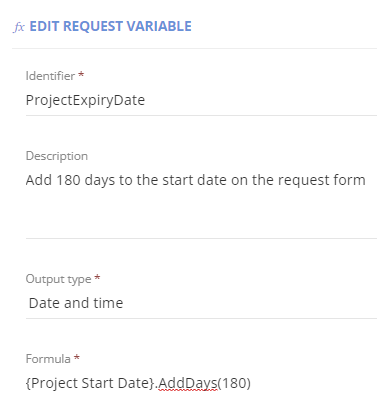
Don't forget to click Save.
4. Link the Request Variable to a Service Definition
Before we can configure the lease/lifecycle, the request variable must be linked to the Service Definition.
- Go to Admin > Service Definitions and edit the service definition
- Go to the 'Request' tab and scroll down to the 'Request variable reference' section.
- Click +Add Reference
- Select the request variable created in earlier steps
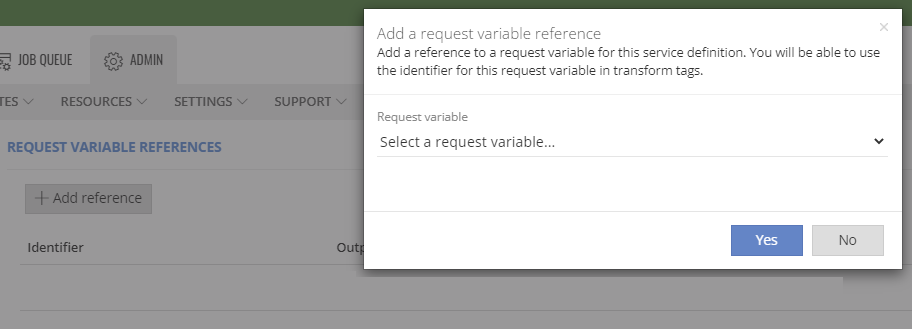
Make sure your Service Definition displays the variable and click Save.

Finally, we can configure the lifecycle.
- A Lifecycle will, apply an expiry date to the workspace that will run multiple stages either before, on or after the expiry date set. Email reminders can be sent before each stage and emails can be sent when each lifecycle action is run.Lease Configuration
Expand to read more about Lifecycle Configuration.
- Create Stages that will be used in lifecycle policies
- Go to Admin > Policies > Lifecycle Policies > Stages
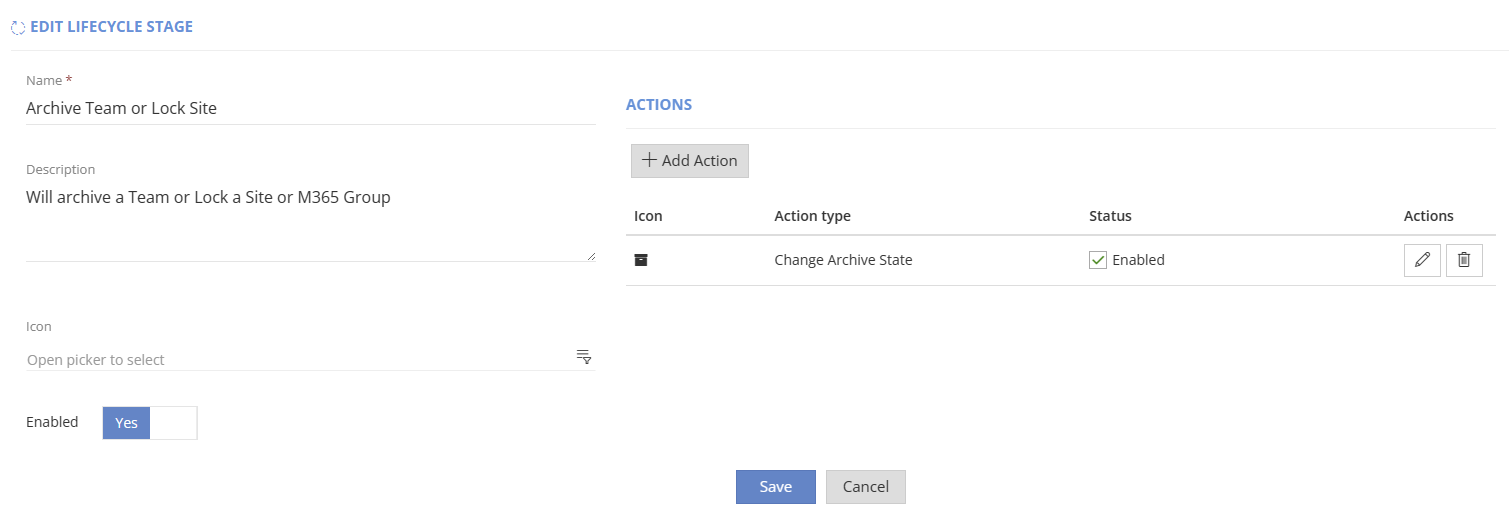
- If you do not have any stages created, click +Add lifecycle stage and complete the configuration
- Name, provide a descriptive name of what actions will be run
- Description, give more details of what will be configured
- Click +Add Action
- Select the Action type that will run - for example 'Change Archive State'
- Setup any additional configuration
- Enable
- Add notifications if needed, an email will be sent once the action is run
- Click Save on Action
- Add any other action types that should be run for this stage
- Save the stage
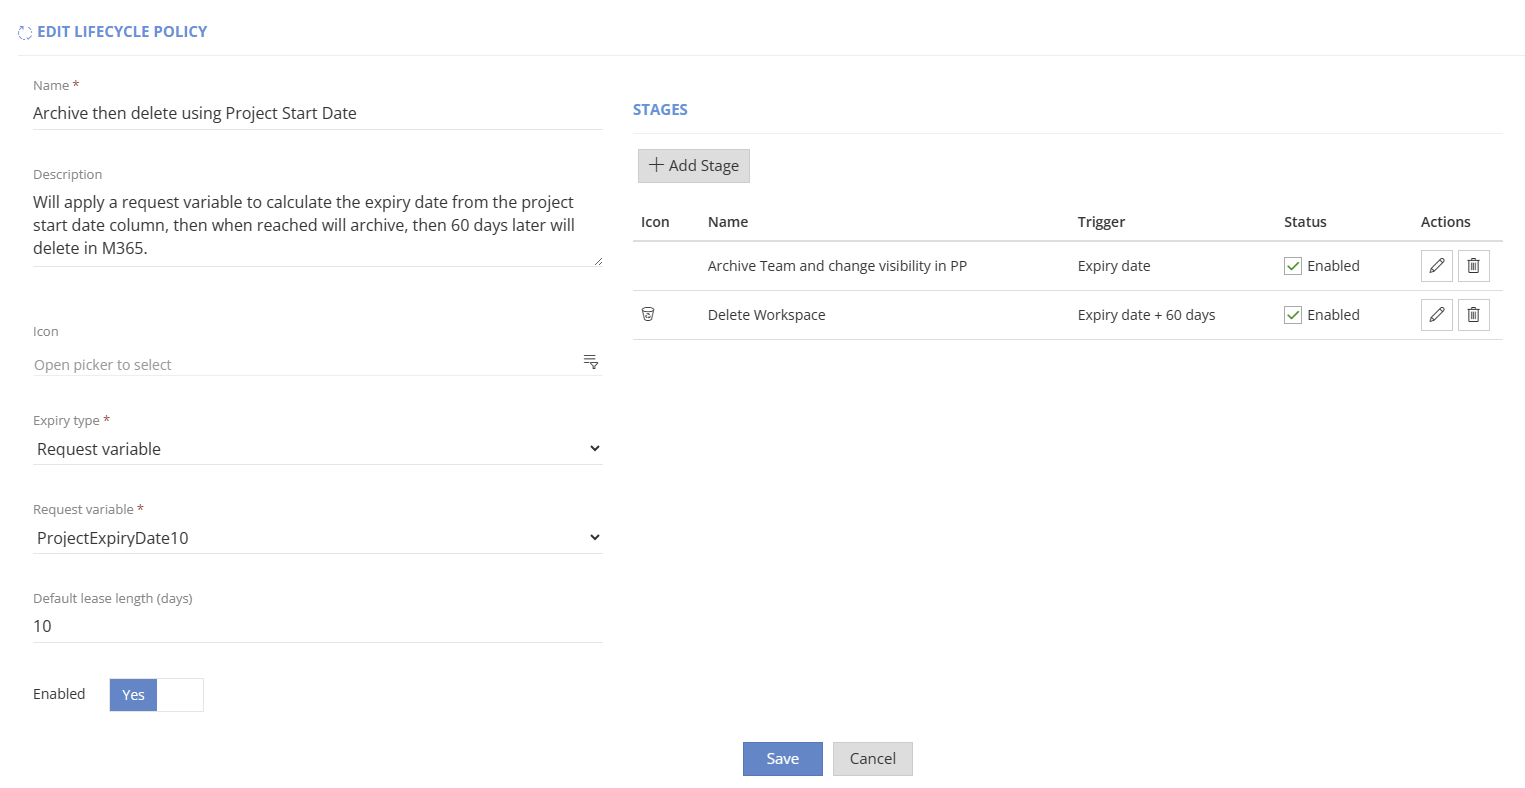
- Create a Lifecycle policy
- Go to Admin > Policies > Lifecycle Policies
- If you do not have any policies created, click +Add lifecycle policy and complete the configuration
- Name, provide a descriptive name of what actions will be run and how the expiry date is calculated
- Description, give more details of what will be configured
- Set Expiry type to Request variable
- Select the Request variable from the list of available, Select the one created or chosen in earlier steps.
- Set the Default lease length (if the variable cannot be used or fails, this number of days will be assigned, this will also set how many days it can be extended using change the lease actions)
- Click +Add Stage
- Select from the list of stages you created
- Set the Trigger to either
- On Expiry date
- Or Expiry date - #of days before
- Or Expiry date + #of days after
- Enable reminders if you want emails to be sent before the stage is reached
- Save
- Set who reminders will be sent to
- Save
- Repeat for more stages to be added
- Enable the Policy
- Add the lifecycle policy to the Service definition
- Go to Admin > Service Definition > open the definition > Lifecycle tab
- Click +Add Policy
- Select the Lifecycle policy to use
- Show the lifecycle stages in the info pages, set 'show service instance lifecycle tab' to yes
- Add a lease description on request form
- Click Save
- Save the Service Definition
How to Change the Expiry Date after Creation
If you need to change the date you can use the following actions, they must be enabled in the Service Definition to use.
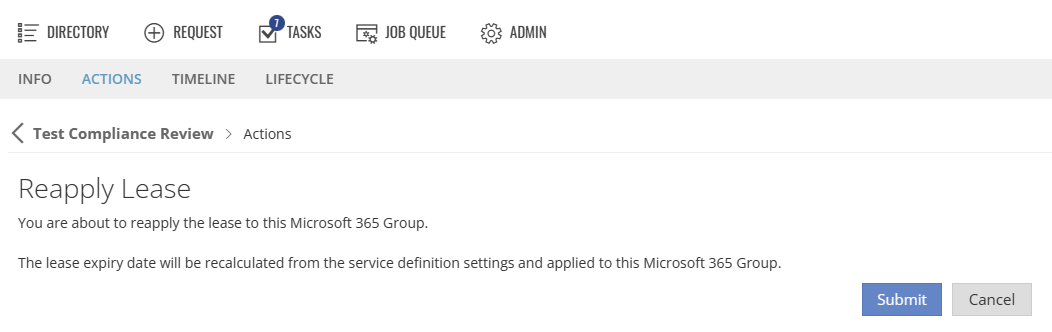
Reapply Lease
Expand to read more about the Action: Reapply Lease
Reapply Lease. This will reapply the Lease configuration, as the formula is set to Now, it will extend by the same number of days set in the request variable.
Change the Lease
Expand to read more about the Action: Change the Lease
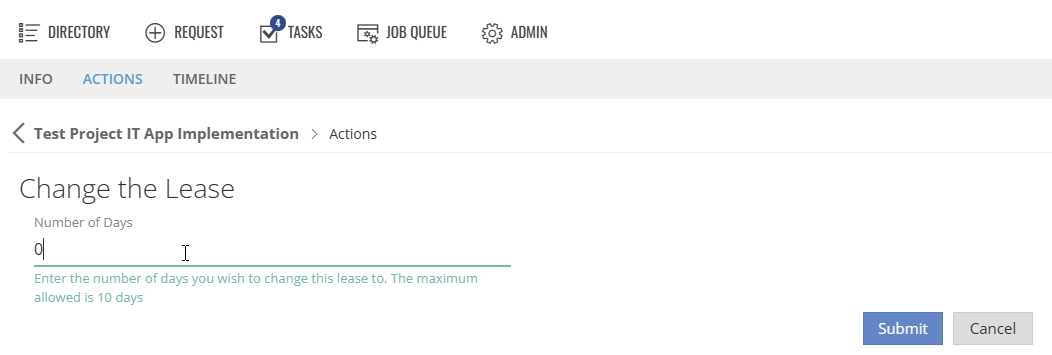
This allows the requestor to set the number of days it will now last, the maximum will be the default lease length. To trigger the lifecycle to run today, set to 0 days.