What is a Custom Action
A Custom Action can be used to create an action that is not natively available in ProvisionPoint, but still leverages the permission, notification and approval options available to our standard actions.
Custom Actions use webhooks to communicate with external systems, enabling you to integrate with any custom logic via Power Automate Flows, Azure Runbooks or PowerShell Scripts.
How it works
Custom Service Types extend ProvisionPoint's provisioning capabilities through a webhook-based architecture.
- External Configuration: Create a PowerAutomate Flow, Azure function or runbook, or any other resource that will create a webhook Url as the trigger
- ProvisionPoint Configuration: App Managers define Custom Action in ProvisionPoint with the external webhook URL as the endpoint
- Service Definition: Service Definitions can be configured to use the Custom Action manually or via lifecycle policies
- Request: When a user submits or the lifecycle triggers the custom action, ProvisionPoint sends provisioning data to your webhook
- External Processing: Your Flow, Runbook or script processed the request and makes the changes defined
- Response: Your system responds back to ProvisionPoint API with status and resource details
Use Cases
- Push information to other systems
- Perform a Backup
- Move data before Archiving
- Apply additional configuration to the Workspace created
- Update Private or Shared Channels with Folders or views
- Delete a Custom Service Type you have created
- Running multiple built in Actions with 1 trigger.
- Delete from M365 & Delete from ProvisionPoint
- Restore an Archived Team and set an Expiry Date ....
You are only limited by what your external resource can do and what Microsoft allows
Getting Started - Setup
This guide walks you through creating, editing and managing Custom Action in ProvisionPoint.
Pre-requisites:
- An App Manager within ProvisionPoint
- A webhook endpoint URL (from Power Automate, Azure runbook, or custom script)
- Access to this to test the results
- Understanding of webhooks and HTTP requests
- An App Registration with the ProvisionPoint API setup (Only for responses)
Create a Custom Action
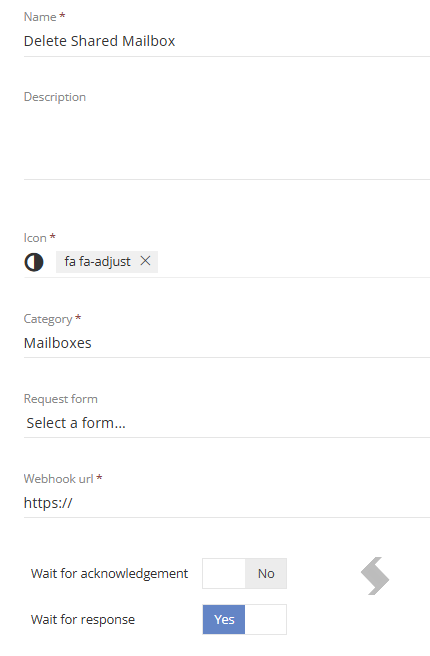
- Go to Admin > Templates > Custom Actions
- Click +New custom action
- 'Name' the Custom Action, this will be displayed on the Action tile
- Add a 'Description' of what it will do, this will be included on the Action page before submission.
- Add an 'Icon' for the Action, select from the list of available icons
- Set the 'Category' the Action will be displayed in. to display in one of the existing categories type the name as it is displayed in the app or define your own. The existing categories are Content, Security, Advanced, Expiry, Privacy, Channels.
- If additional information is required a 'Request form' can be selected. Create forms in Admin > Templates > Forms. The Columns will be displayed on the Action page.
- Add a 'Webhook Url' that will be used to start your custom process. This will be created elsewhere and pasted into the field.
- 'Wait for Acknowledgement' When enabled, the webhook must respond within 10 seconds with a success code of 2xx. If not, the action will be marked as failed.
- 'Wait for Response' Recomended! When enabled, the Action will show as processing until an API call is made back to ProvisionPoint to update the status. Read Configure the API response for Custom Actions or Service Types
- Click Save
If neither wait for acknowledgment or response is used, all requests will be displayed as successfully completed, regardless of the outcome in your external configuration.
We recommend using our API to send a response back if the item fails or completed via wait for response.
Enable in Service Definitions
This will allow manual run of the Action by users with permissions
Expand here to see the steps:
- Go to the Service Definition that should have the action
- Enable the Action
- Enable any Notifications on success to Owners, Admins or Requestor (Notifications must also be enabled in the Service Definition for this to save
- Set up Approval if needed (Approval templates must already exist or can be created and added later)
- Go to Permissions to define
- If Owners can run the Action
- Add named people or groups from Entra that can run the action
- You MUST add the Group the the ProvisionPoint API connects to to receive the notification or allow trigger via the API)
- Dynamically assign to a people picker in the request form
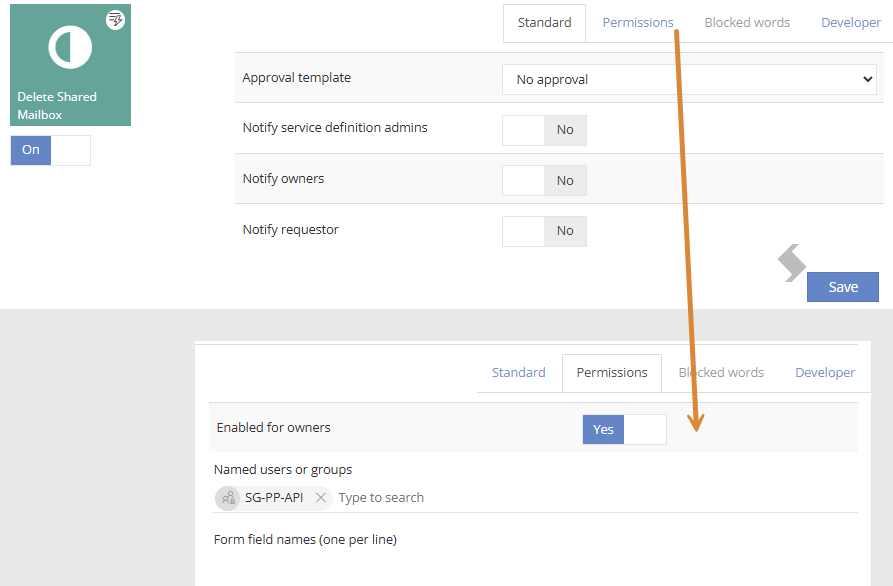
- Save the Action (Bottom right)
- Save the Service Definition
- Repeat for any other Service Definitions
All Custom Actions will show the  icon in the tile
Add to Lifecycle Policies
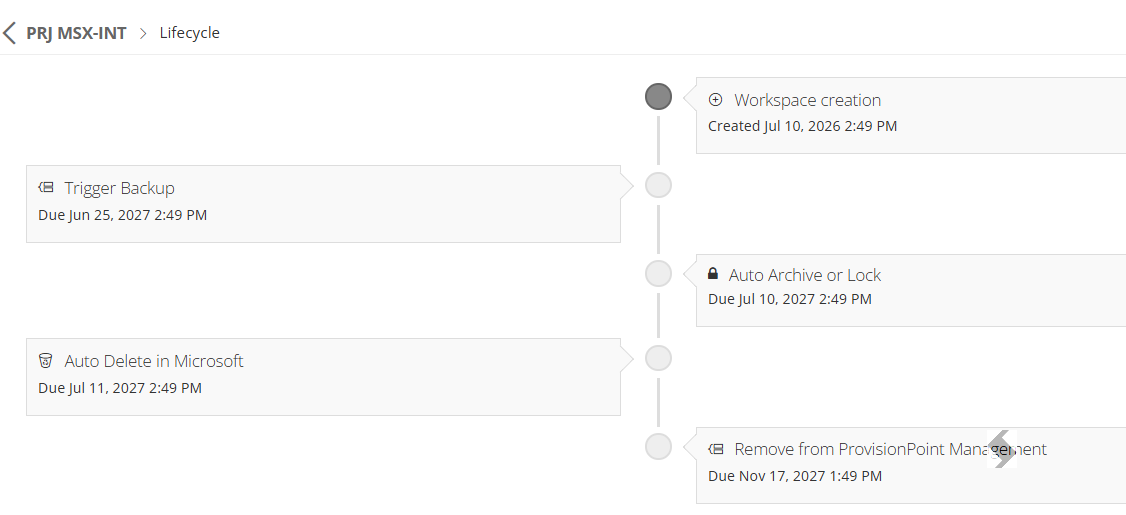
To automatically trigger a Custom Action as part of the lifecycle, add the Custom Action to a Lifecycle Stage & Policy to define when it will be triggered.
Expand here to see the steps...
- Go to Admin > Policies > Lifecycle Policy > Stages
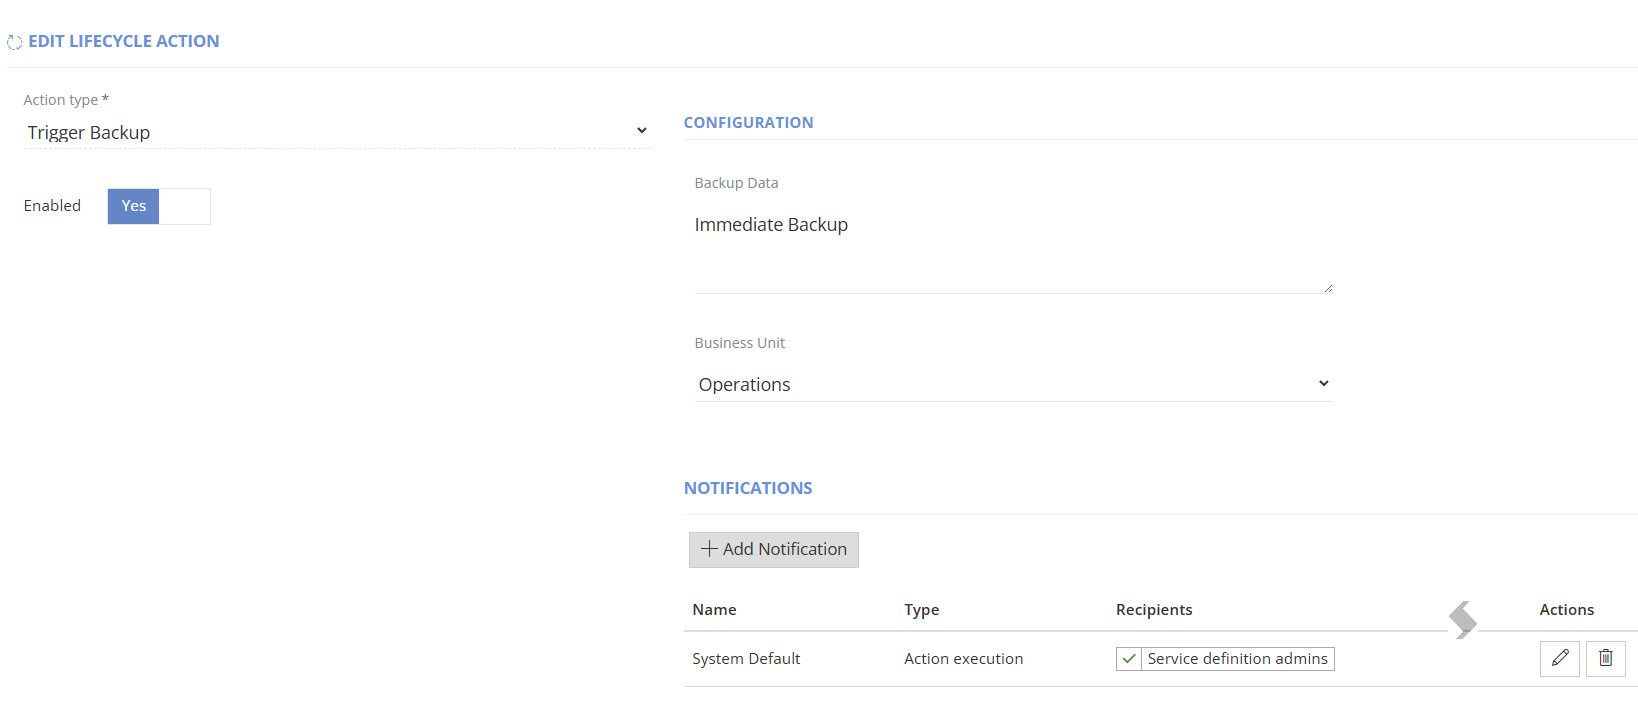
- Create a new Stage or add the custom Action to an existing stage you already have
- Only add to a stage where there will be no conflict.
- Add notifications for when the action is completed to highlight to interested parties this is complete
- Any Forms linked will need to have the data hardcoded, if they are set as mandatory fields they have to be completed
- Add the Stage to a Lifecycle Policy to define when it will run and if reminders should be sent
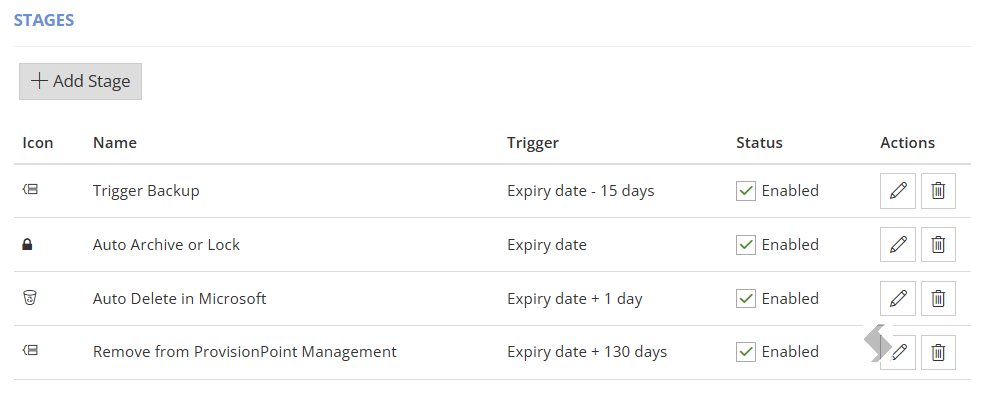
If you add to an existing policy this may trigger this for anything that has already expired.
Run a Custom Action
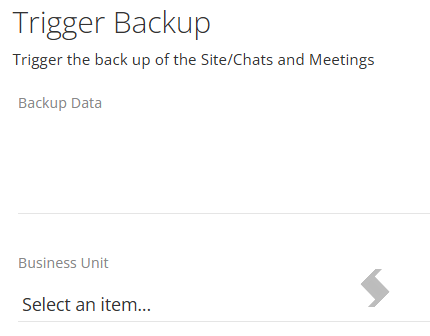
- Access the Actions from the Info page,
- If a Request form is assigned this will be shown when the Action tile is selected
-
Click Submit to start and then let your webhook setup do the rest.
- For Lifecycle this is triggered by the Expiry date and Lifecycle setup.
-
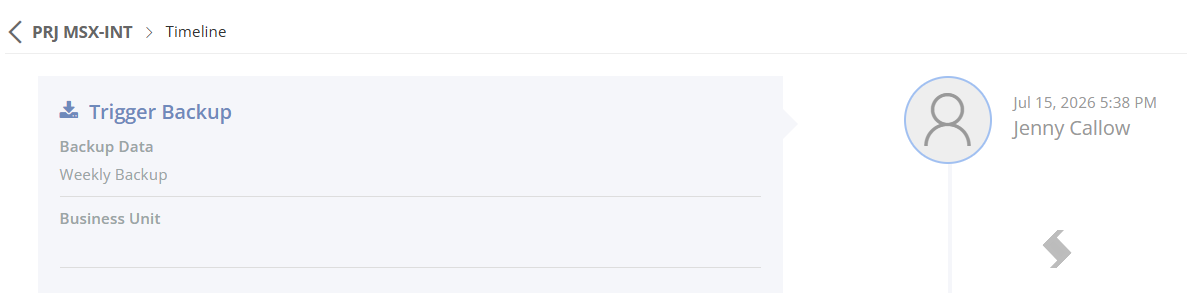
Once a Custom Action is run, the results and details of who ran it and at what time will be collected in the Timeline.
For Lifecycle trigger, this will be shown as ProvisionPoint Bot
- What will the webhook receive - The webhook will receive a message from ProvisionPoint with the following properties:
| actionTypeId | serviceInstanceName |
| customActionId | actionName |
| operationId | actionDetail |
| serviceInstanceId | requested |
| serviceDefinitionId | requestedBy |
NOTE: The actionDetail property is a JSON representation of the request including the request form if provided.
If you have Wait for response enabled, this will stay in progress until the API receives the completed or failed result.
This will use the OperationId from the webhook data.