Content:
Additional Lists or Document libraries can be created using the Lists tab in any Service Definition that will create a SharePoint Site.
The Service Types that will support this tab are:
- Site Collections
- M365 Groups
- Microsoft Teams
- Viva Engage Communities
To create your new List or Document Library, click on the + New list button.
For each List or Document Library, there are several settings to configure:
- Display name - this is the name of the List or Library that will appear
- Url - set the url segment for the List or Library
- Description -
- List type - set if you want this to create a List or Document Library
- Show on Quick Launch - type in Yes or No, to define whether you want this to appear in the Quick Launch or not
- Icon - set the icon that appears in the ProvisionPoint app from our set of icons
- Enable for create instance action - Will be created as part of the workspace creation
Once the above has been defined, click Save. Then Save the Service Definition.
Please note, this only creates the List or Library itself. Additional columns will need to be created in the Site itself, or via PnP template.
As well as creating the List or Library, additional options can also be applied once it is created, these are listed below:
Click the links below to find out more.
-
Enable Versioning and Limits
Versioning can be enabled for the Document Libraries and Lists and a maximum limit can be defined. This will apply only to the Document Library or List it is set on.
Microsoft's default for versions is 500, use this option to reduce the amount of saved versions and the amount of storage that will be used by the versions.

Configuration in ProvisionPoint Lists
Type the number of Major versions to be kept.
-
Sync Content Types
If a Content Type exists in the SharePoint Admin Center Content type gallery, they can be manually synchronised to the Site and the Library.
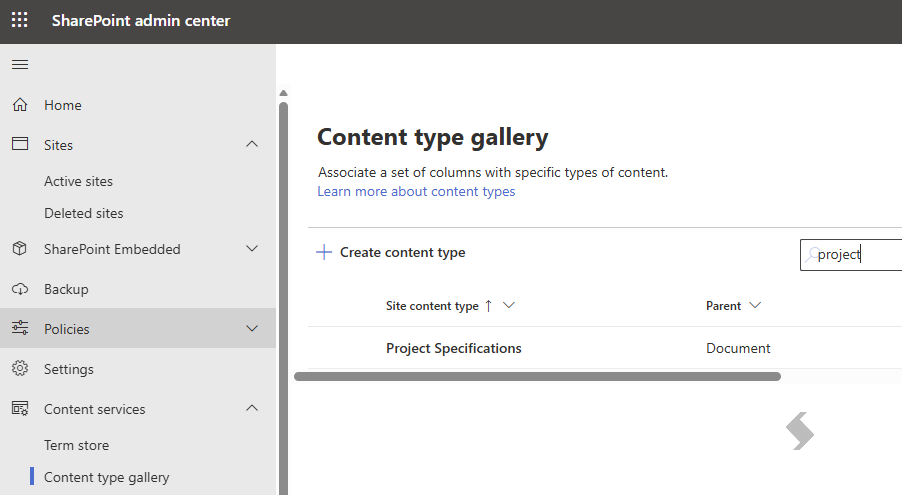
This will automatically be added to the New button in SharePoint and via Teams Shared tab. This allows a central location for Document templates, files, columns to be created and applied to the Site on creation.
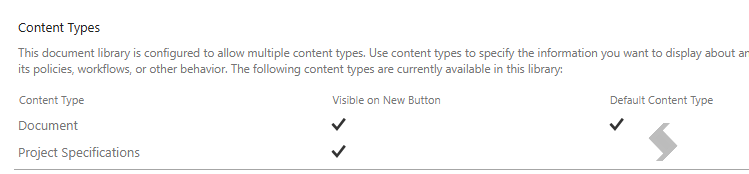
Configuration in ProvisionPoint Lists
Type the Name of the Content Type exactly as it is in the gallery and click + to store
-
Set default Sensitivity Labels
Sensitivity labels in Microsoft are best used to
- Provide protection settings that include encryption and content markings. They can be applied to documents and extend SharePoint protection when files are downloaded.
- Protect content in Office apps across different platforms and devices.
- Identify content for eDiscovery cases and protect containers that include Teams, Microsoft 365 Groups, SharePoint sites, Viva Engage communities, and Loop workspaces.
When the default Sensitivity label is applied to the document list or Library it will be applied to the supported documents automatically when added or created in the List or Library, allowing you to ensure a base level is defined. Use this option to help enforce your records requirements.
Create multiple Lists or Libraries with different Sensitivity Labels as needed.
Keep track of sensitive data and ensure it remains private or unshared.
Owners and Members of the Site will be able to change the labels based on your configuration in Purview.
Ensure the Sensitivity Labels are configured and published in Purview, added to ProvisionPoint and then used in the List settings.
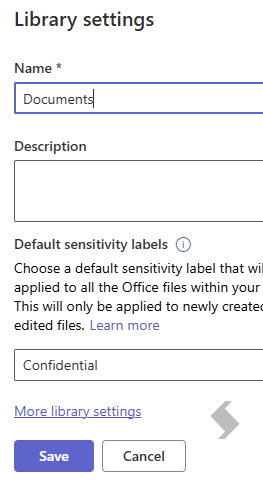
Configuration in ProvisionPoint Lists
Type the name of the Sensitivity Label as it is in the Admin > Settings > Sensitivity Labels section.
If you have used the same label for the container you can also use {Sensitivity} as an option.
-
Set default Retention Labels
Retention labels in Microsoft are best used to manage the lifecycle of content, ensuring that important files are retained for compliance reasons and that outdated content is automatically deleted. Here are some of the best uses of retention labels in Microsoft:
- Retention for Compliance: Retention labels can be applied to documents to ensure they are retained for a specified period, which is often required for legal and regulatory compliance.
- Data Management: Retention labels can help manage the lifecycle of content, from retaining important records to deleting outdated ones.
- Granular Control: Retention labels allow for granular control over content, applying different retention periods to different files or items.
- Integration with Purview: Retention labels can be integrated with Microsoft Purview, allowing for broader content management across SharePoint, OneDrive, Teams, and Exchange.
- Automated Management: Retention labels can be automatically applied to content that matches specified conditions, streamlining the management of content.
By applying retention labels as defaults on document libraries or lists, organizations can ensure that their content is managed effectively and in line with their compliance and data management policies.
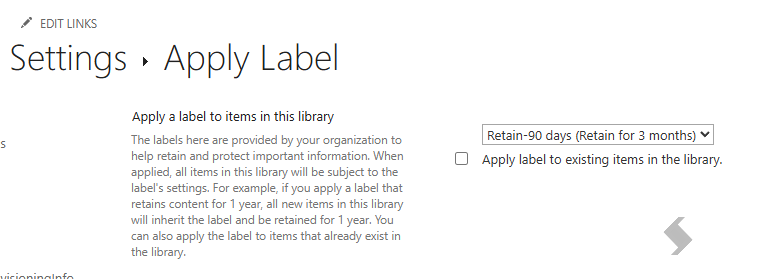
Configuration in ProvisionPoint Lists
Type the name of the Retention Label as it is in Purview.
-
Add Folders
Folder Structure can be applied within the Document Libraries to ensure the documents are structured in a suitable way.
Use the folder options to easily create Folders and Sub-folders with ease.
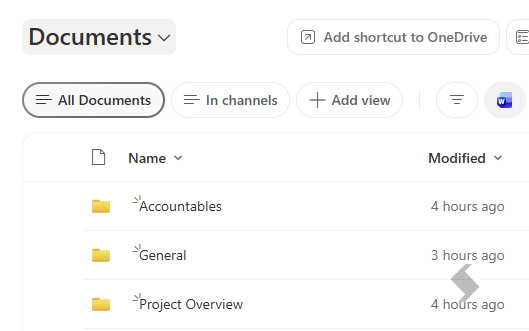
Configuration in ProvisionPoint Lists
Save the List or Library and click on No Folders to add the folder structure you need. More can be found in Create Folders in Teams or SharePoint
If additional lists/libraries are required after the initial provisioning of the Site, there is a 'Create List' action that can be enabled.
This will require a template to use as the setup. Use any of the Lists you have created by setting the create list action to Yes.
This will apply all settings that have been applied and give you the option to choose the List name and url.
The Action will then need to be enabled in the Actions Tab.
When it is run from the Info page all the templates will be displayed, include a description to help users select the correct template for their needs.