Once a Service Definition has been created, you are automatically taken to the 'Overview' tab. Here you will define:
- The name and description of the Service Definition
- What the request tile will look like to anyone wanting to create a new workspace
- What type of workspace will be created
- If Manual Limits have been enabled in SharePoint Admin Centre, the quota for storage and its warning levels
Overview
Name
The Name can be changed at anytime and will be immediately reflected in the request tile. Make it useful as this will often be the first thing people read to choose the template
Description
A Description can be added to the Service Definition to explain what it should be used for, if the requestors should see the description you will need to adjust the request tile layout or width.
Request Tile
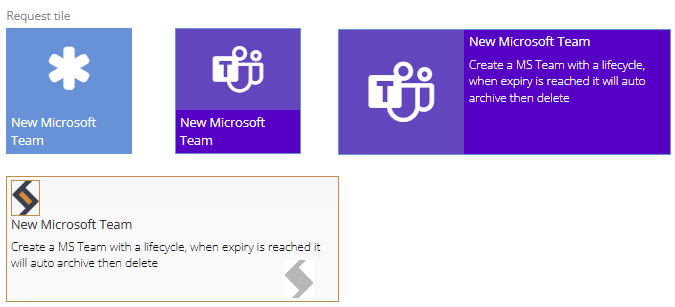
The Request Tile is what will be displayed to your users in the main 'Request' Tab. Click on the tile to customise in the following ways:
- Include the Description
- Change the colours
- Change the Icon to another
- Replace the Icon with an Image
- Change the Size of the Tile or Icon/image area
Expand here to see more details
By default, the icon will appear with the asterisk icon and the tile will be blue, use the following options to customise the request tiles:
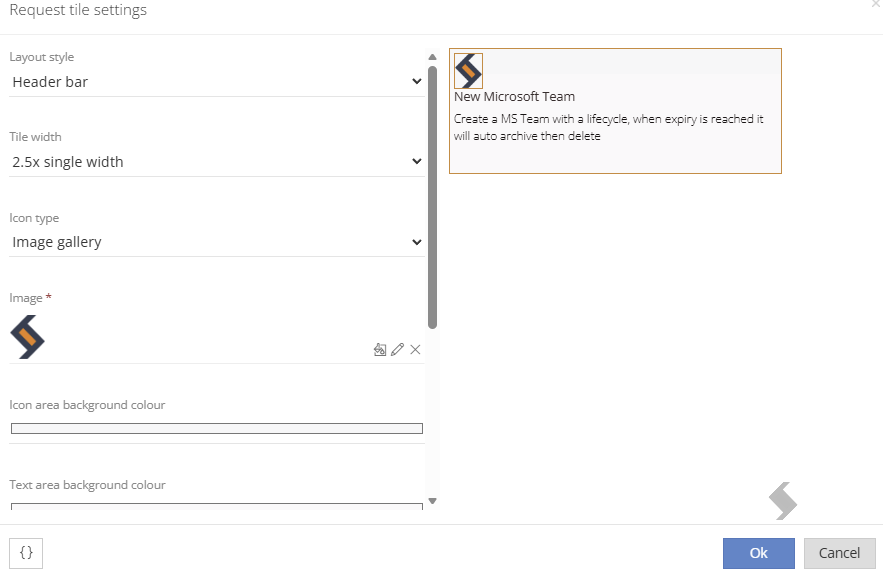
A preview of the configuration will be shown on the right-hand side
Layout Style
There are 3 options available for the layout of the tile, this will define where the icon/image will be, the vertical and horizontal size of the overall tile:
| Name |
Description
|
Look
|
|
Simple
|
- This is the default layout for new Service Definitions.
- The icon will be placed centrally in the top 2/3 of the tile.
- The name of the Service Definition will be displayed in the bottom 1/3 of the tile.
|
|
|
Vertical Split
|
|
|
|
Header Bar
|
- The icon will be left-aligned in the top 1/3 of the tile and will be reduced in size.
- The name and description of the Service Definition will be in the remaining 2/3s of the tile.
|
|
Tile Width
Now the layout has been chosen the width of the tile can also be adjusted to 2, 2.5 or 3 times the width of a single tile. This will in some cases adjust where the icon/image will be displayed. See the examples below:
Simple Layout:
Vertical Split Layout:
Header Layout:
Icon or Image?
By default, the asterisk icon will be applied to the tile. There are filtering options available to locate a suitable icon or upload or select a public image URL
To apply another Icon set the:
- Icon type to Icon font gallery
- Select from the list, this can be filtered to look for M365 icons.
To upload your own Images you will need to:
- Change Icon Type to 'Image Gallery'
- Click the pencil icon to edit
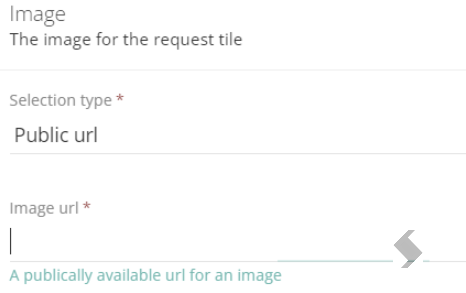
- Set the selection type to
- Public URL to add a link to an existing image via the public URL address
- Gallery, hover over 'Request tiles' to add a folder or add an image file
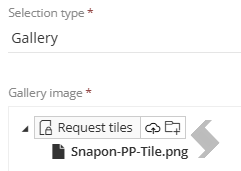
- Click OK
To upload relevant images you need to be aware of the following:
- A maximum of 32k file size, ideally images should be as small a file size as possible.
- For square images, we recommend 200x200 pixels
- For any 2x+ widths the image will need to be adjusted in size to fit the image area.
- Transparent images can be used
Colour
The colours or theme of the tiles can be adjusted to match company, department or individual use case scenarios.
Select the colour of the following:
- Icon area background
- Text area background
- Border
- Title
- Description
Click on the bar to set the colour to use by using the dropper to select a colour shown on your screen, add the RGB/HSL/HEX numbers or select it using the colour panel
If you would like to copy the configuration click

and copy the settings:
{"styleType":2,"sizeType":2,"iconType":1,"iconClass":"ms-Icon ms-Icon--TeamsLogo","image":"/media/request-tiles/Snapon-PP-Tile.png","imageBgColour":"#f7f7f8","textareaBgColour":"#faf9fa","borderColour":"#d98838","iconColour":null,"titleColour":"#392d2d","descriptionColour":"#1a1414"}
This can then be copied to any other request tile to ensure the correct layour, colours and images are used
Re-Order the Request tiles
The order the request tiles are shown can be re-arranged by using drag and drop. We recommend keeping tiles the same size to prevent too much white space.
Requestor Settings
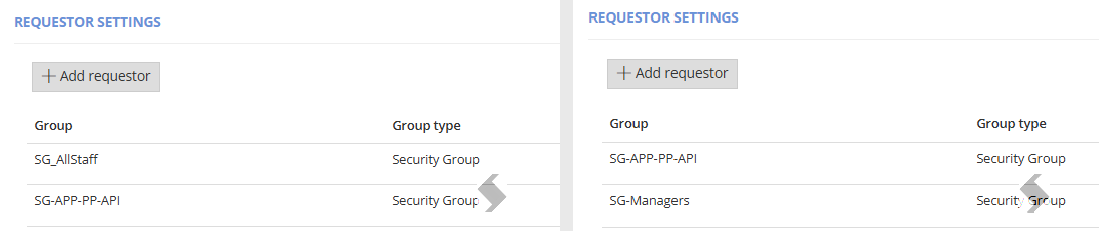
Each Service Definition must have a set of people who can make a new request, this section allows you to choose Security Groups from your Entra tenant.
Use this to restrict which Service Definition templates can be selected from the Requests tab.
If you plan to Import existing workspaces or use the API to create or bulk create workspaces also add the Security Group that will contain the app registration.
Creation Details
Service Type
When the Service Definition is first opened the Service Type will be defaulted to a SharePoint Site Collection (Classic or non Group connected).
This can be changed to any of the workspaces we support or a Custom Service Type if they have been created.
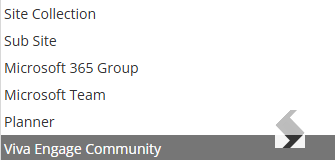
Microsoft 365 Group is also known as a Modern Team Site, this is a Group connected SharePoint Site.
Expand to see more details
Here is a list of M365 workspaces we support:
- Microsoft Teams
- Modern Team Site with Group
- SharePoint Collection Sites
- Classic
- Team Site with no Group
- Communication Site
- And more
- SharePoint Sub Sites
- Planner Plans
- Viva Engage Communities (formerly known as, Yammer)
- Custom Service Type - Utilise a webhook to create anything you need to monitor, for example Shared Mailboxes.
Group creation can be restricted in your tenant forcing users to make request via ProvisionPoint. Read more in Groups Settings for Tenant & Restrict Owner Permissions in Microsoft
Storage/Resource Settings (Optional) = Manual Limits
The Manual limits section is only required if your SharePoint Admin Centre is set to use manual storage limits. Go to SharePoint Admin Centre > Settings > Site storage limits to check if this is enabled.
Expand to see more details
If it is, add the Quota size and warning levels for each request.
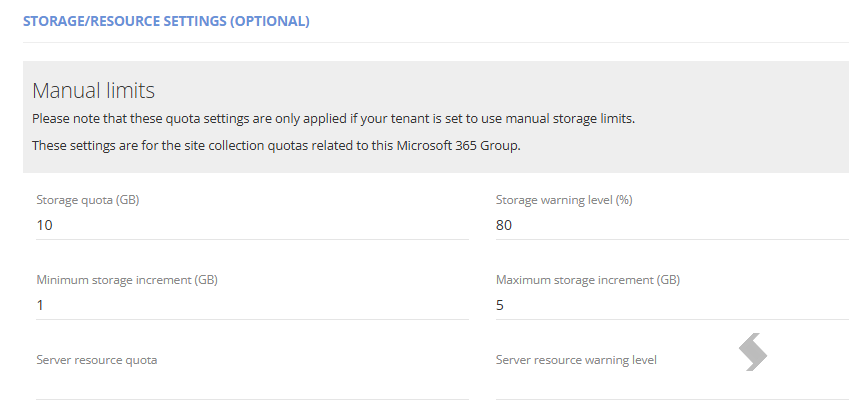
The Quota can be increased using the 'Change Storage Quota' Action, this will reflect the min/max storage increments defined in the overview